Contents
5. Upload data
![]() Updated
by Mapidea Team
Updated
by Mapidea Team
Data can be uploaded from local files or network files:
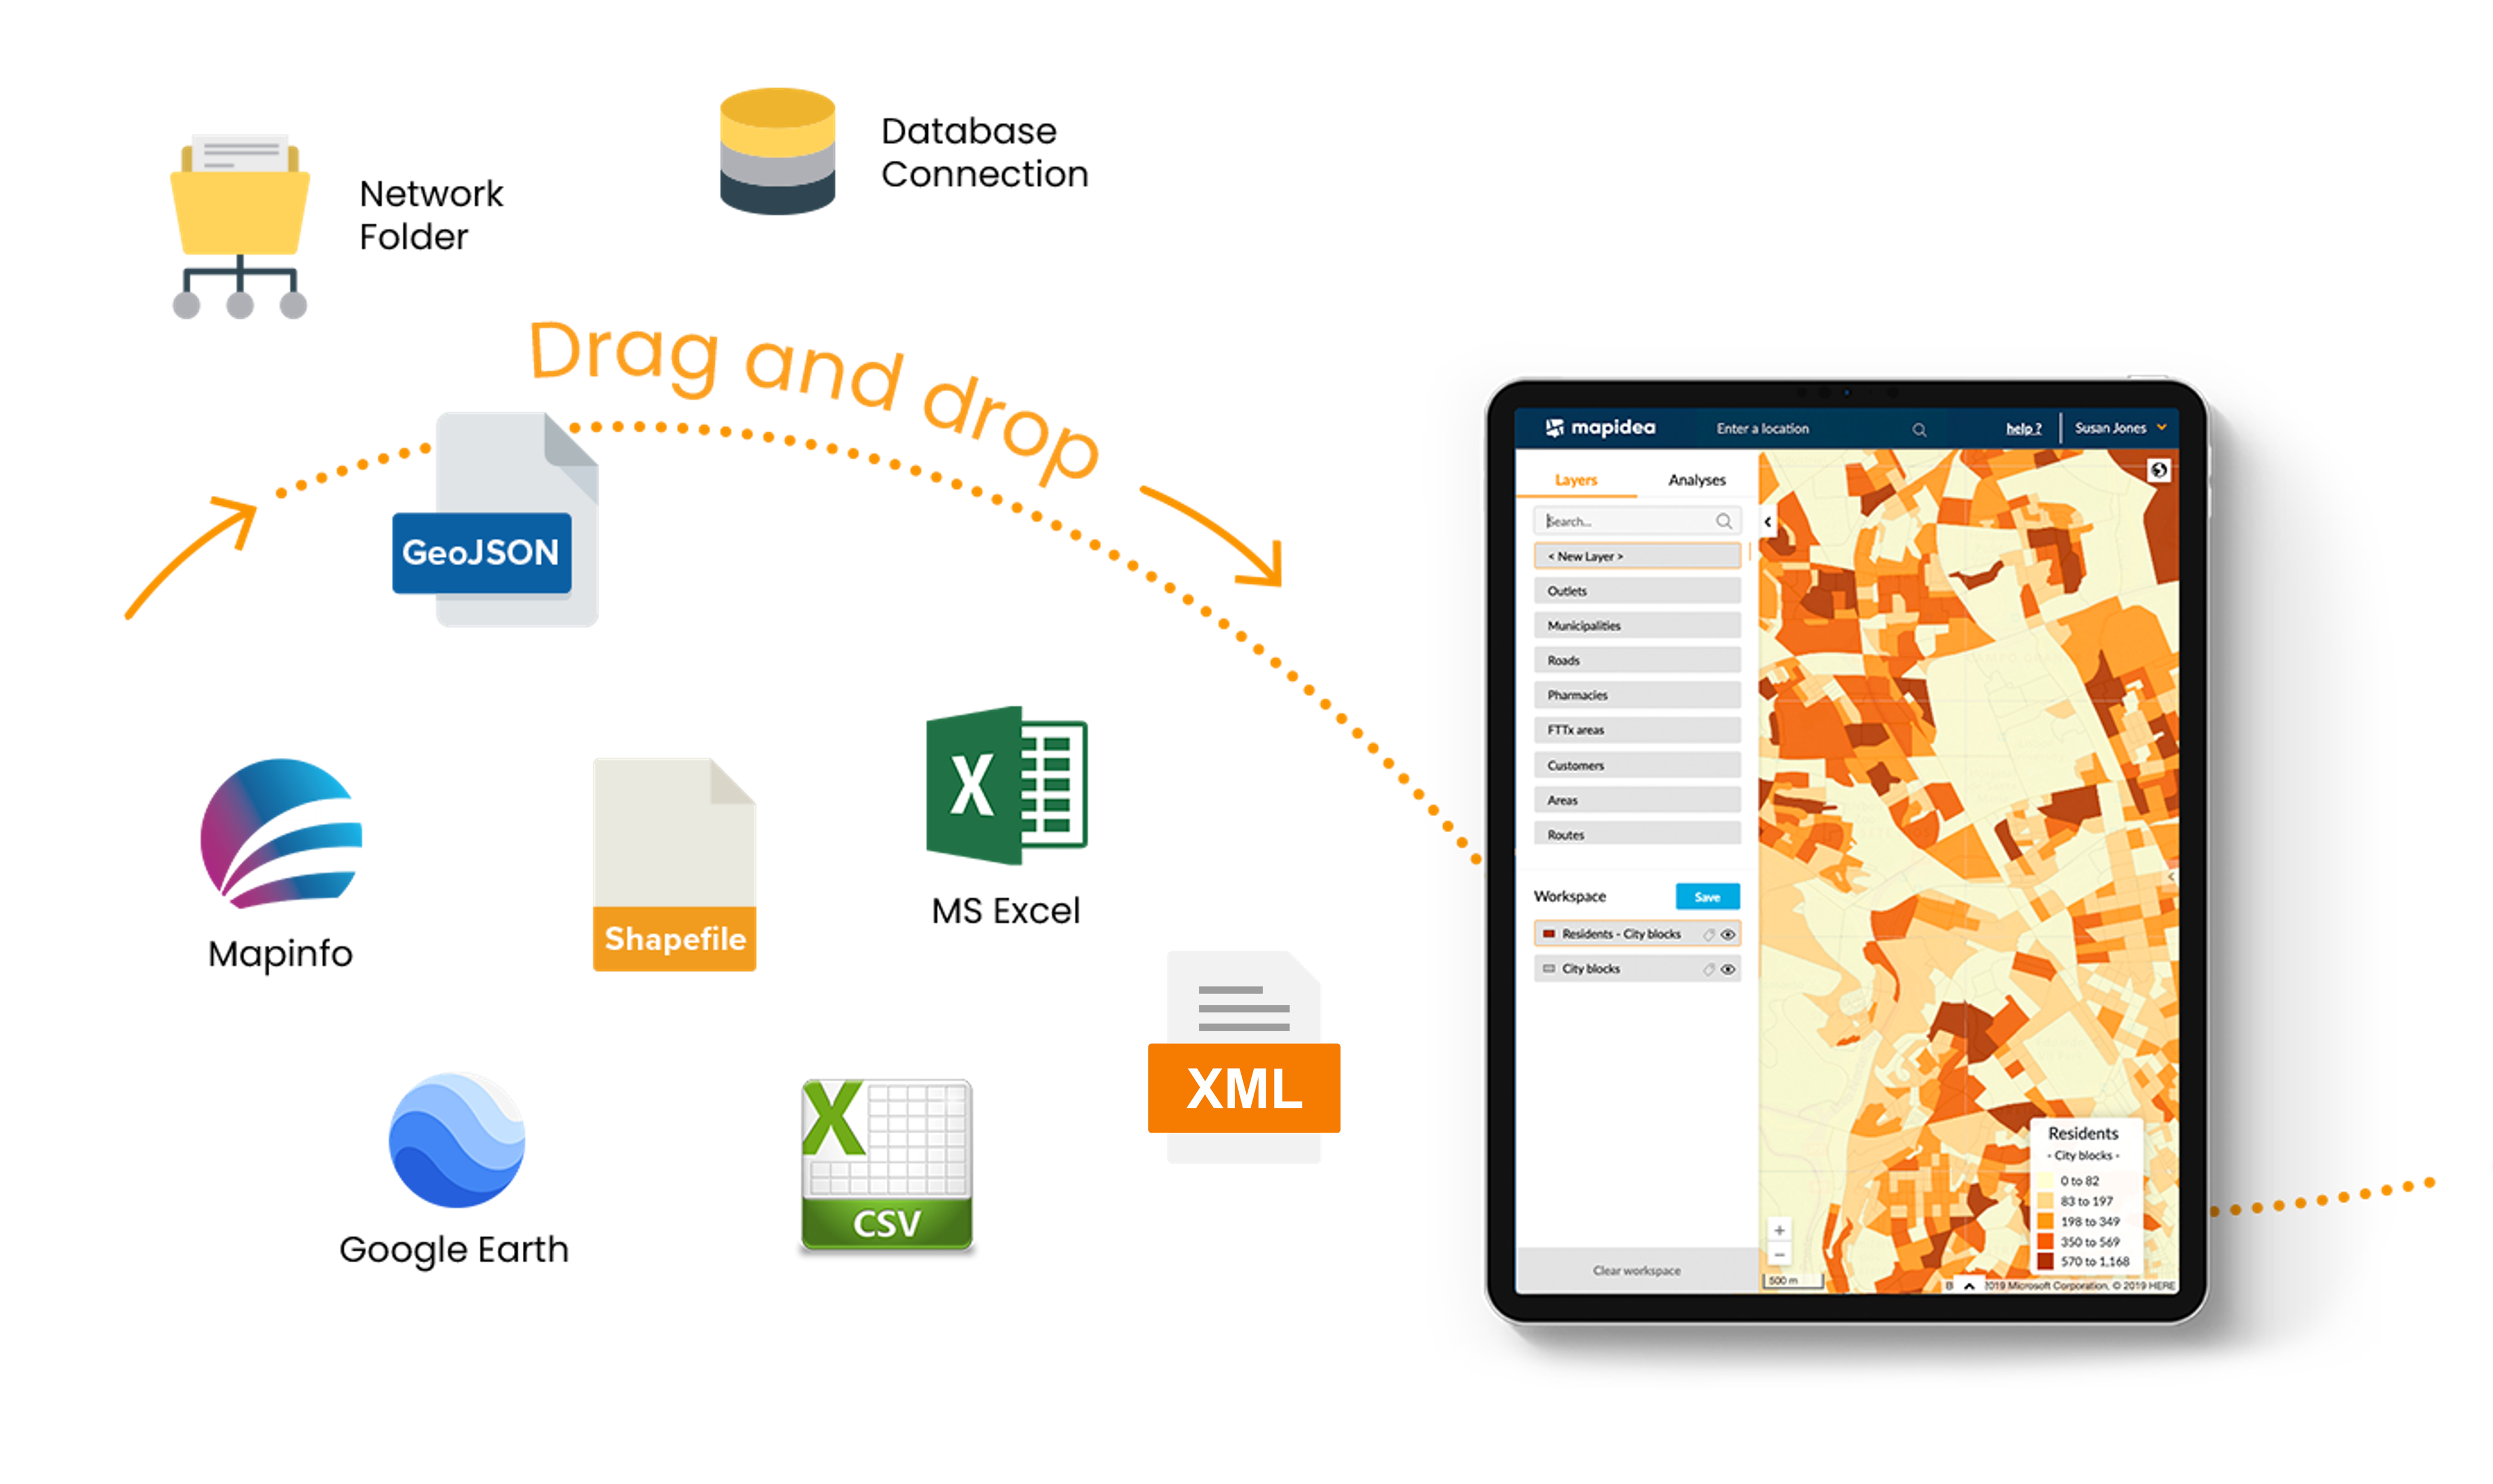
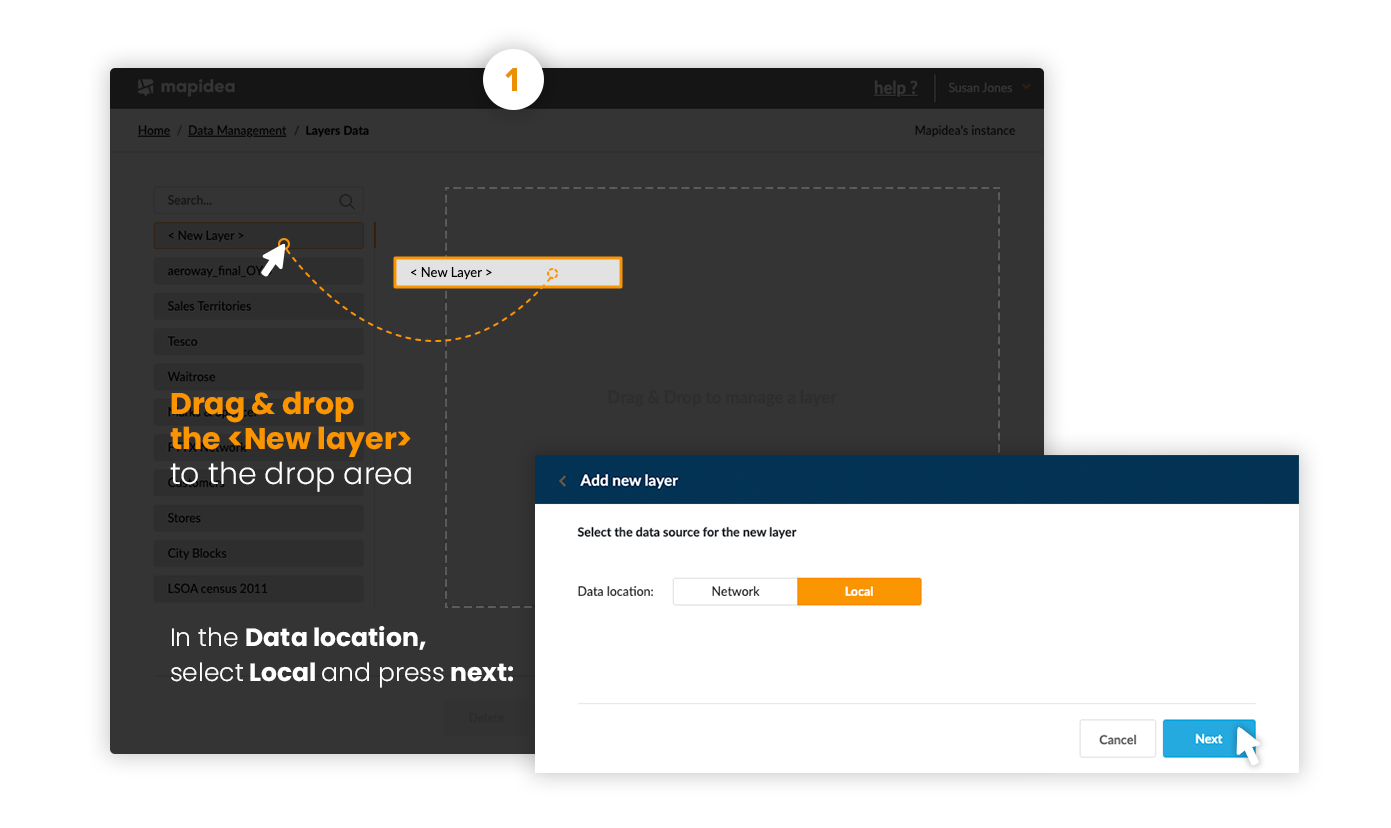
To upload data, go to Data Management > Layers data and drag and drop < New layer >
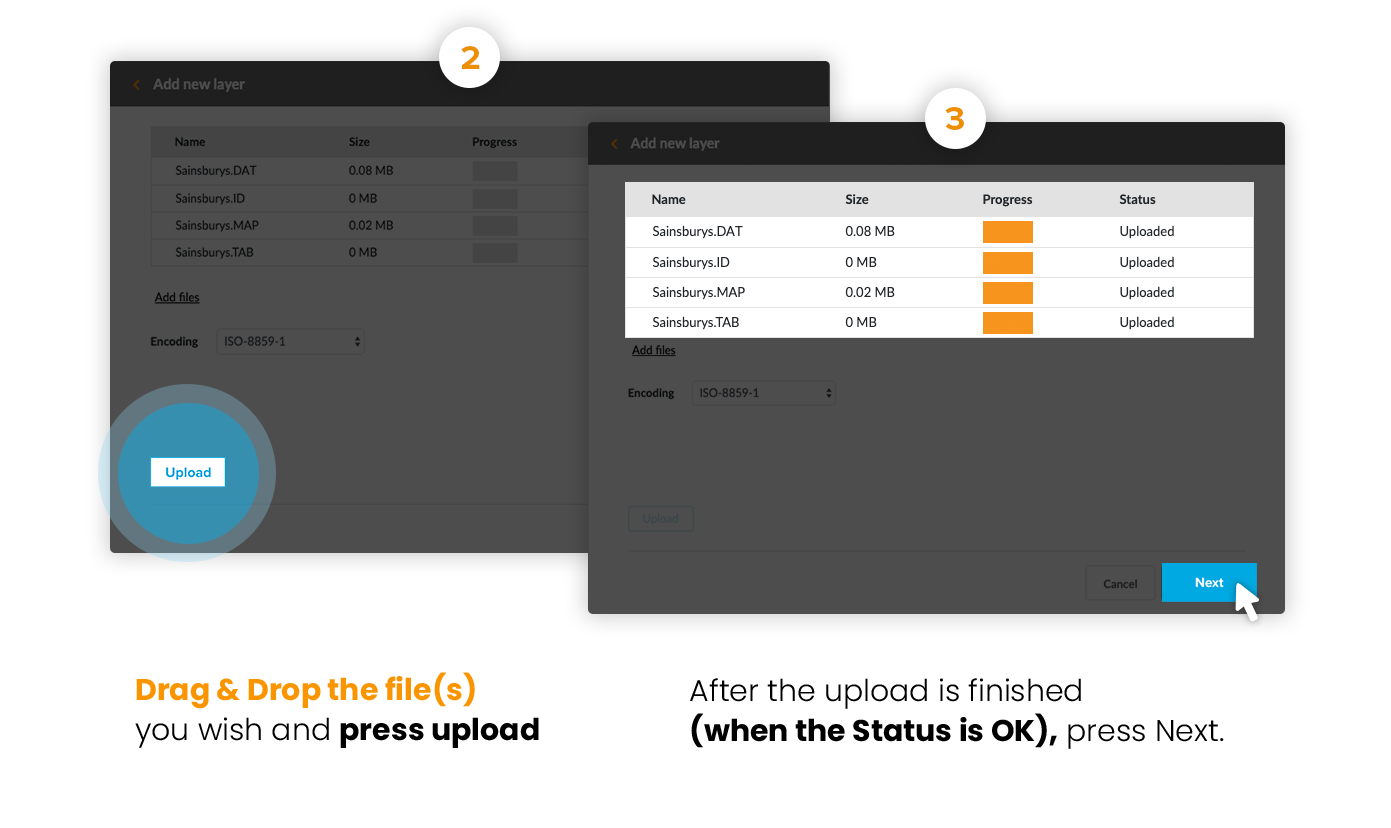
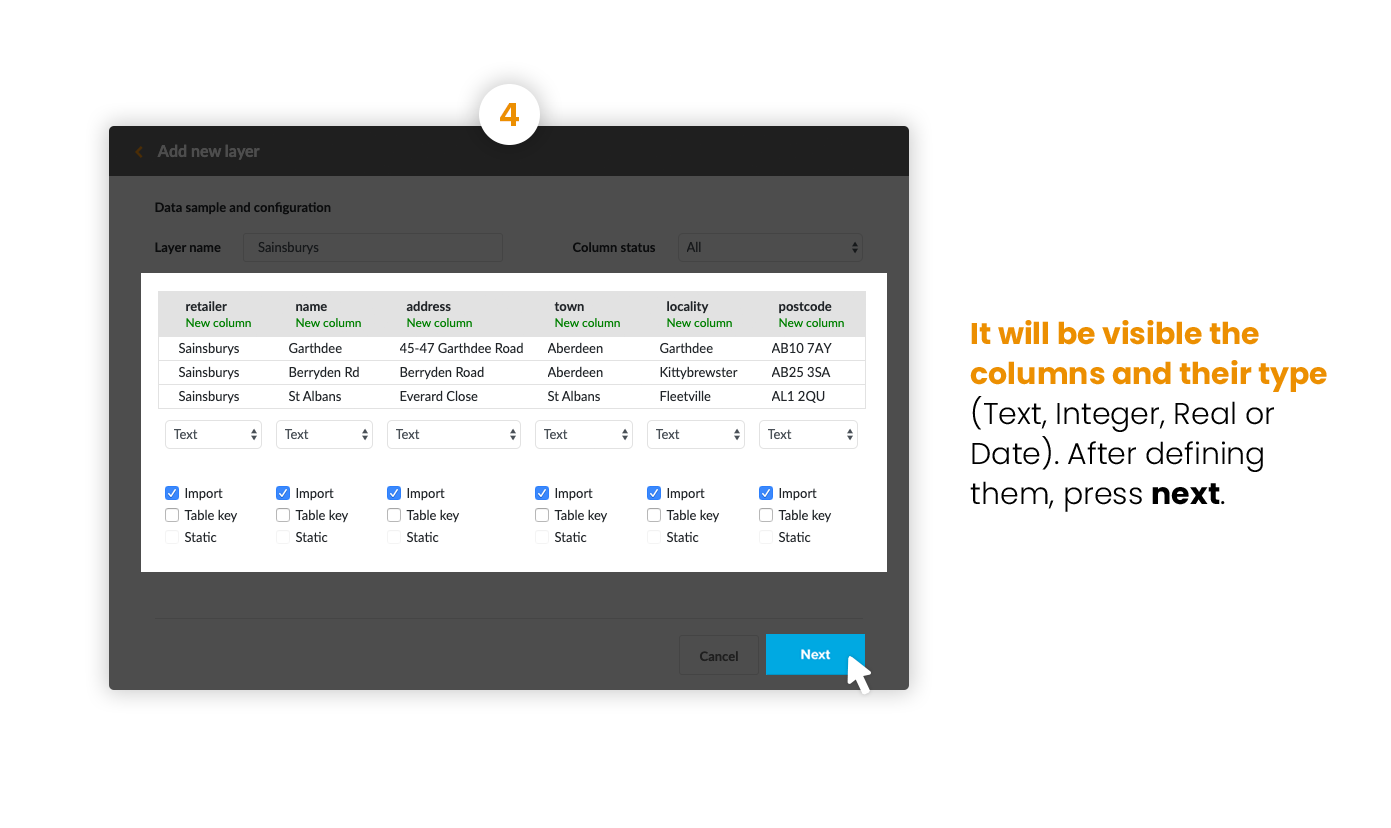
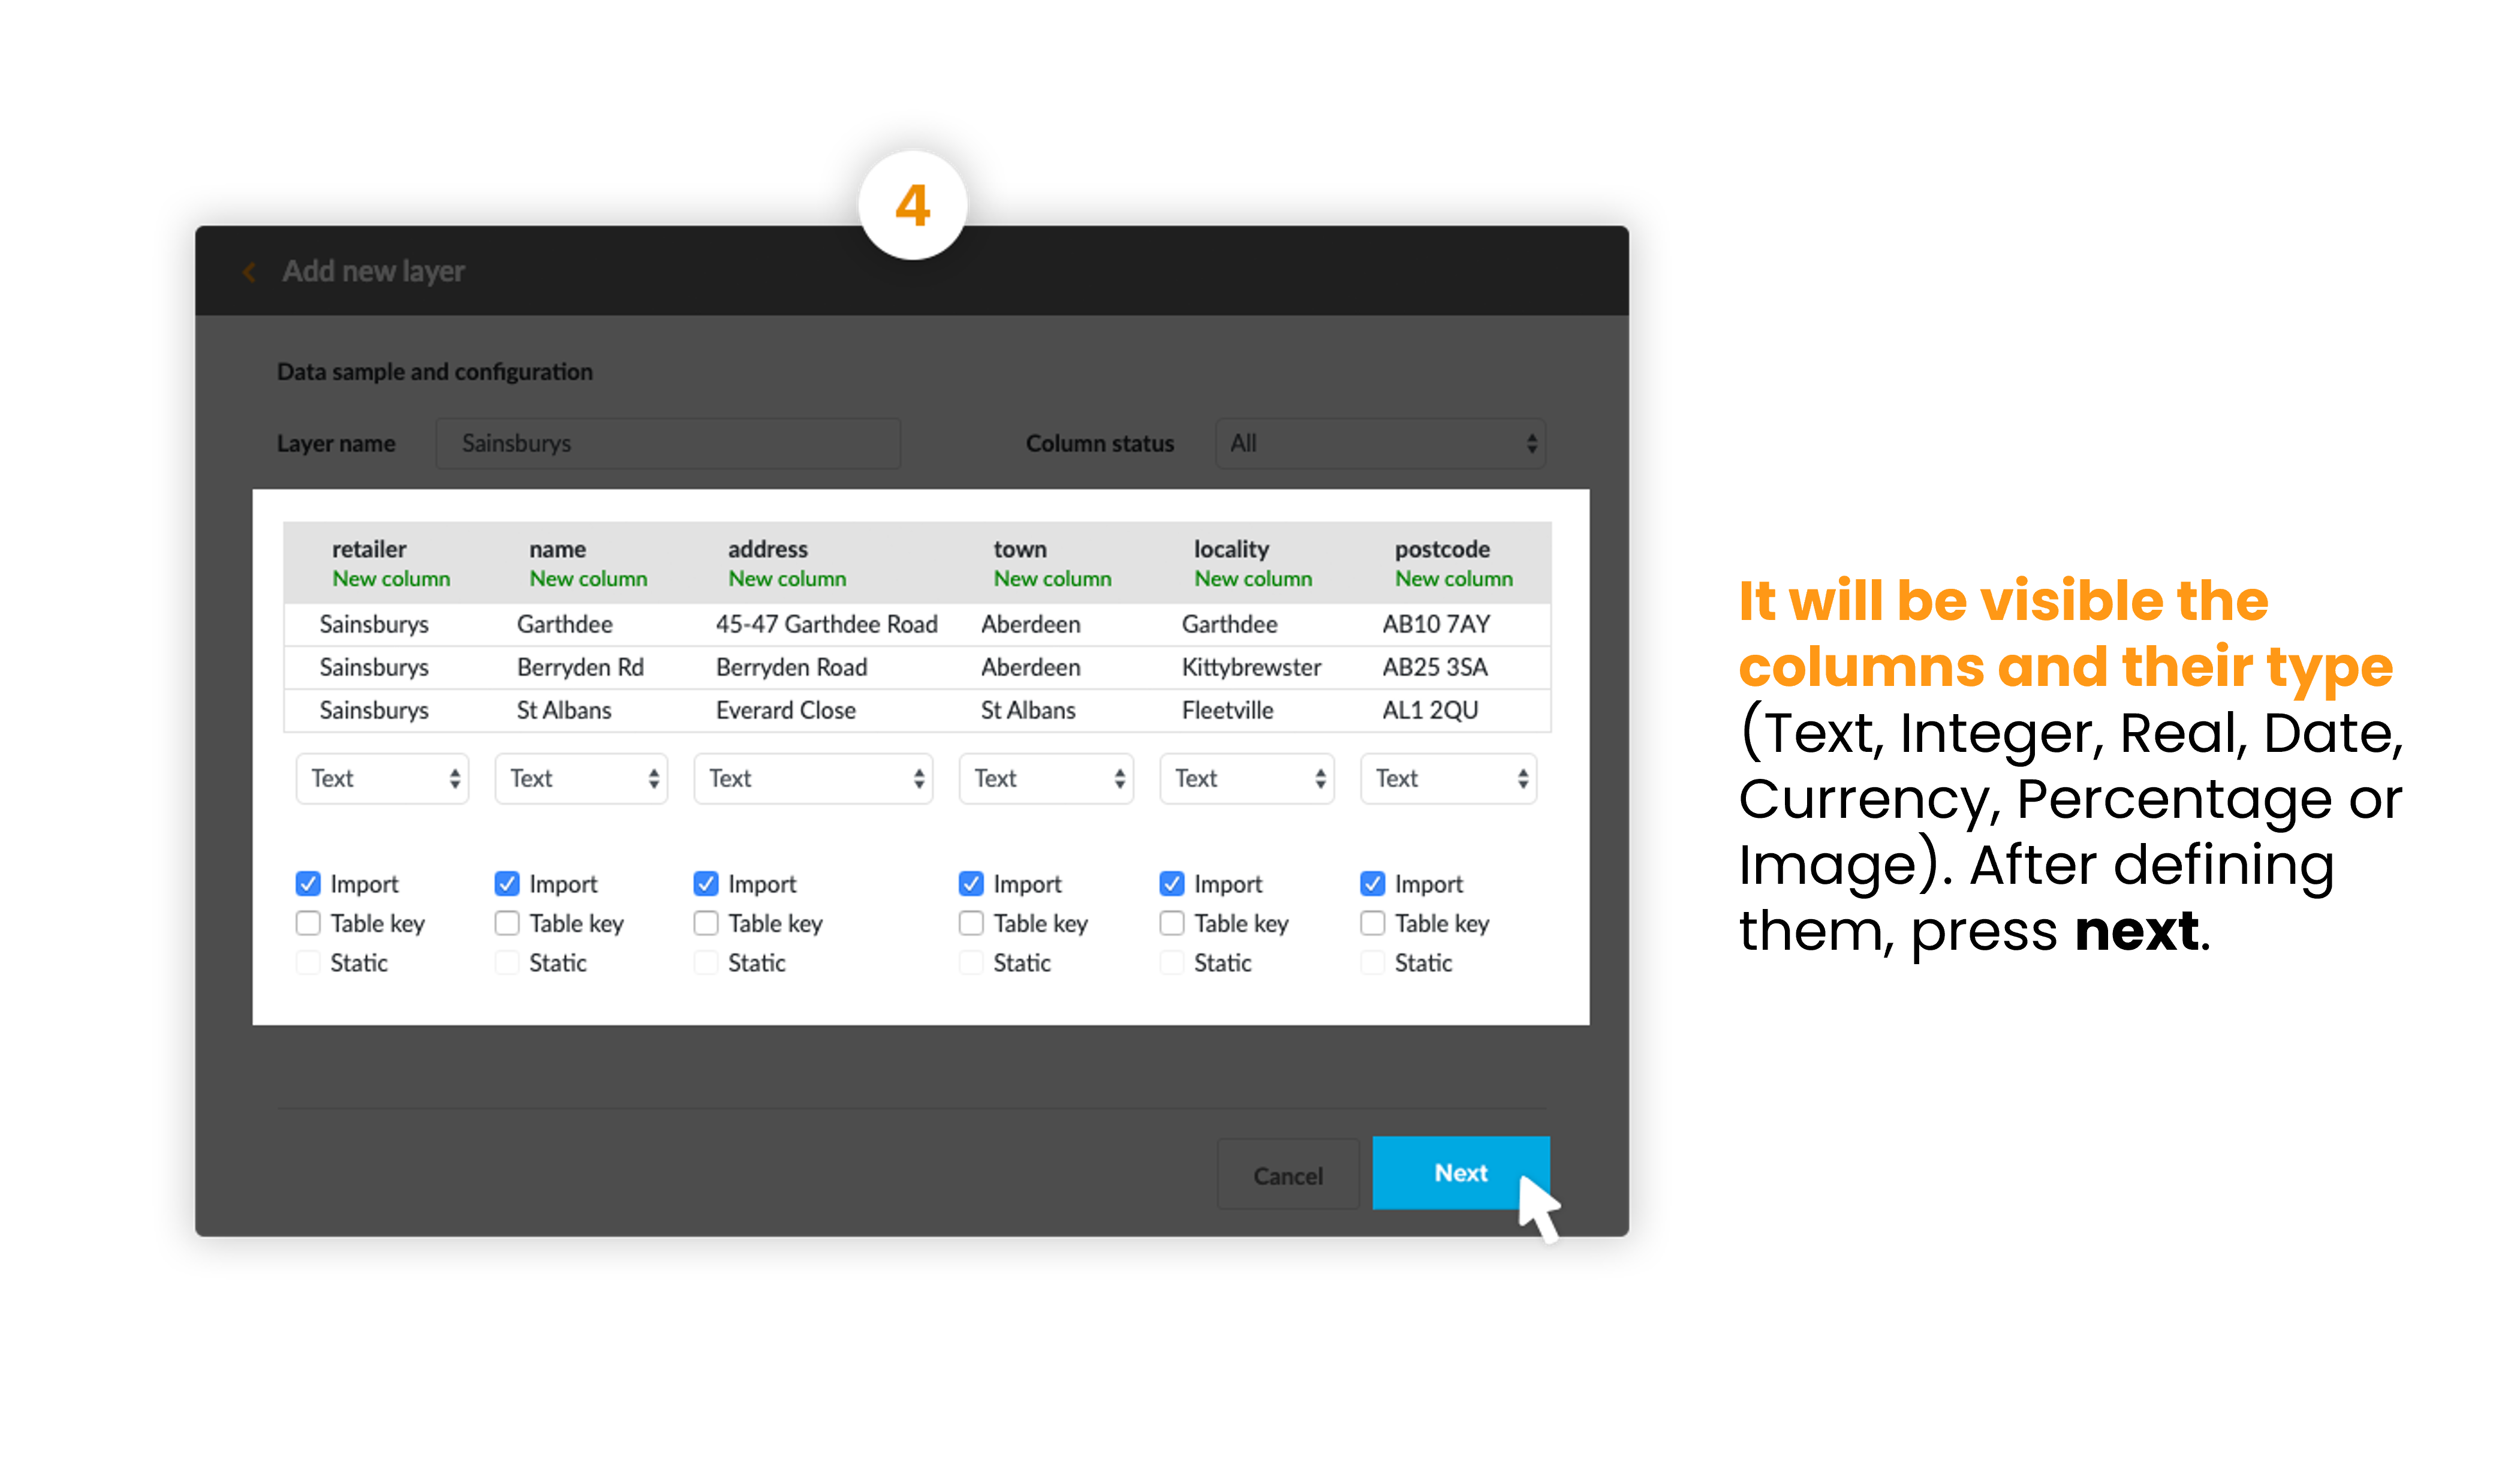
5.1 Upload data from local files
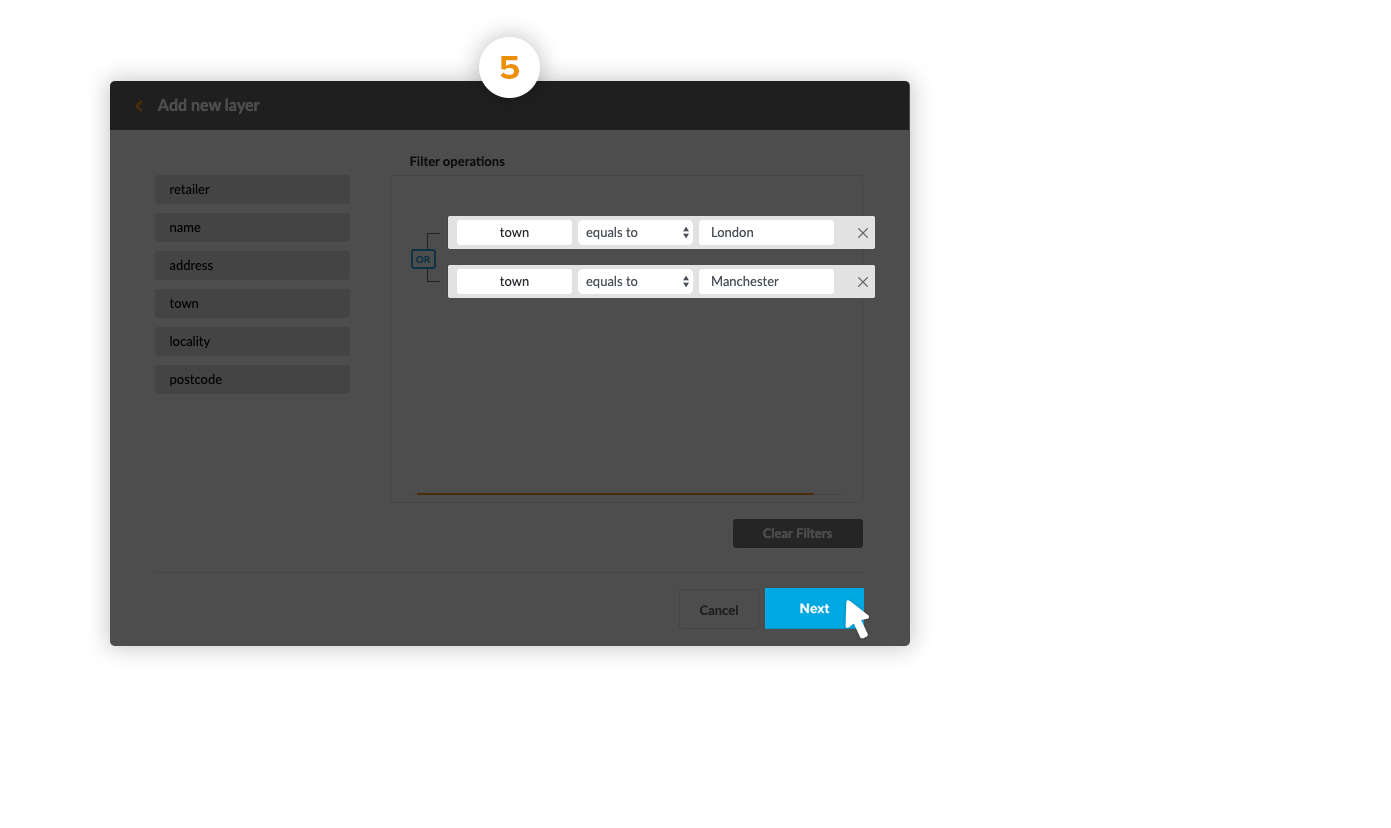
It is possible to limit the information to upload by doing a filter operation. If not necessary, press next.
Example: Upload only the elements in London or Manchester:
5.2 Upload data from network
When adding a new layer, press network to upload layers from databases or network folders that are already connected to Mapidea.
Inside the database, Select which table you want to upload and press next:

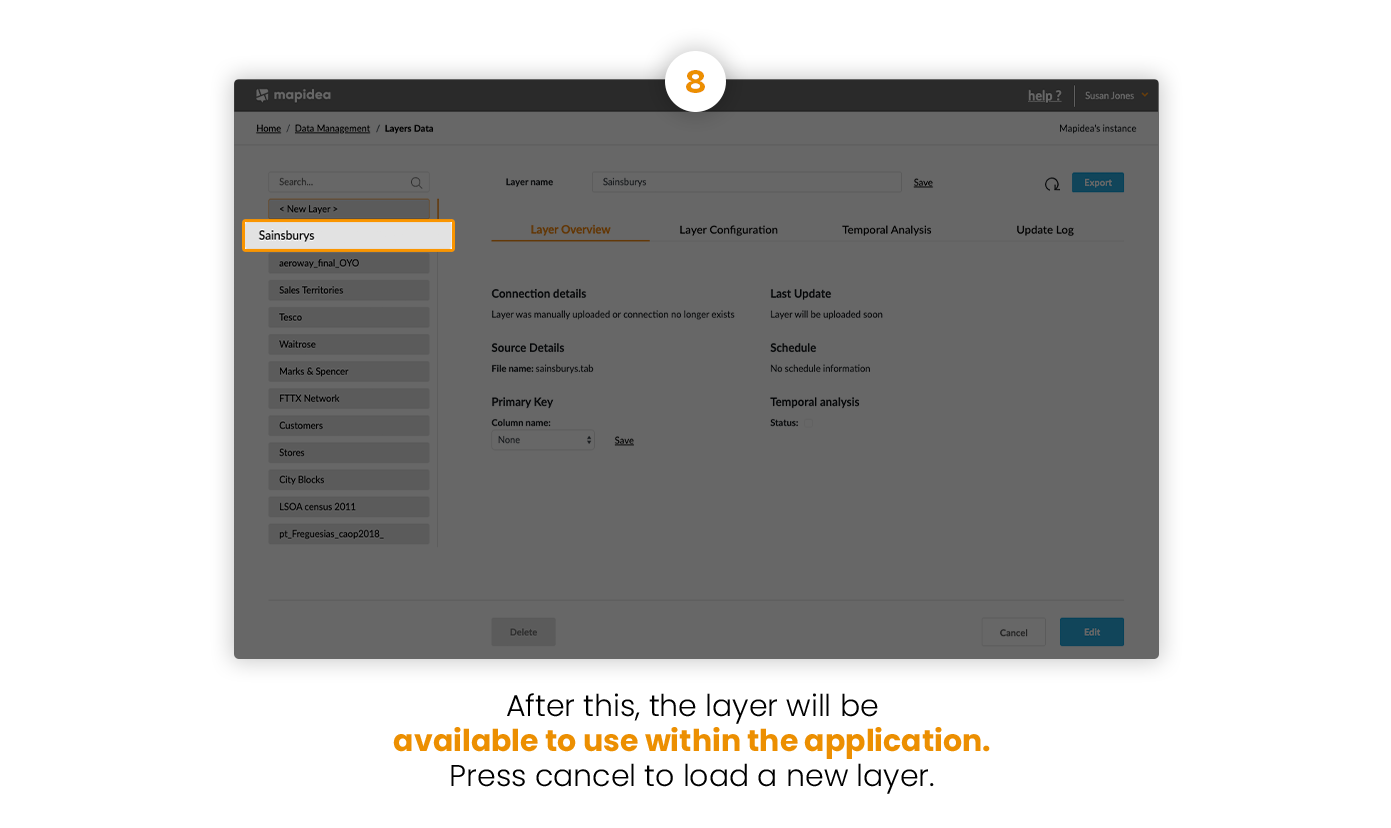
After that, configure the layer (columns, filter operations, temporal analysis and geographic configuration) and finish uploading it.
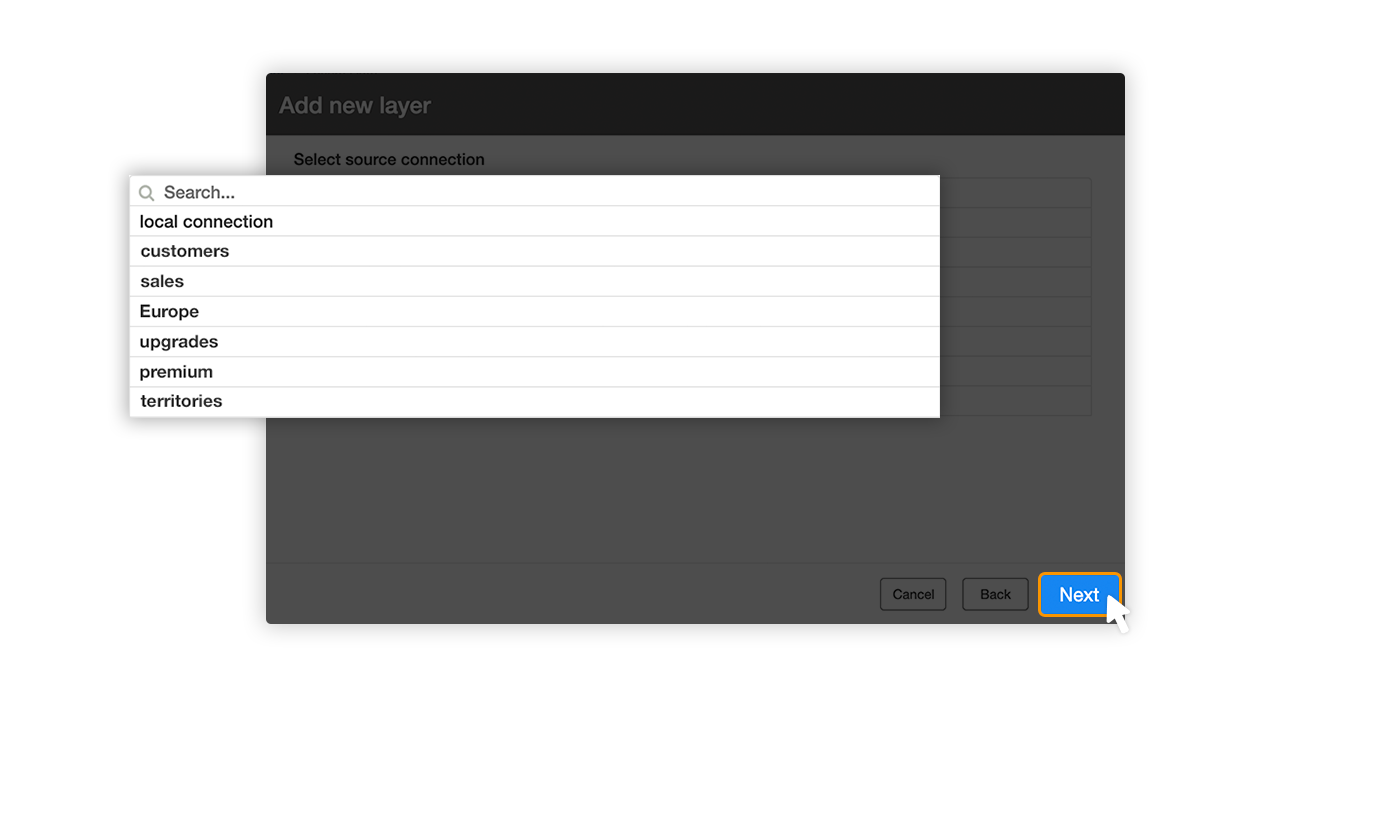
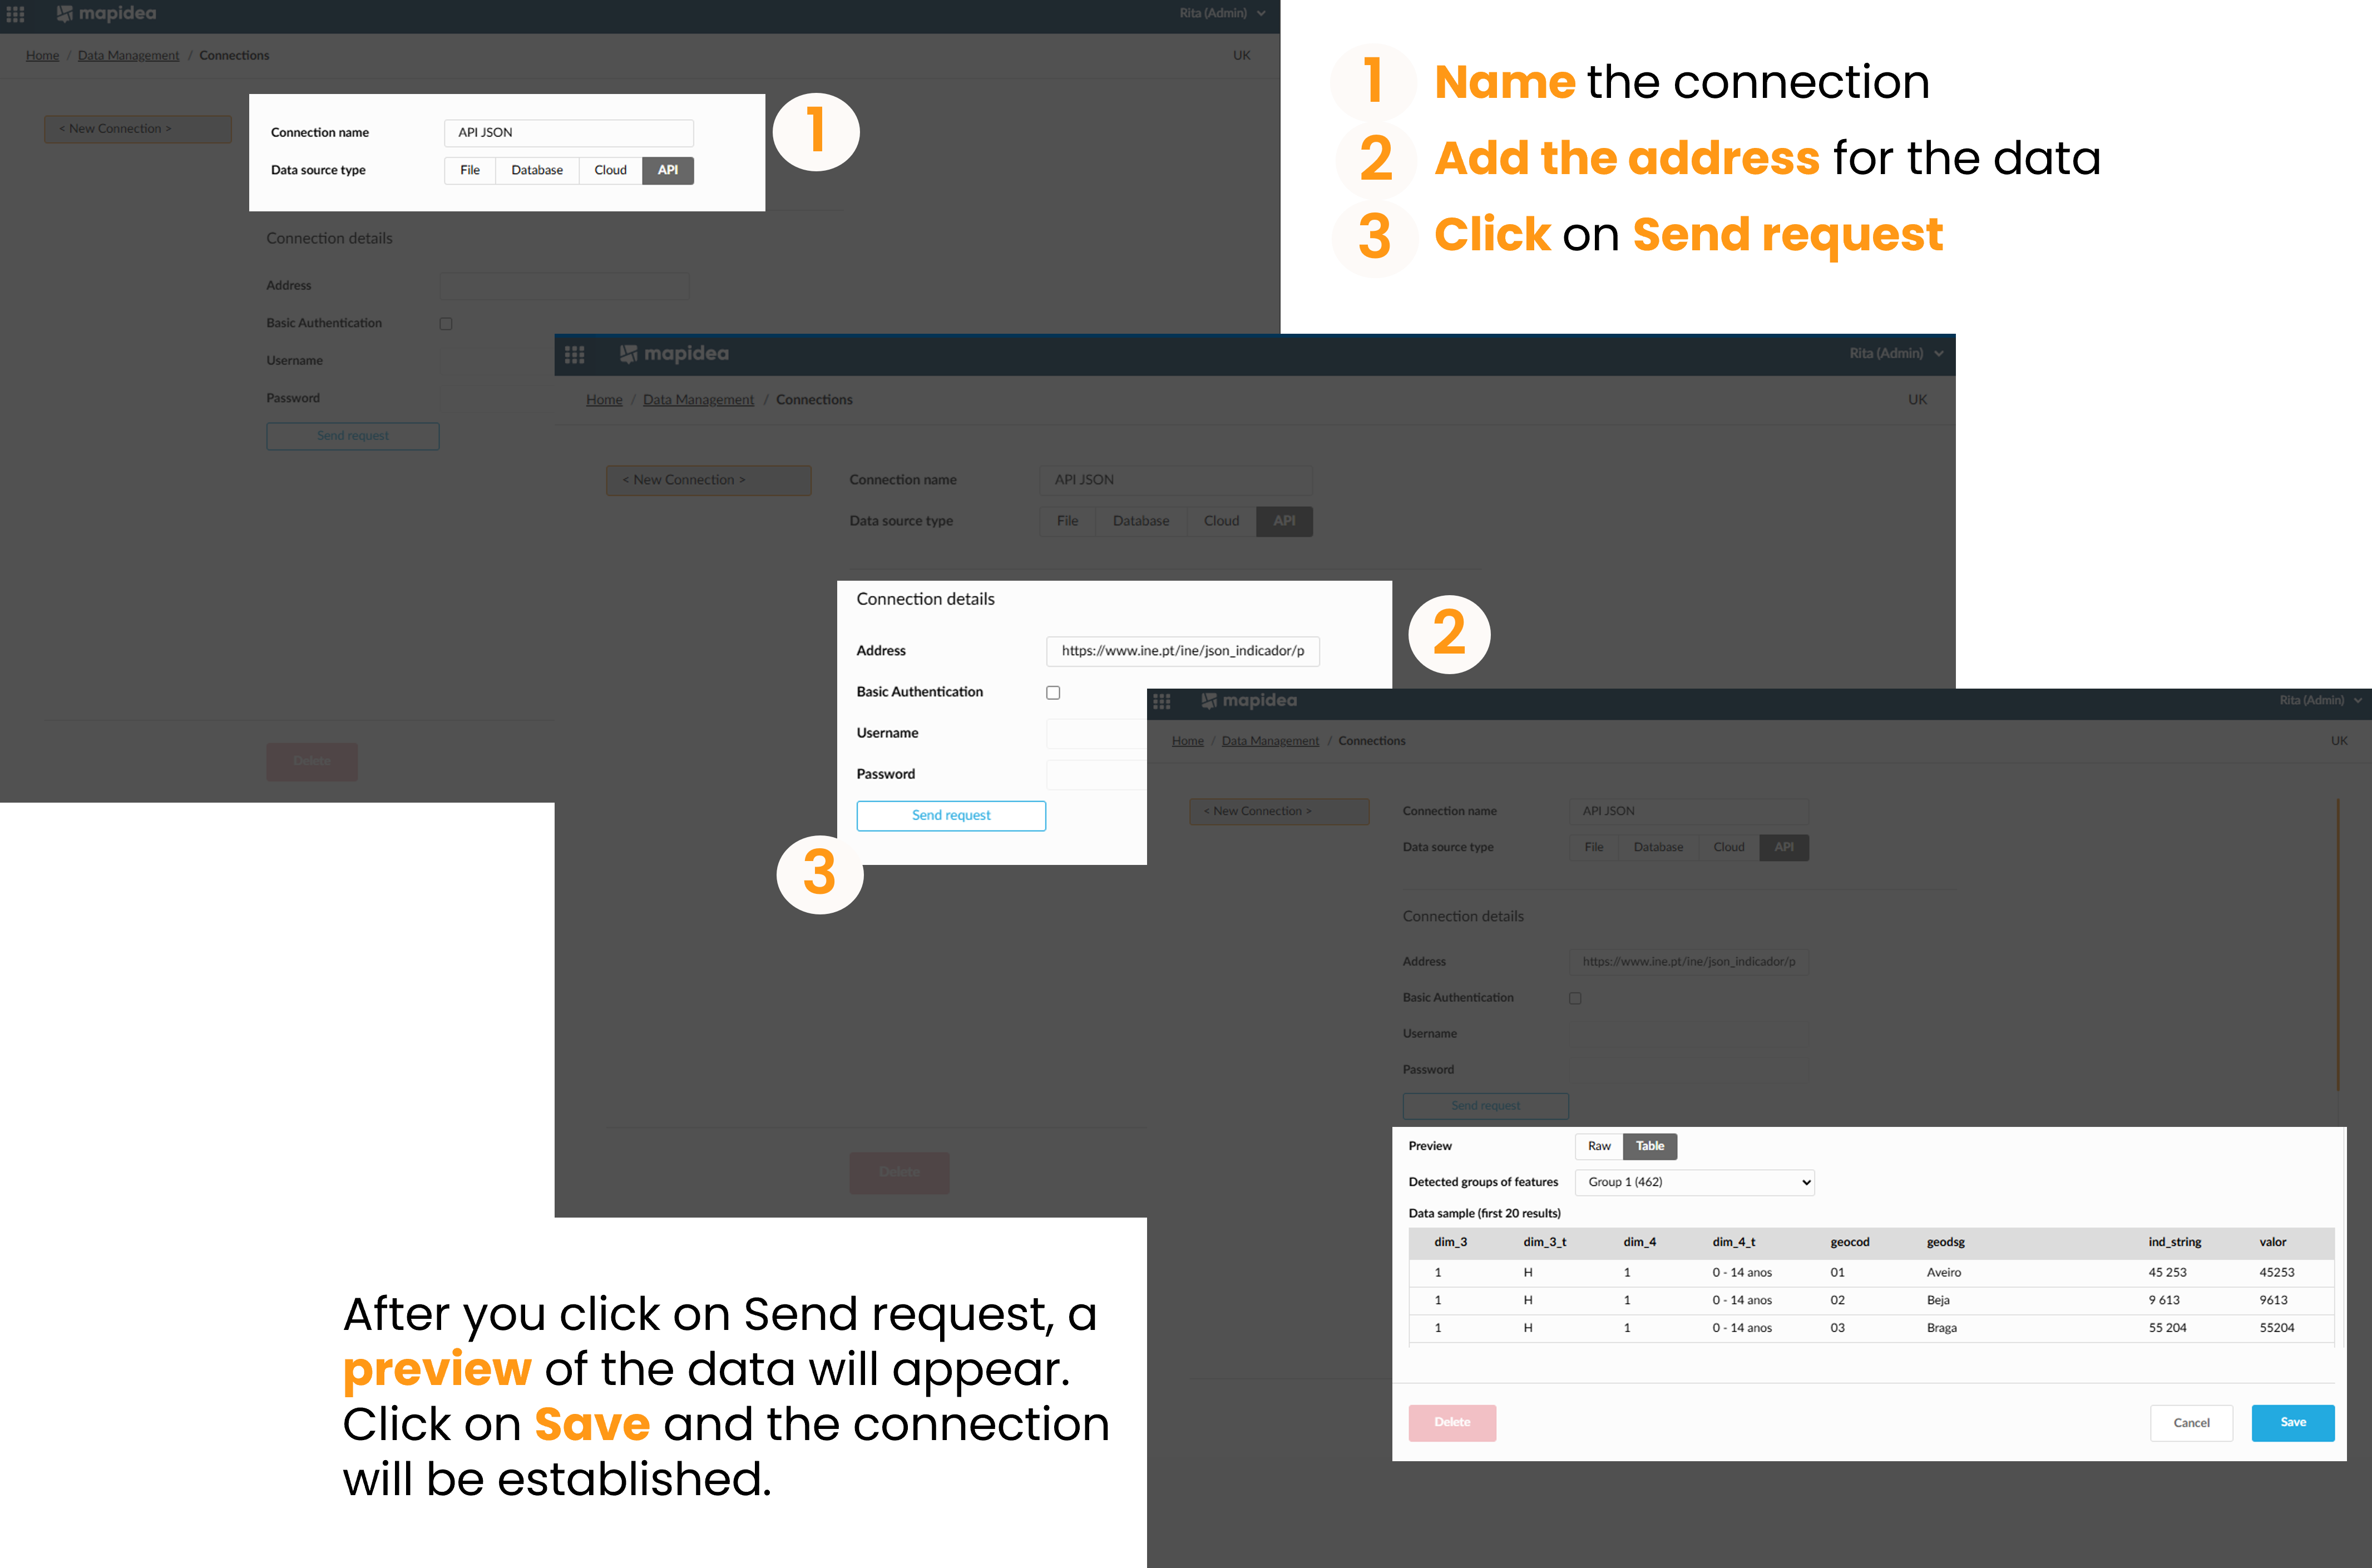
In order to upload data from the network, a source connection must be chosen from the connections available. There are two types of conncetions to automatically integrate data from an external system, which are:
- Database direct connection;
- Network File Connection.
Both require the external host (and source of the information) to be reachable from Mapidea's server to pull the information into its internal database.
5.2.1 Database Direct Connection
With database direct connection, Mapidea pulls the data directly from the remote database server whenever it is schedules to do so.
Mapidea only needs a connection configured with a read allowed user to a table or view on the database so it can pull the data into it's internal database. Each view or table is then imported into a single layer in Mapidea.
Mapidea can connect with the following database systems:
- Apache Hive (via ODBC);
- MS SQL Server;
- MySQL
- Oracle;
- PostgreSQL;
- Snowflake
The following cloud systems:
- Google BigQuery
- Google Drive
- Microsoft OneDrive
And also with API connections, either with JSON only, to add to a pre-existing geometry, or a GeoJSON.
5.2.1.1 Troubleshooting
If you can't establish a connection from Mapidea's server to the source database, check the following possibilities:
- Verify the source database server IP/Hostname and port;
- Make sure the database port on the source machine is open (not blocked by the firewall, etc);
- Verify the Database connection data for user and database is correct (Username, Password, Database name, Database schema);
- Verify the Database user has the right permissions defined to access the Database objects to which the connection will be made.
5.2.1.2 Network File Connection
With Network File Connection, Mapidea pulls information from a file accessible in the network into its internal database.
This network location can be a shared folder on a remote machine or in the Mapidea local filesystem.
It's possible to schedule an import task to a file if its network path and name doesn't change.
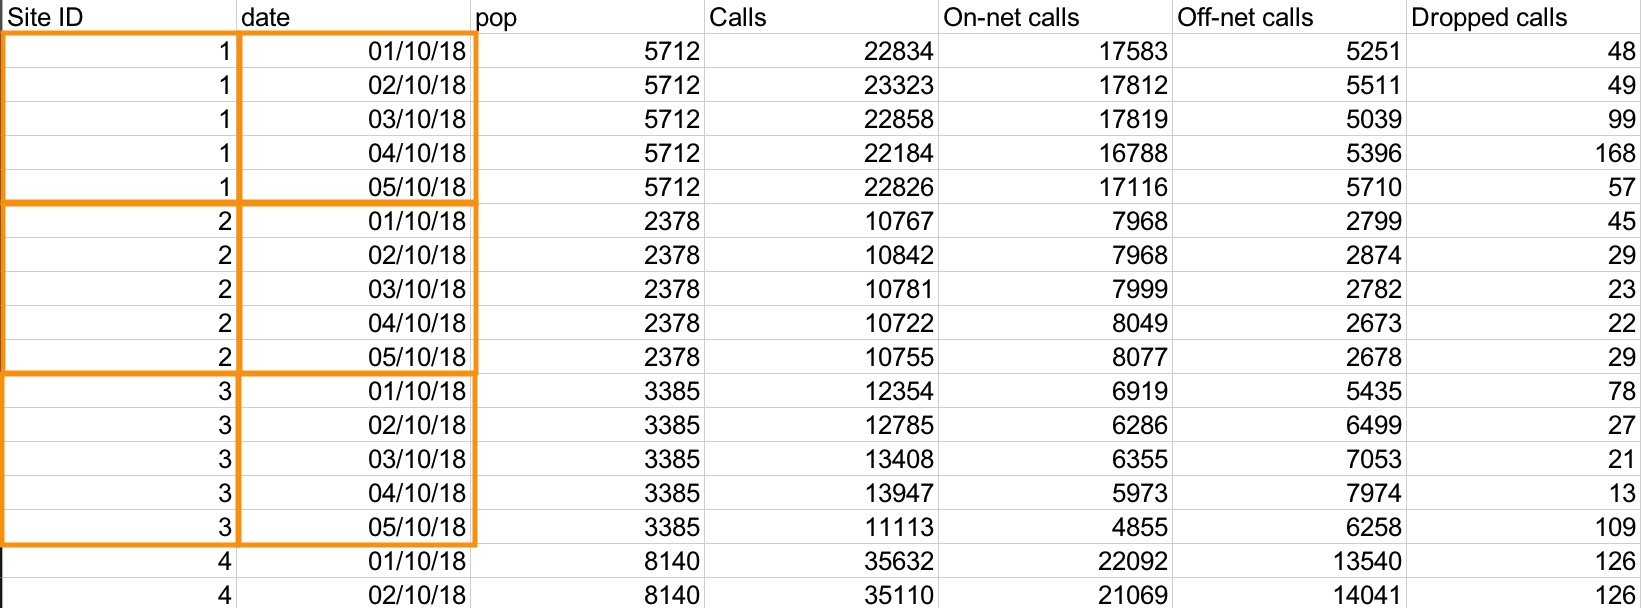
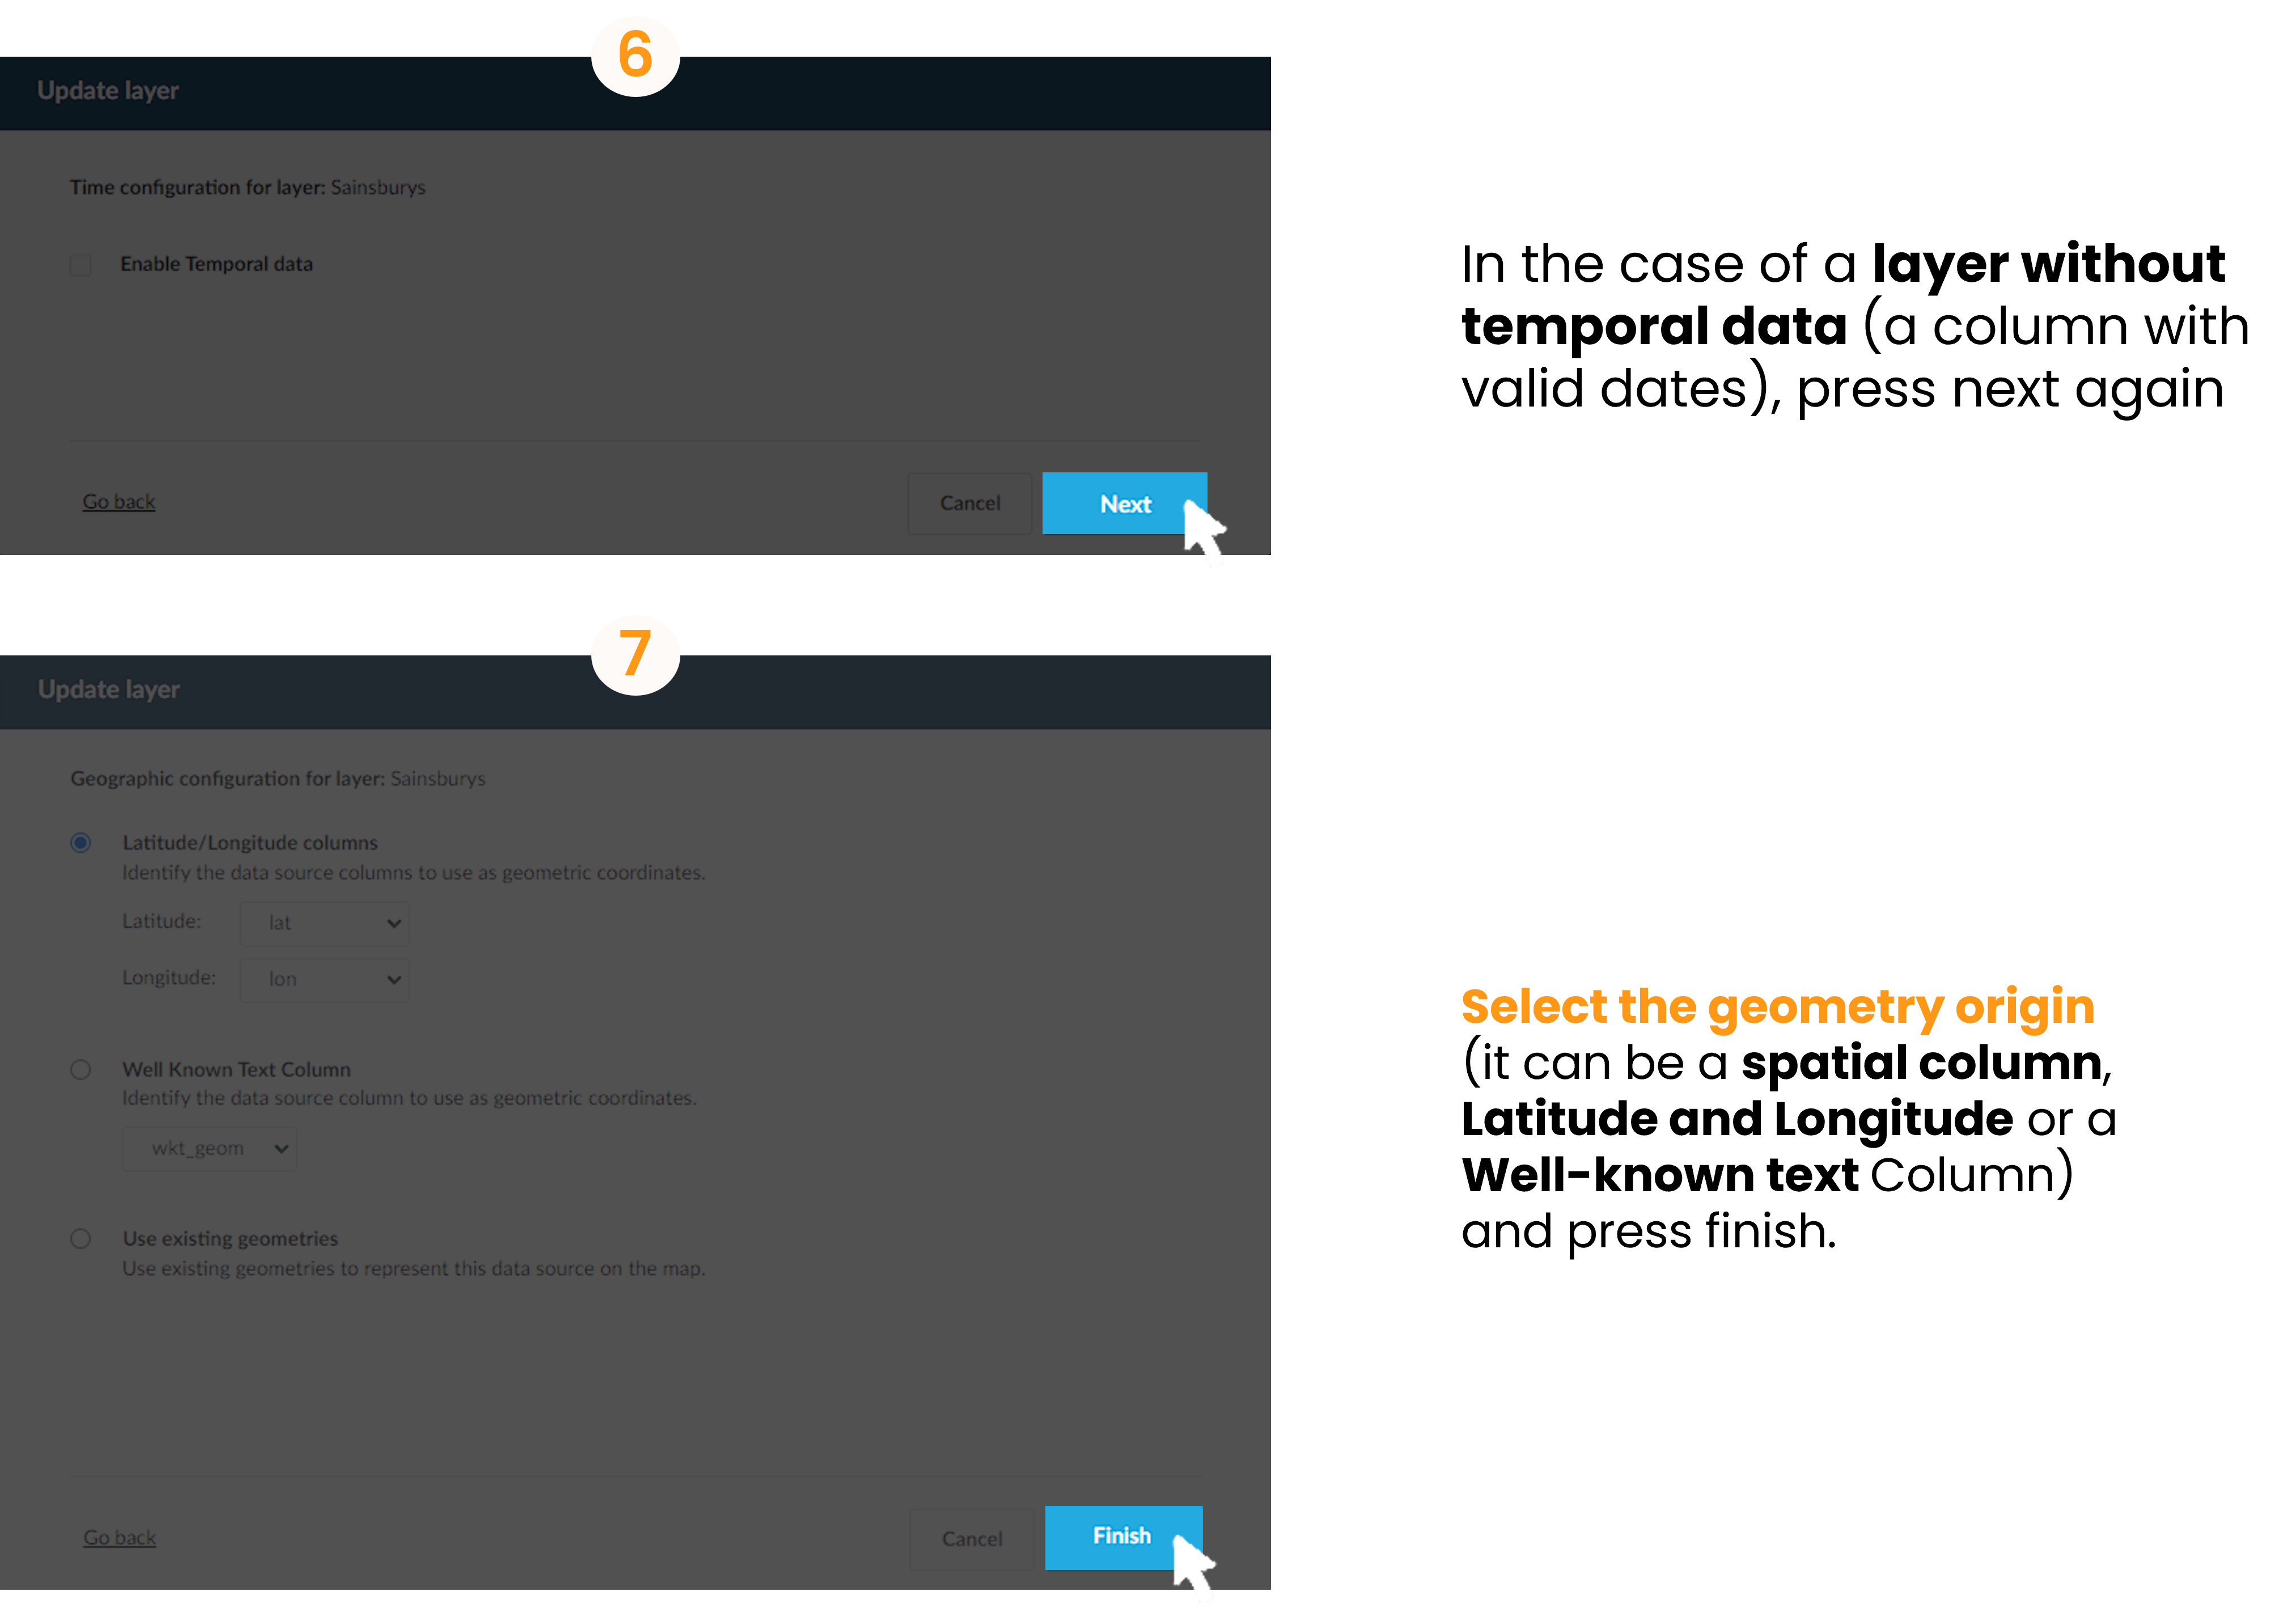
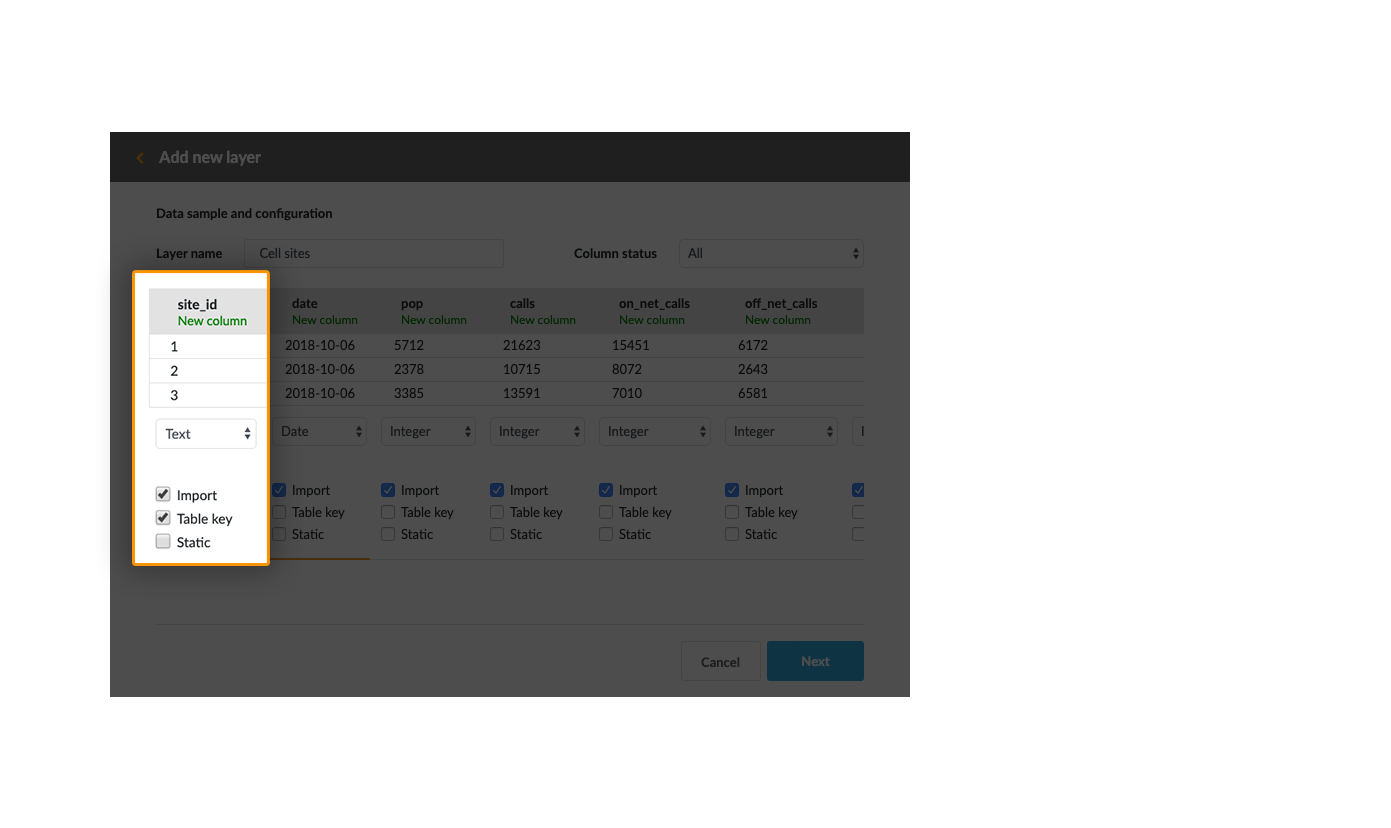
5.3 Layer with Temporal data
To enable temporal data in a layer it’s necessary to define a table key.
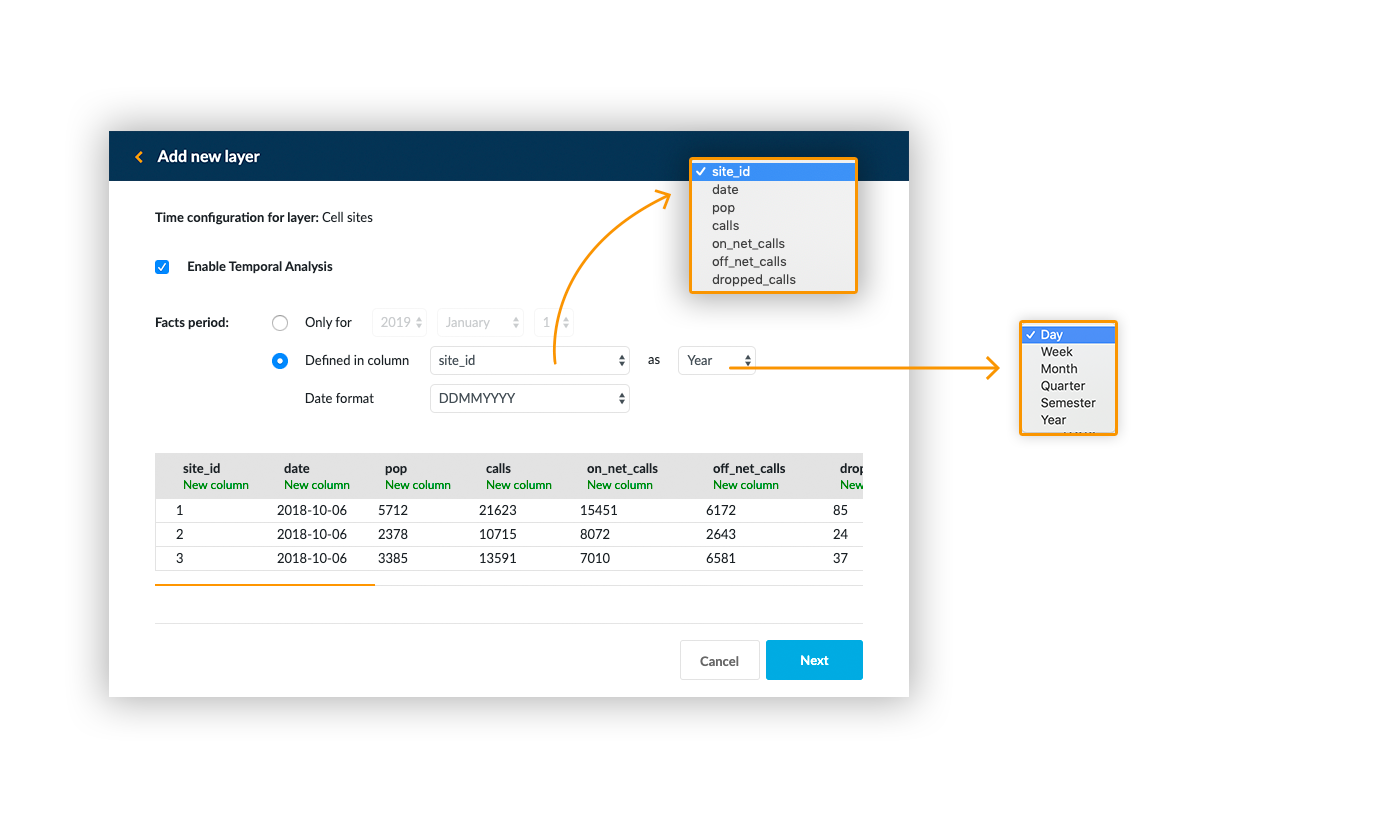
When enabling temporal data in layers with several time periods, the column with date information must be specified, and also the time grain in which the data is based.
If the layer has data for only one time period and there’s no column defined as date, it can be defined by choosing the date in “Only for…”:
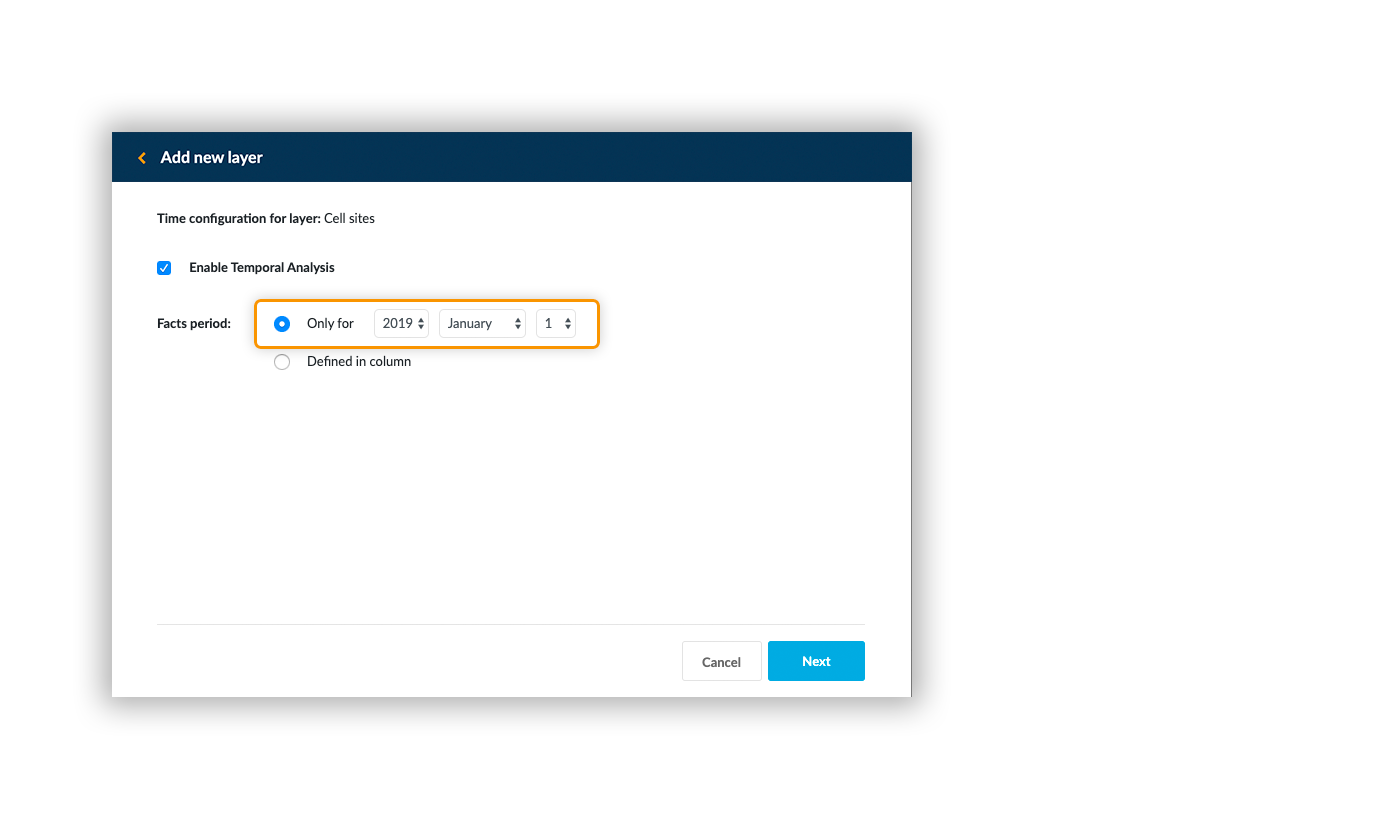
After that, specify the geographic configuration of the layer and finish uploading it.