Contents
6. Update data
![]() Updated
by Mapidea Team
Updated
by Mapidea Team
It’s possible to update a layer by replacing it entirely, update existing columns or add new columns.
The replacement happens when there is no table key defined. Otherwise, when the layer has a table key, the elements are updated or added (upsert) to the layer

6.1 Replace
Replace happens when there is no table key defined. The updating files will replace layer entirely.
Drag and drop the layer in Data management > layers data and press Edit.
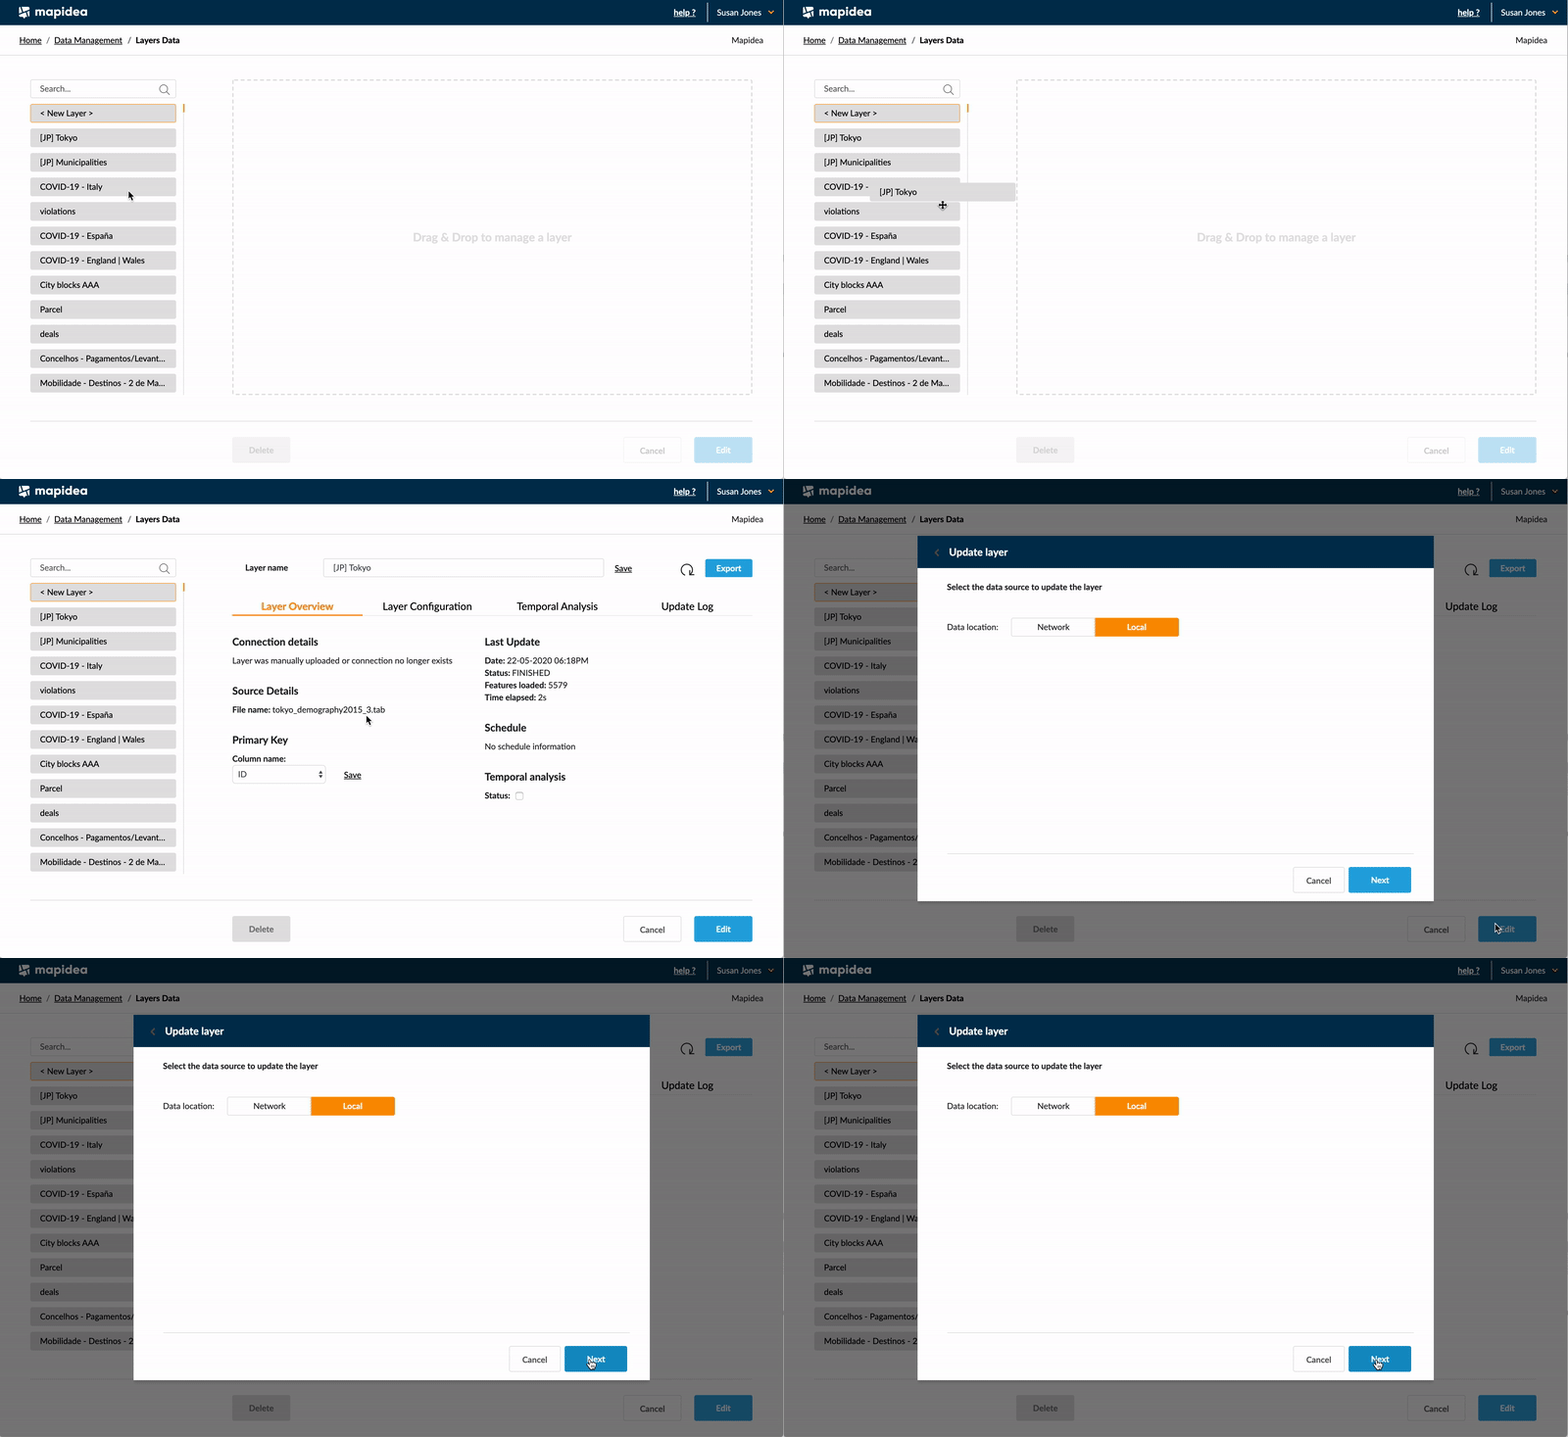
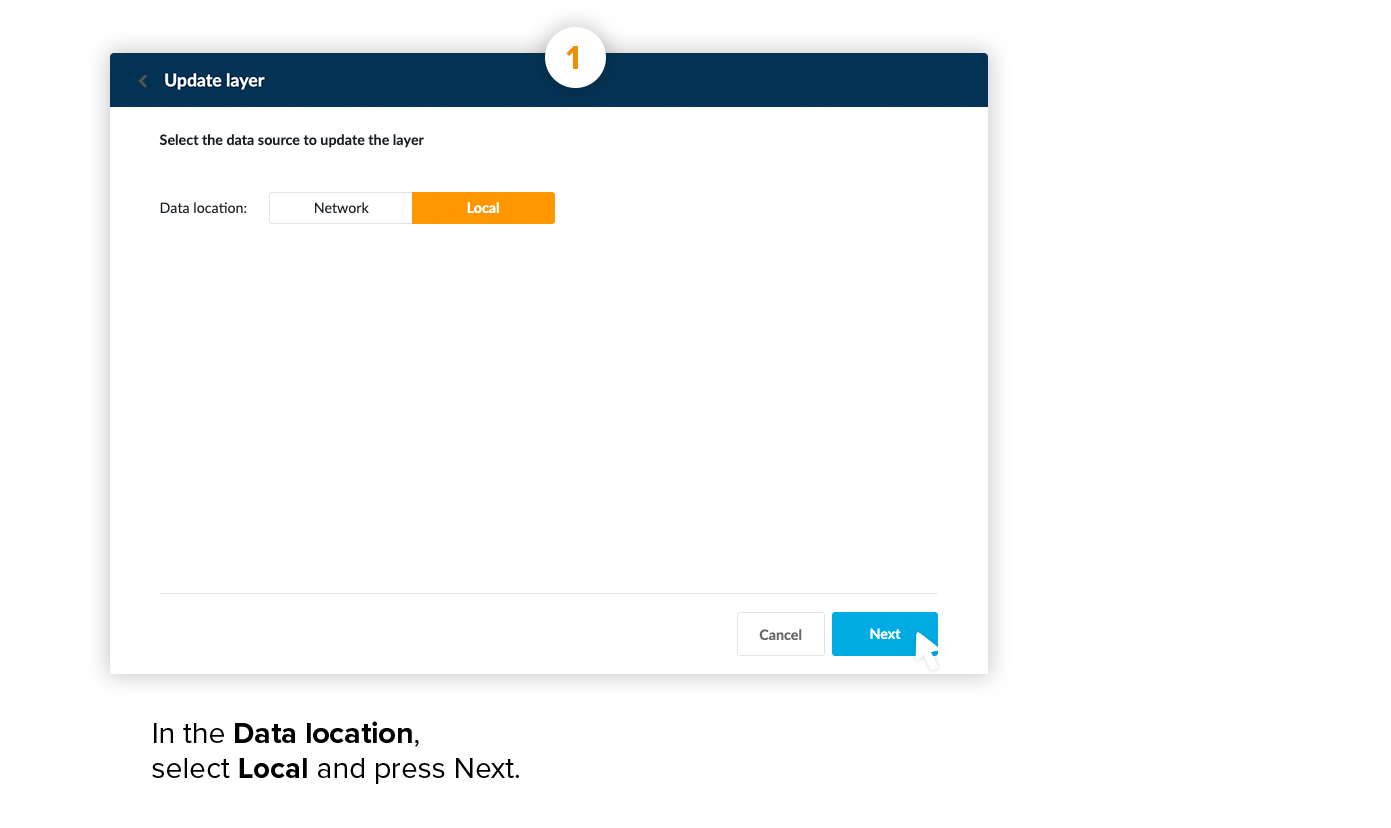
Choose the data source of the replacement layer and press next.
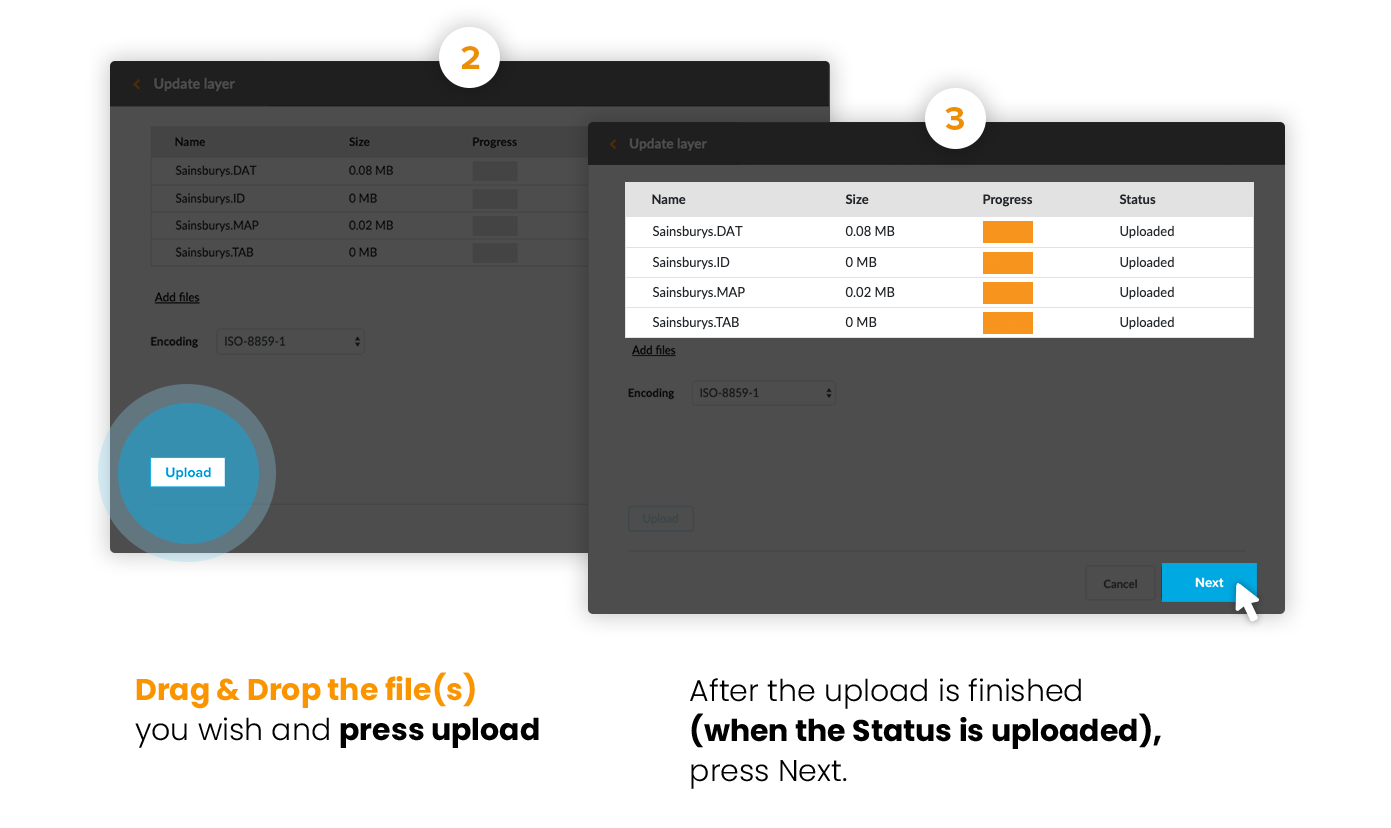
Drag and drop the files and press upload.
After, choose which columns are to upload, check the column status and press Next.
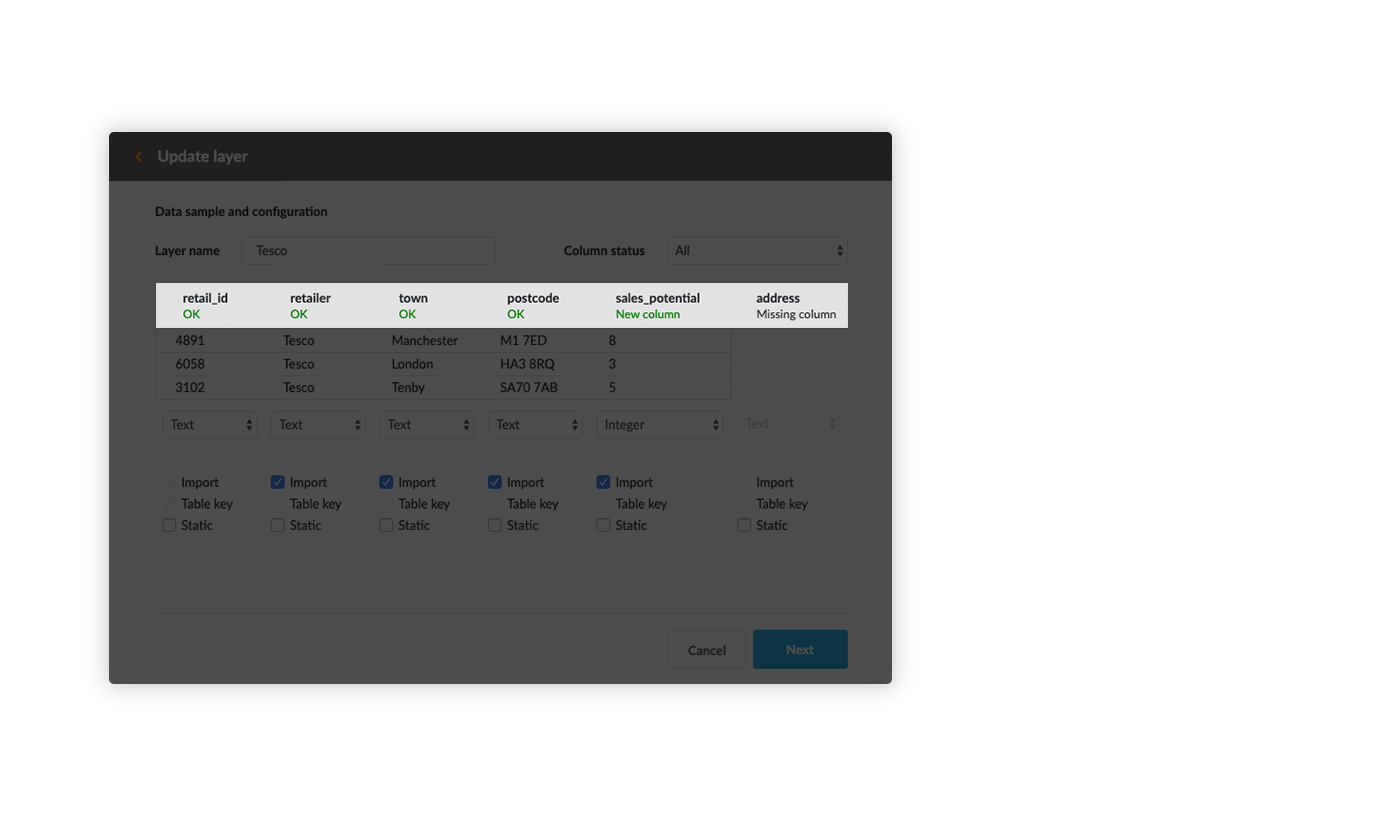
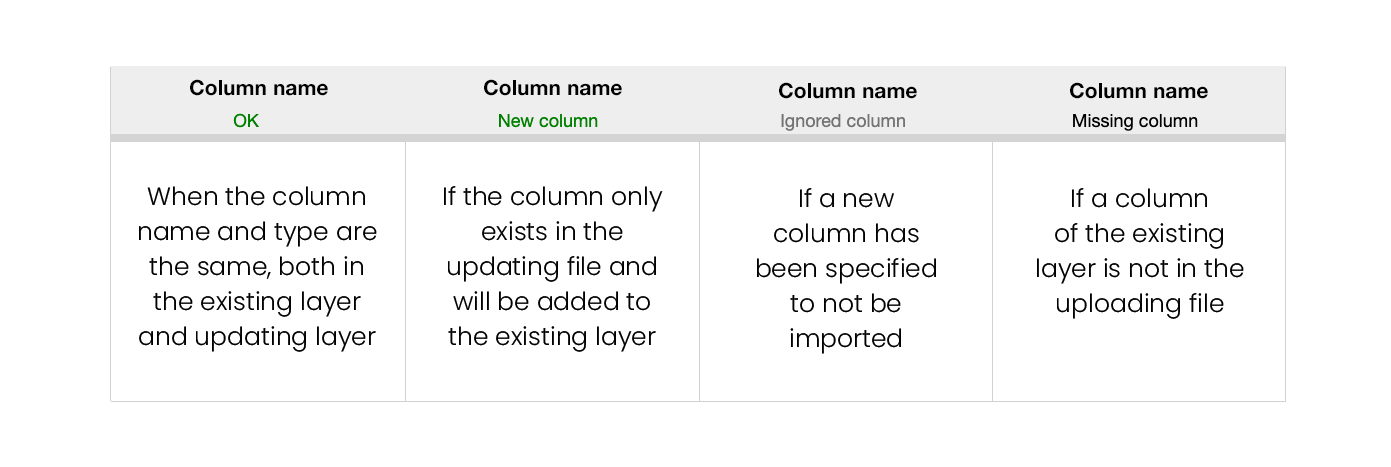
Doing a layer replacement, there are 4 different possible column status, based on the relation between the existing layer and the replacement file: OK; New column; Ignored column; Missing column.
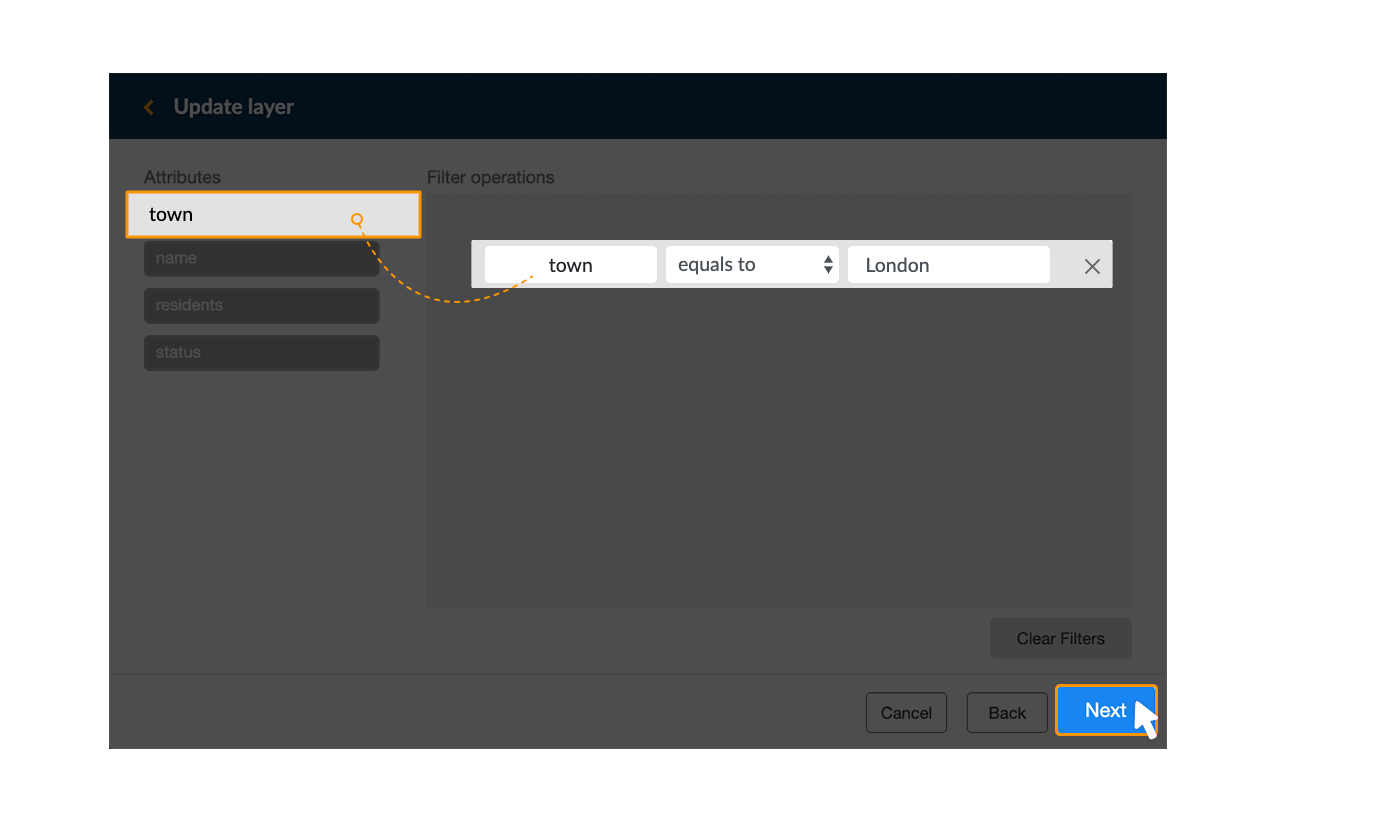
After, it is possible to filter the information from the replacing file.
Example: Upload only the elements in London
Clicking next, in Geographic configuration layer it’s given the option of identifying the columns to use as geometric coordinates, the option to use the geometries of the replacement file or the option to use a Well-Known text column.
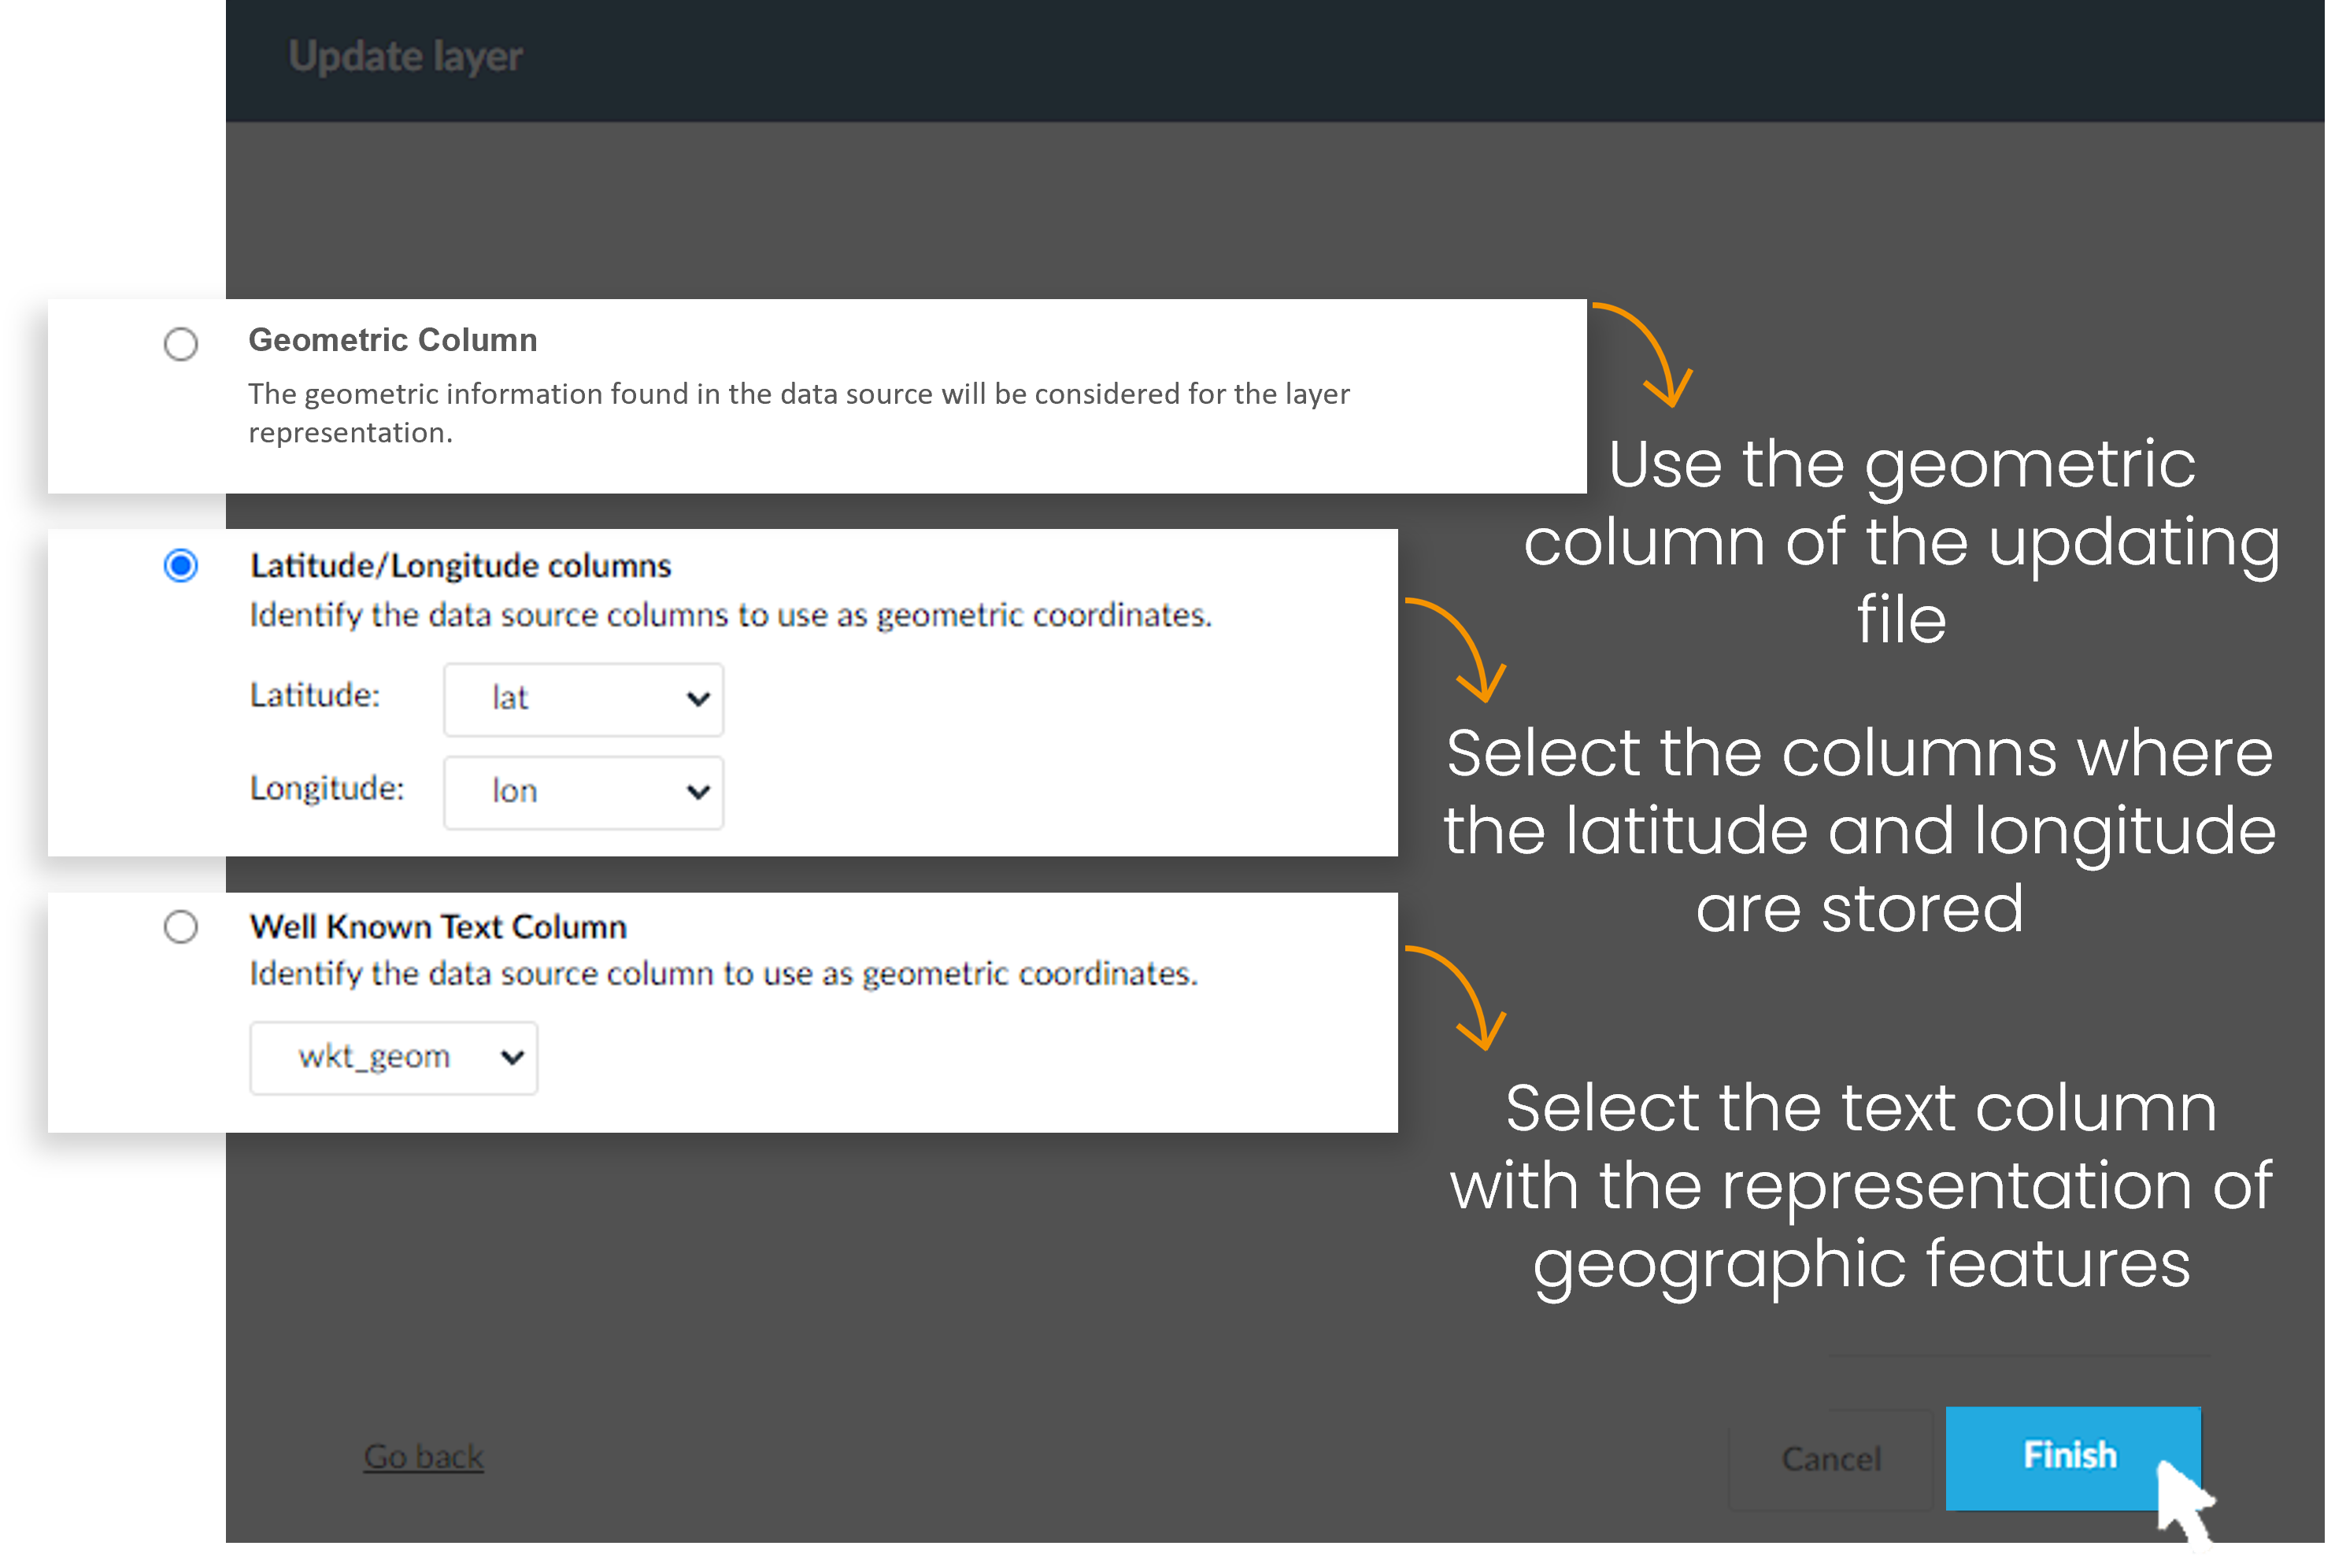
After that, press Finish and the layer will be replaced.
6.2 Update
Updating a layer happens when the layer has a table key defined. It means that is possible to change the values of the layer based on the column that contains the primary key.
Drag and drop the layer in Data management > layers data and press Edit.

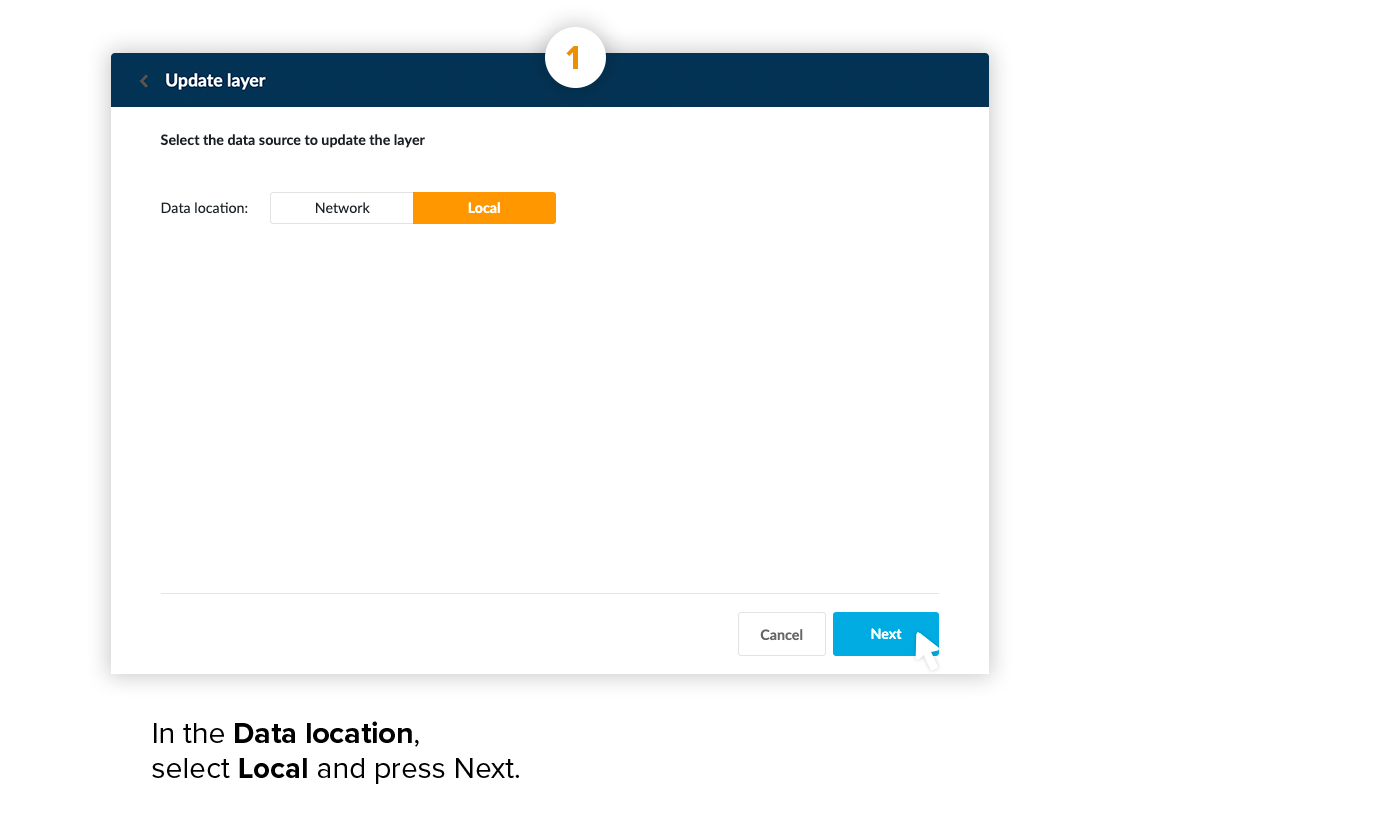
Choose the data source to update the layer and press next.
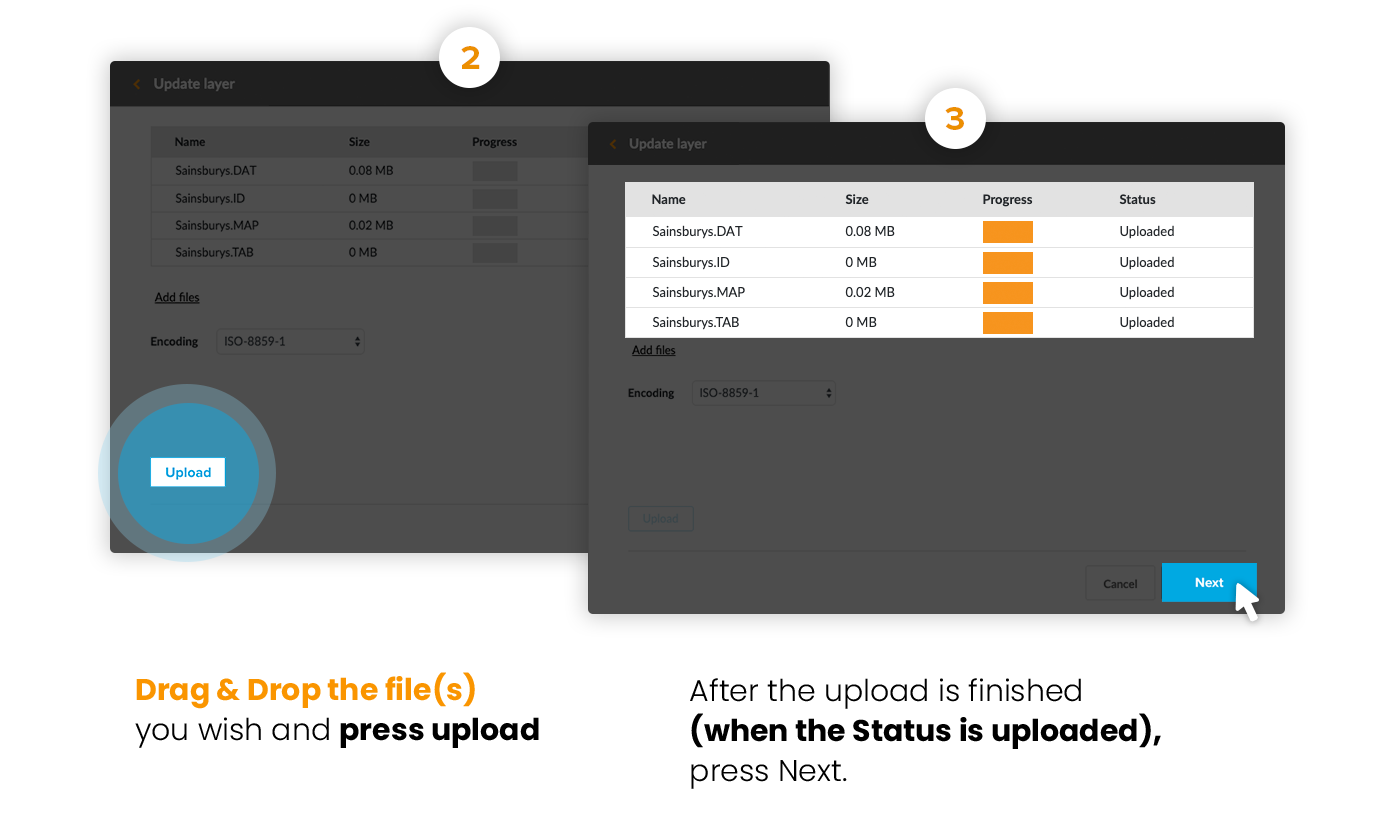
Drag and drop the updating files and press upload.
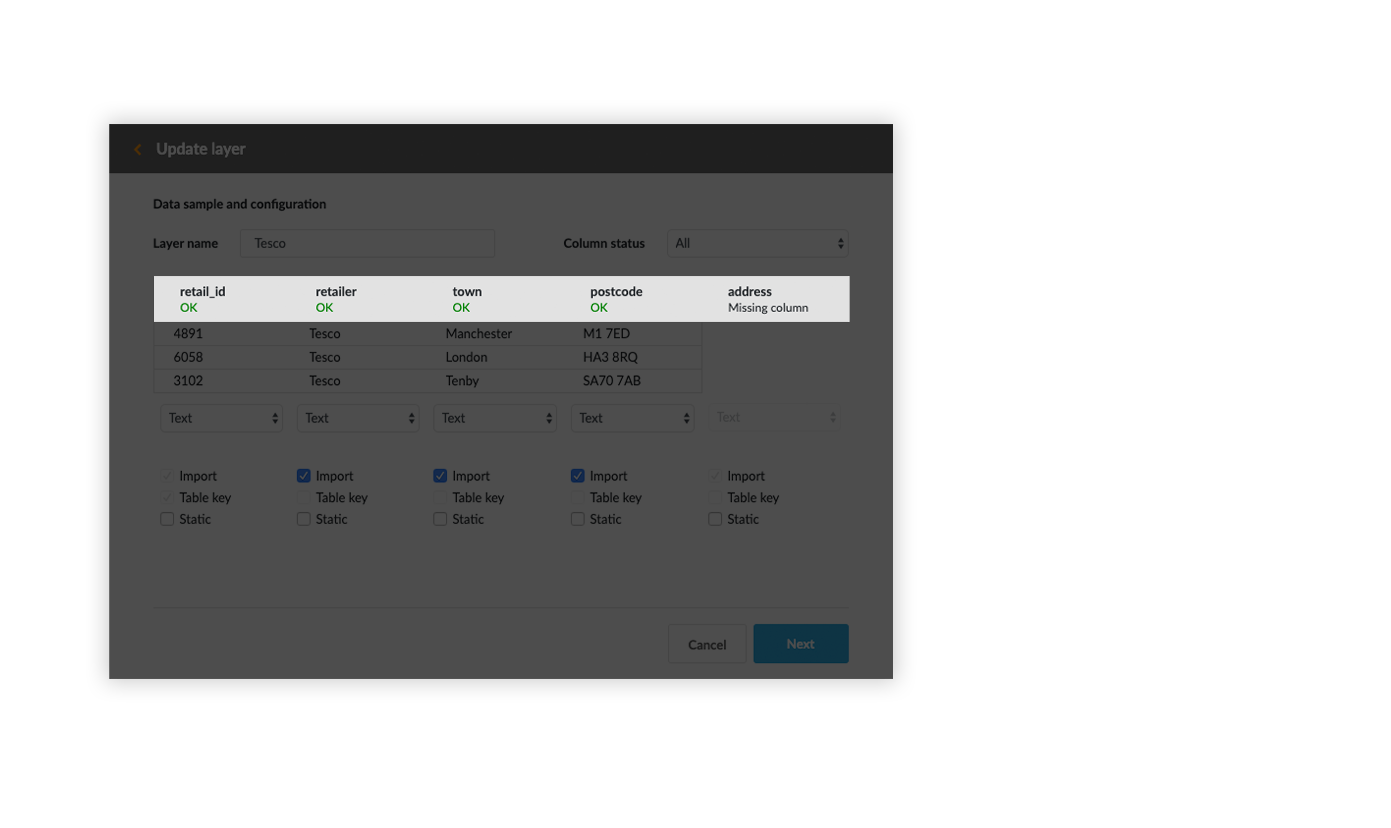
Choose the columns to be imported, check the column status and press Next.
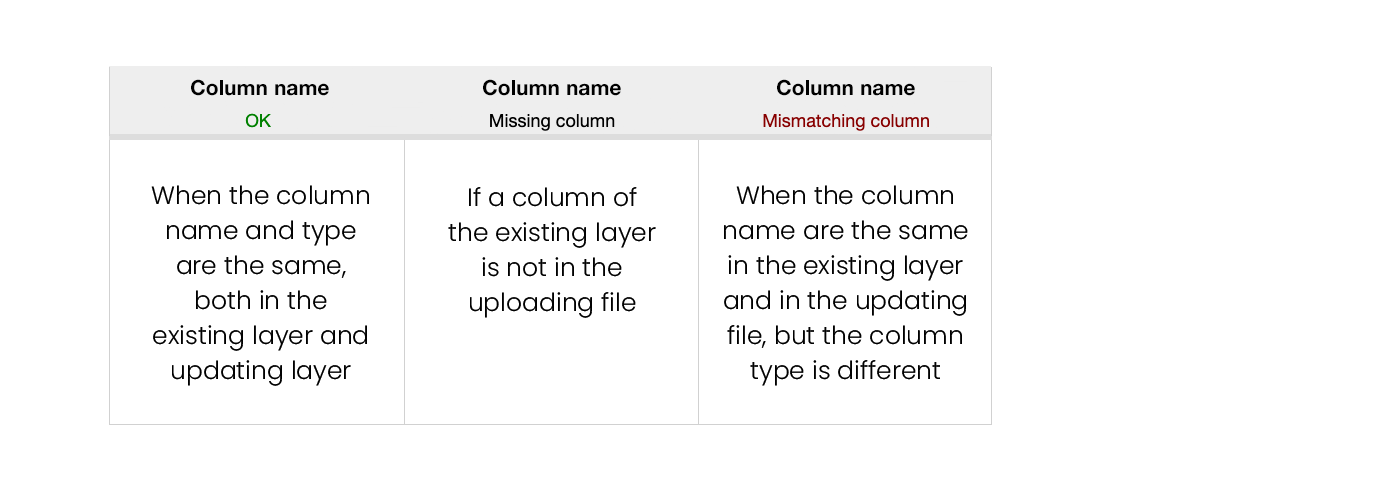
There are 3 different possible column status, based on the relation between the existing layer and the updating file: OK; Missing column; Mismatching column.
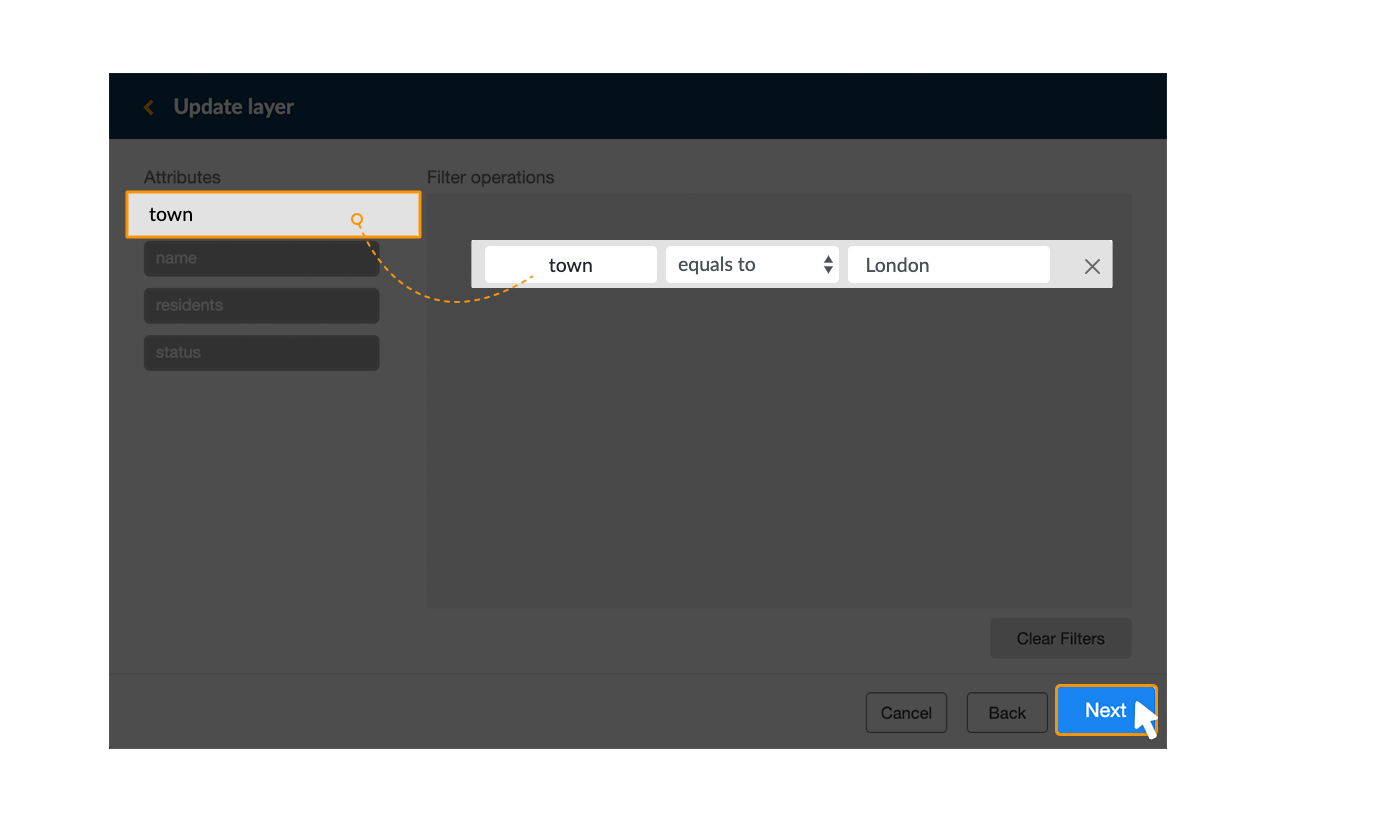
After, it is possible to filter the information to update. This is useful when the file contains more rows that the ones desired to update.
Example: Update only the elements located in London
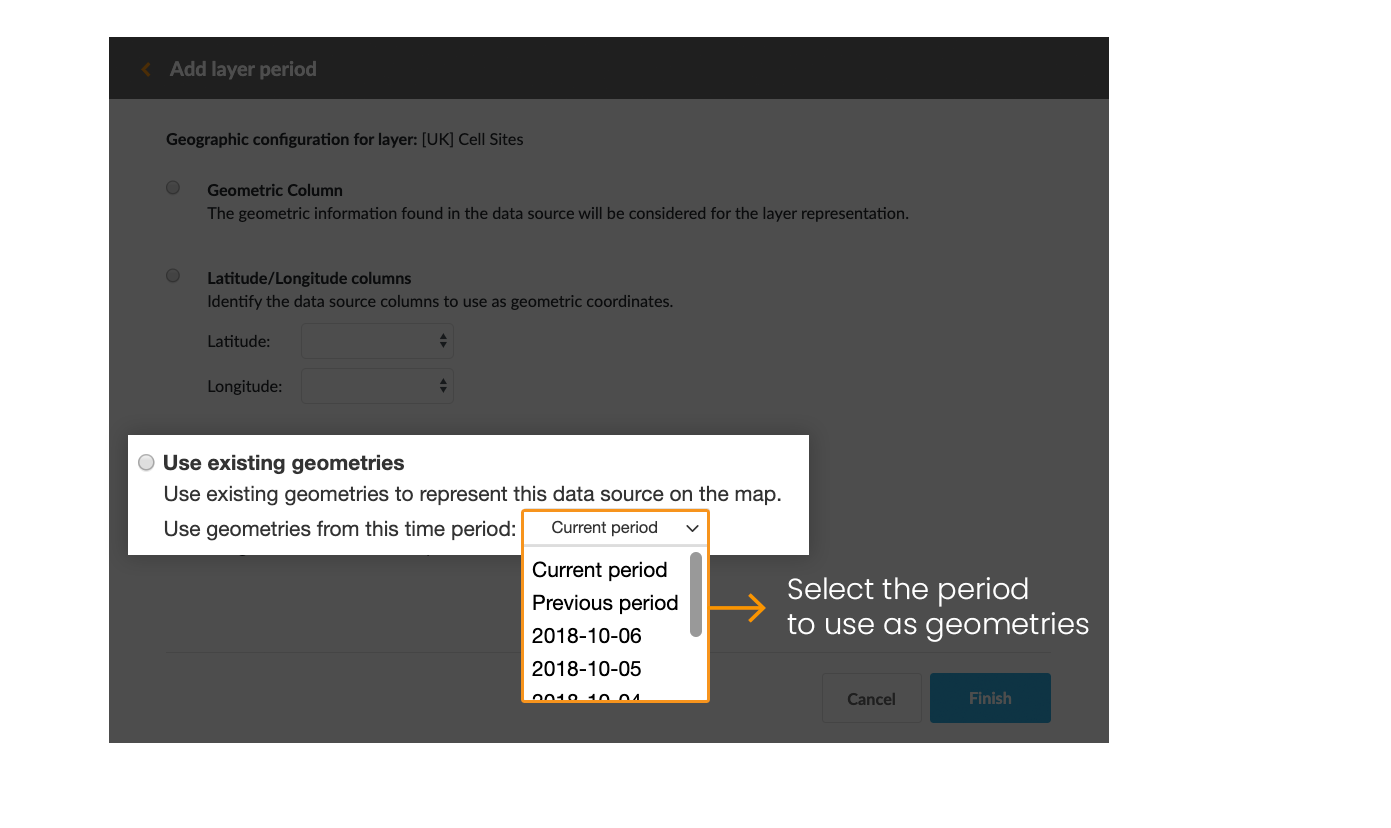
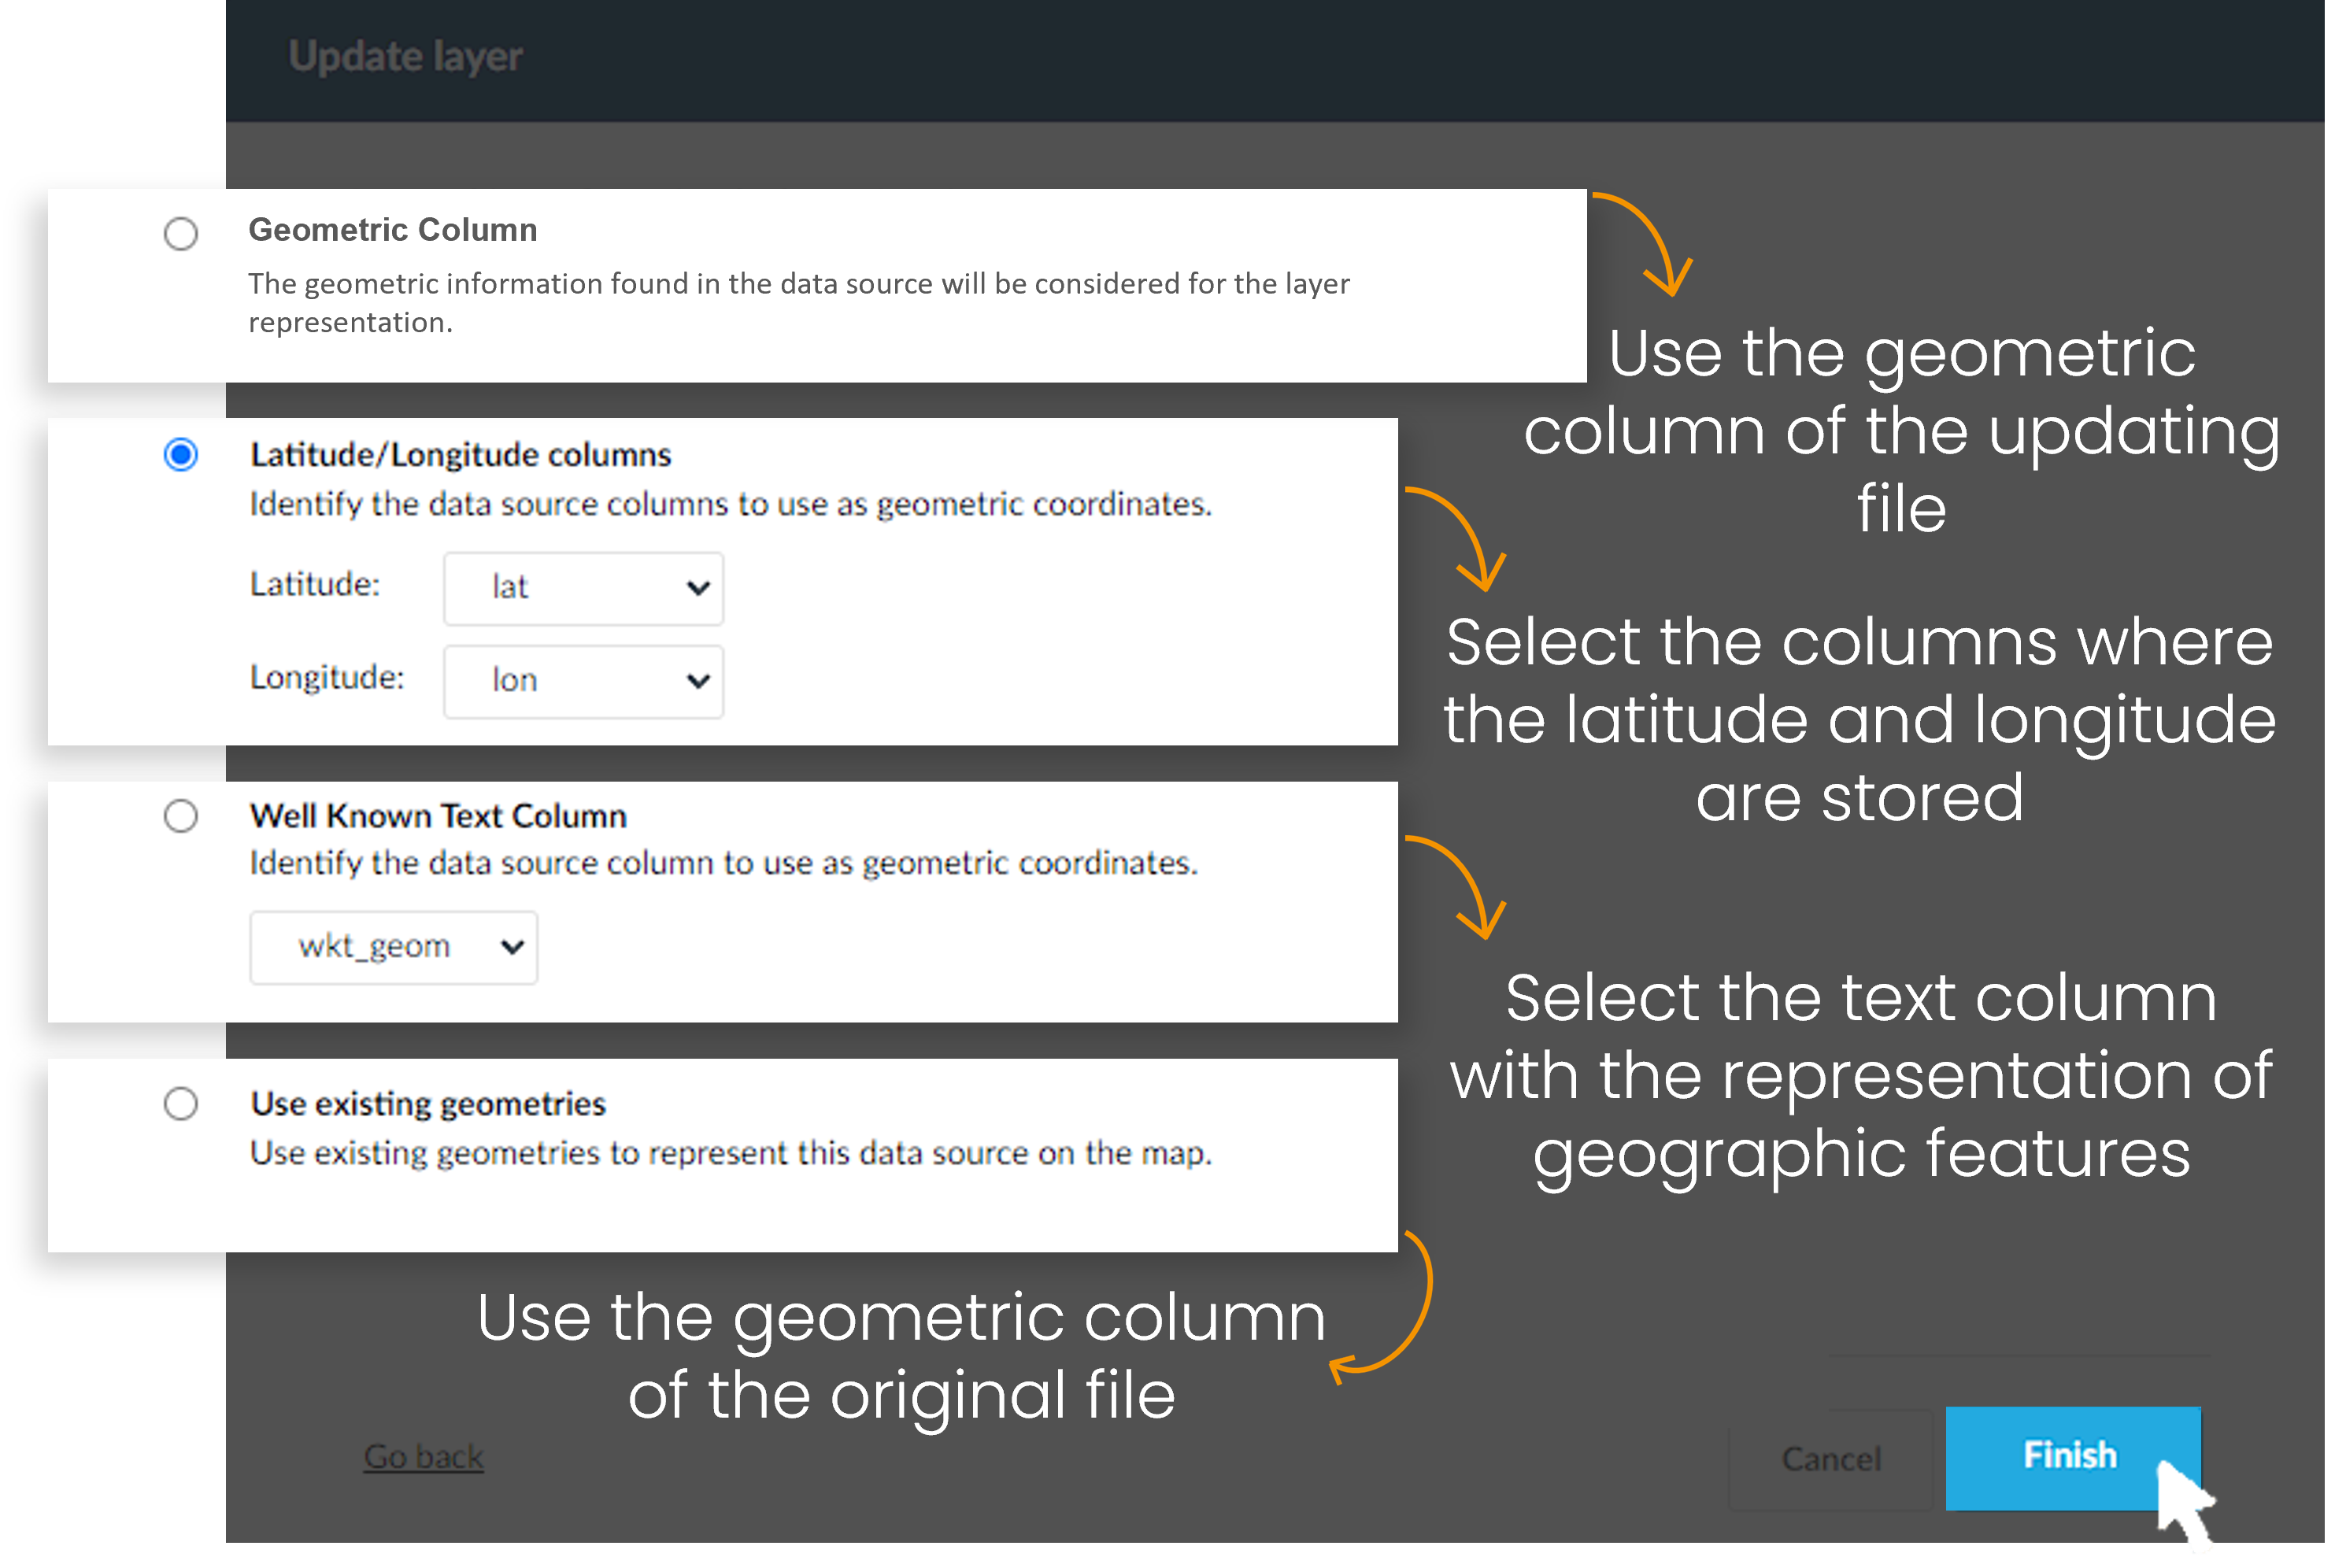
Clicking next, in Geographic configuration layer, besides the options of identifying the columns to use as geometric coordinates, or a well-known text column or to use the geometries of the uploading layer (if it has), it is possible to choose the geometries of the existing layer.
After that, press finish and the layer will be updated.
6.3 Add columns
Adding columns to an existing layer is possible when a table key was defined.
Drag and drop the layer in Data management > layers data and press Edit.

Choose the data source to update the layer and press next.

Drag and drop the files containing the new columns and press upload.
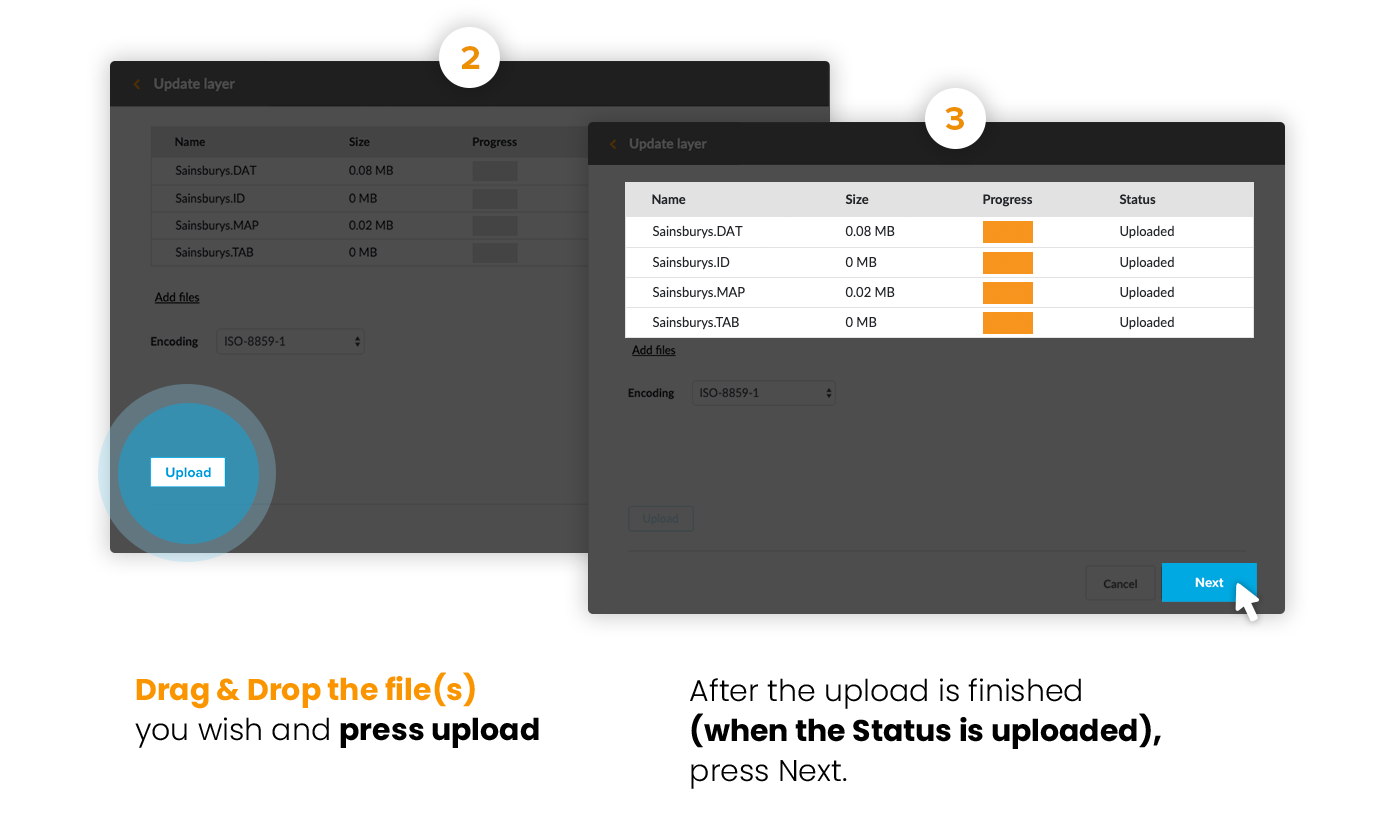
Choose the columns to be imported, check the column status and press Next.
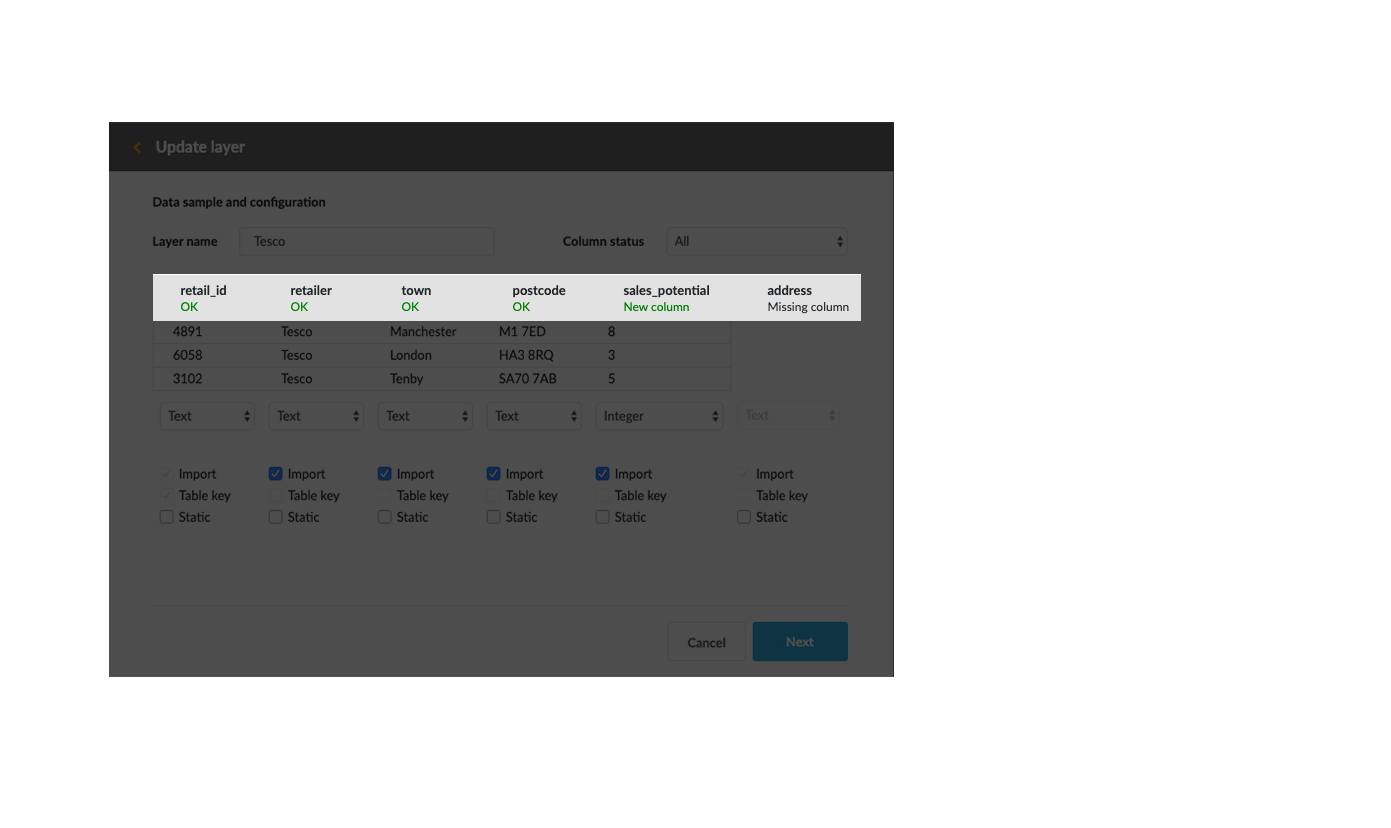
There are 4 different possible column status, based on the relation between the existing layer and the updating file: OK (table key); New column; Ignored column; Missing column.
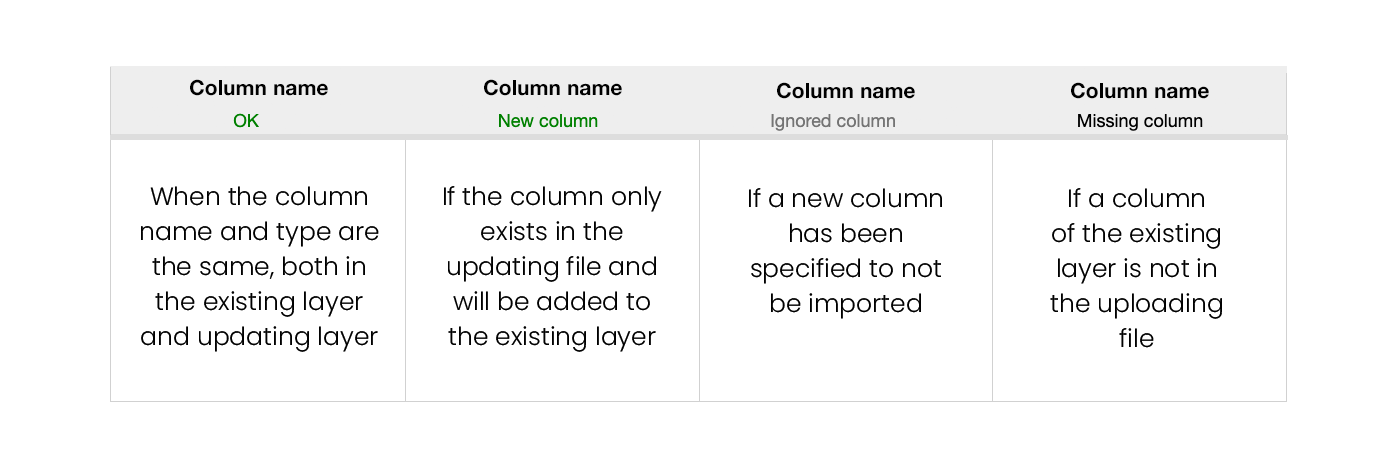
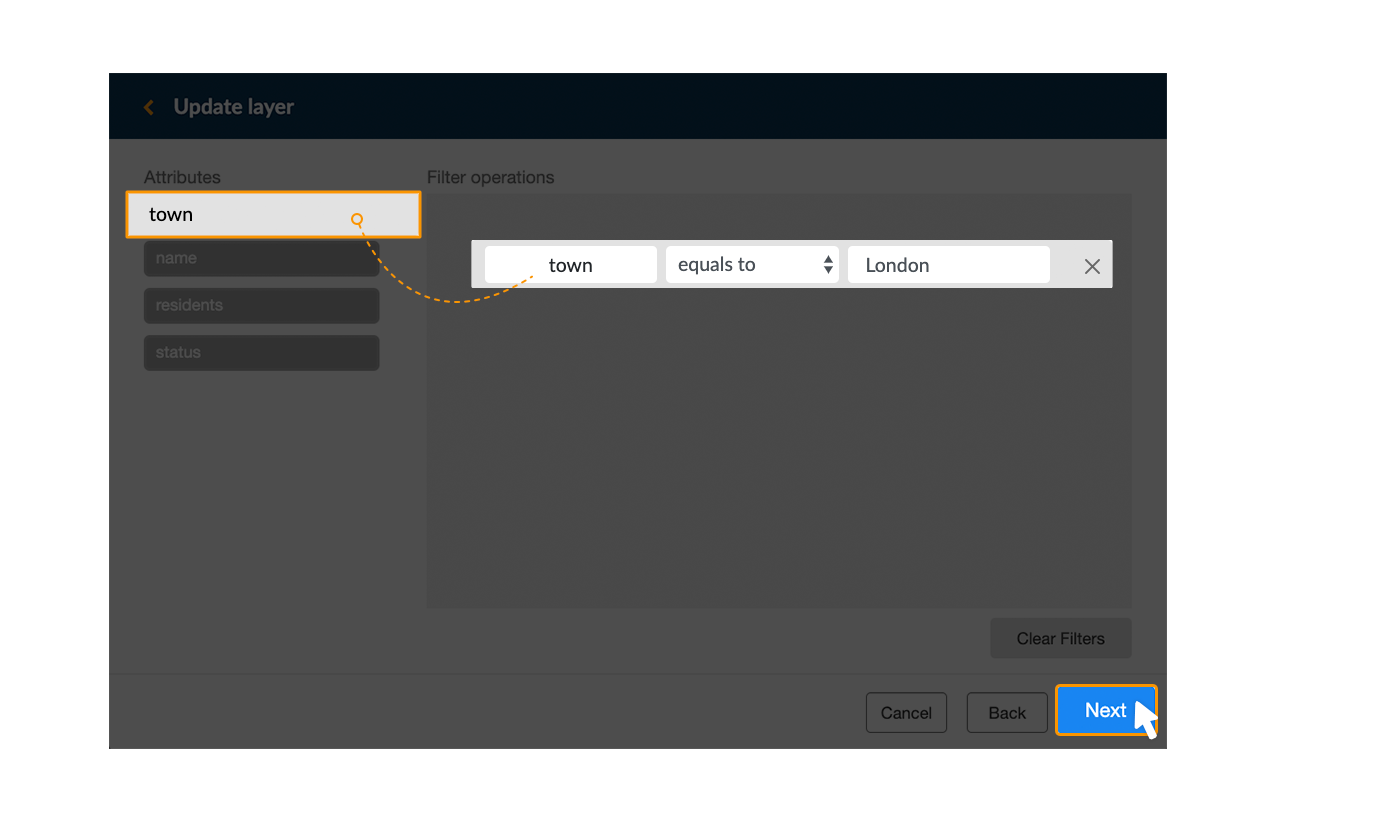
After, it is possible to filter the information to add. This is useful when the file contains more rows that the ones desired to add.
Example: In the new column, only upload values to elements located in London.
Clicking next, in Geographic configuration layer,besides the options of identifying the columns to use as geometric coordinates, or a well-known text column or to use the geometries of the uploading layer (if it has), it is possible to choose the geometries of the existing layer.

After that, press finish and the layer will be updated.
6.4 Layer with temporal data
6.4.1 Update periods data
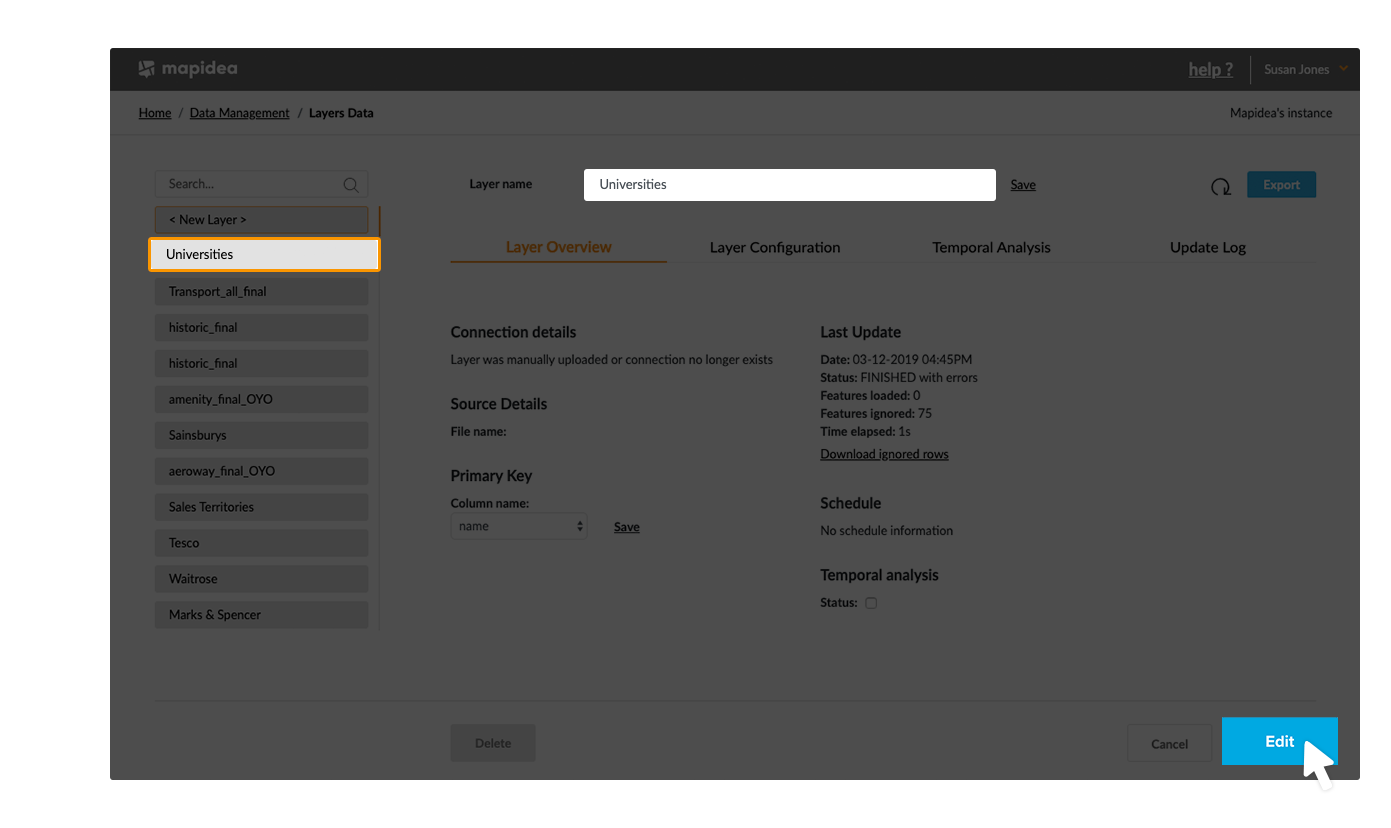
If the layer has temporal data you can update it by clicking Edit.
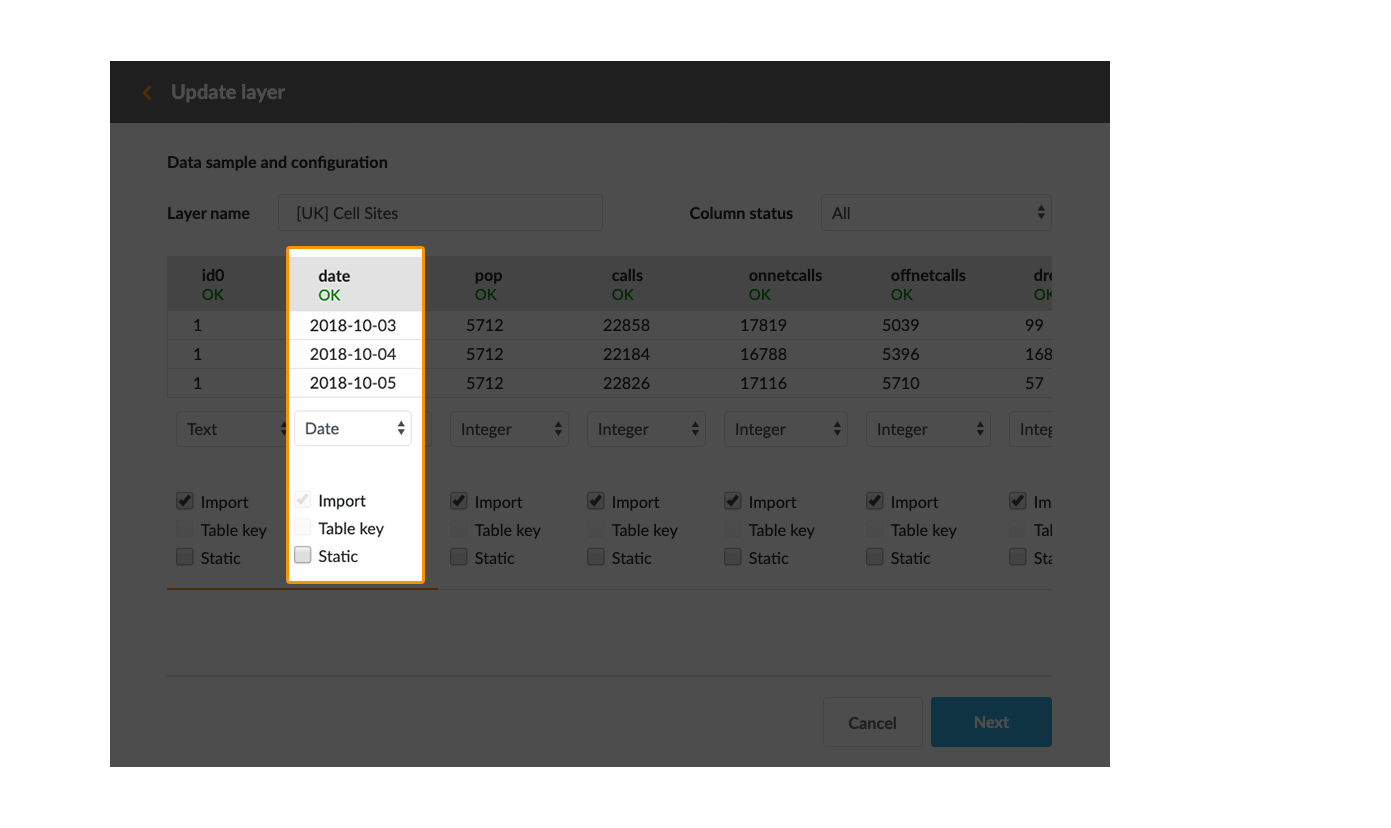
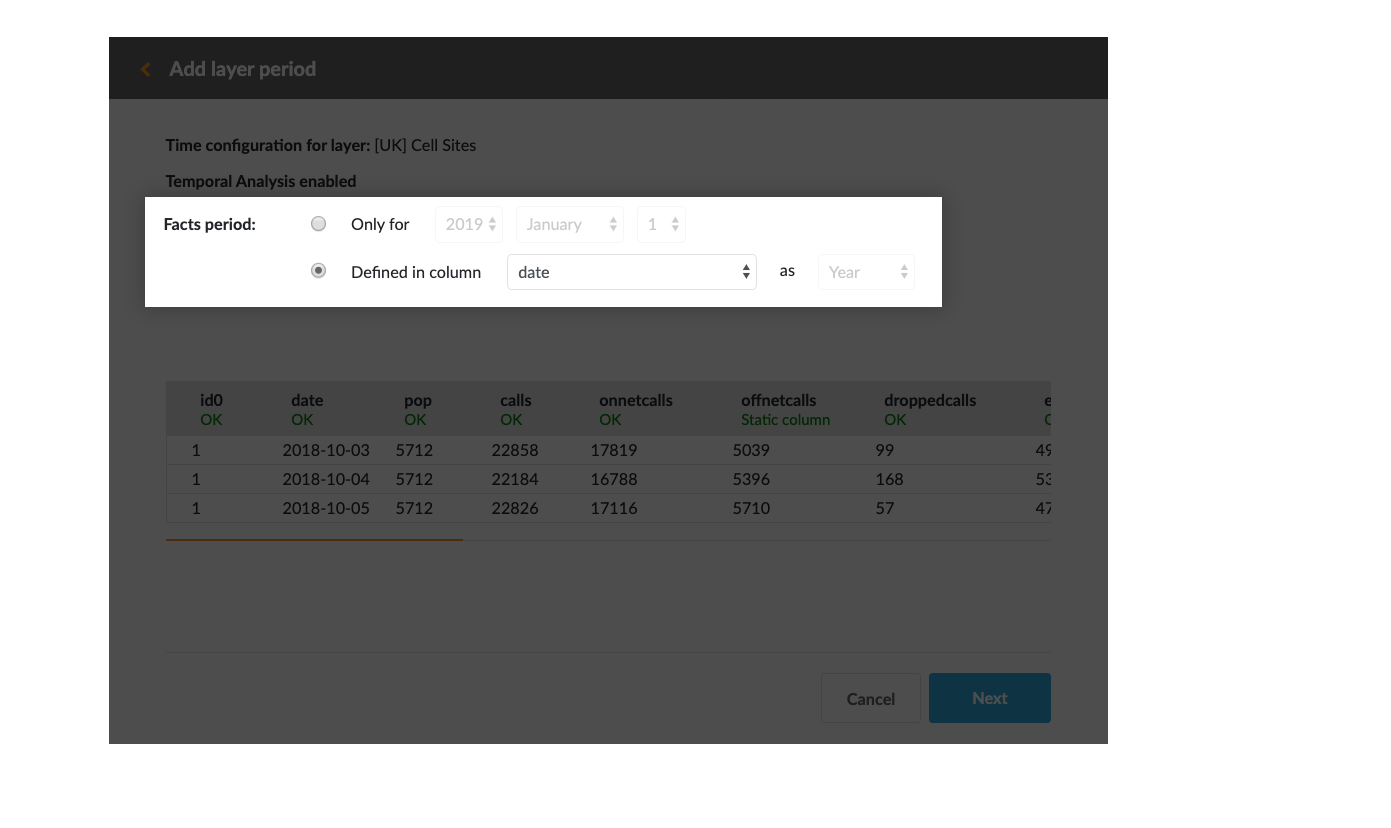
The updating file must have the periods for which the data is referred, whether integrated in a column (in the same format as is in the existing layer) or by indicating it after in temporal analysis facts period.
Only the data for which there’s a period in the updating file will be updated.
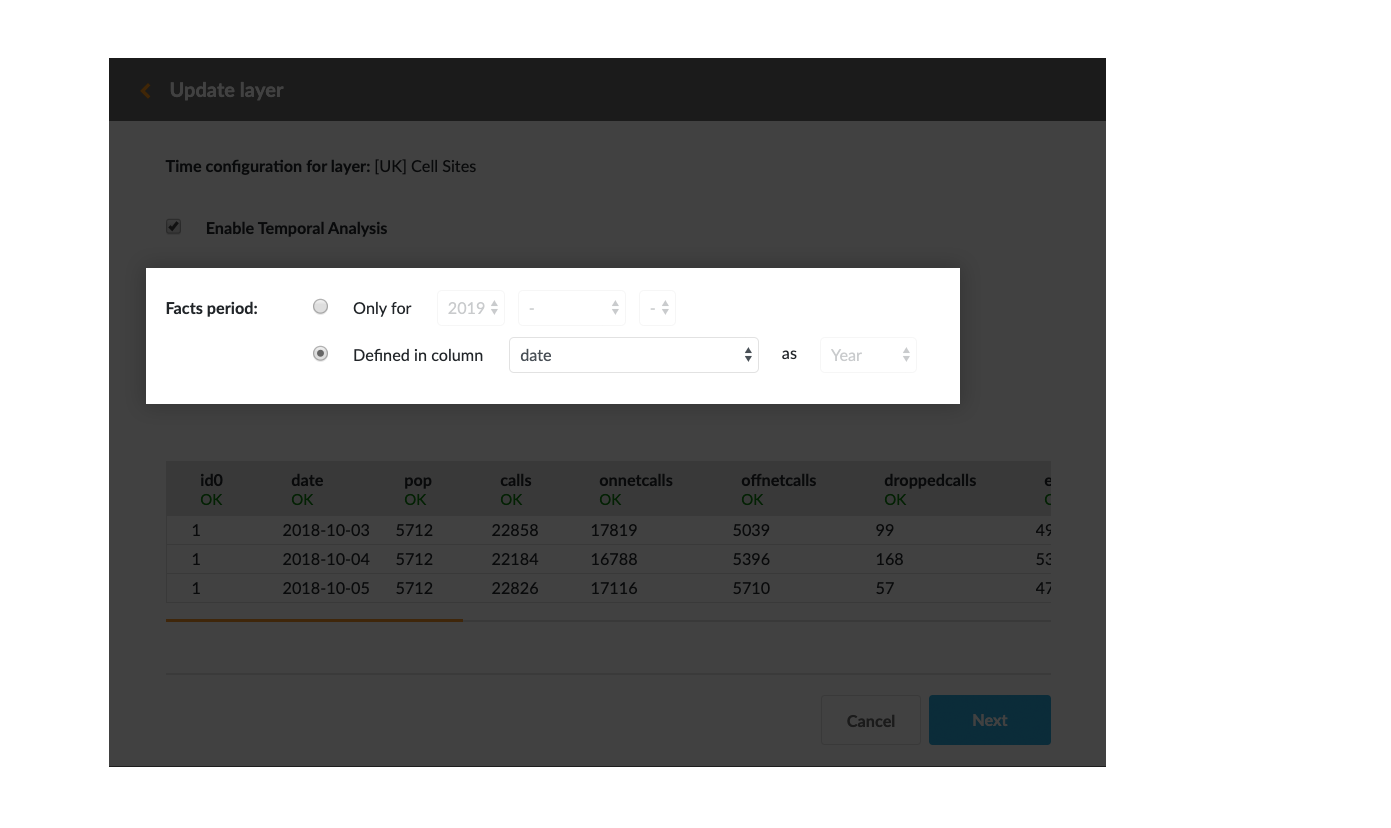
Next, when choosing the facts period, select Defined in column, if it is integrated in the updating file, or select on Only for…, if the updating has not that information. After doing it, press Next.
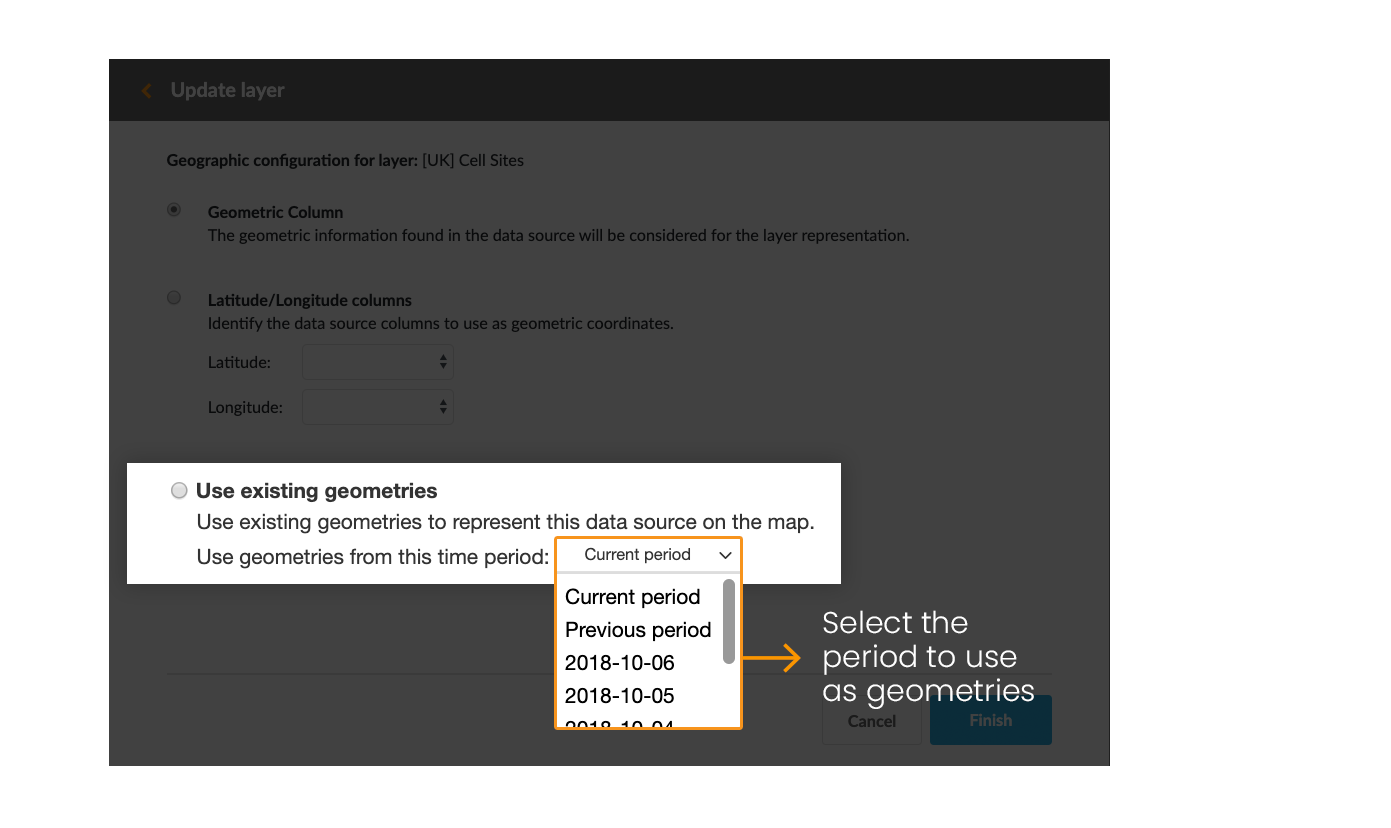
In Geographic configuration, it’s possible to select the geometries of the updating layer, to select the columns with geometric coordinates or to select the existing geometries of the different uploaded periods.
6.4.2 Delete or add periods
In the layer data management, there’s “Temporal Analysis” tab where the time periods of the layer are visible. Here it’s possible to delete and add periods.
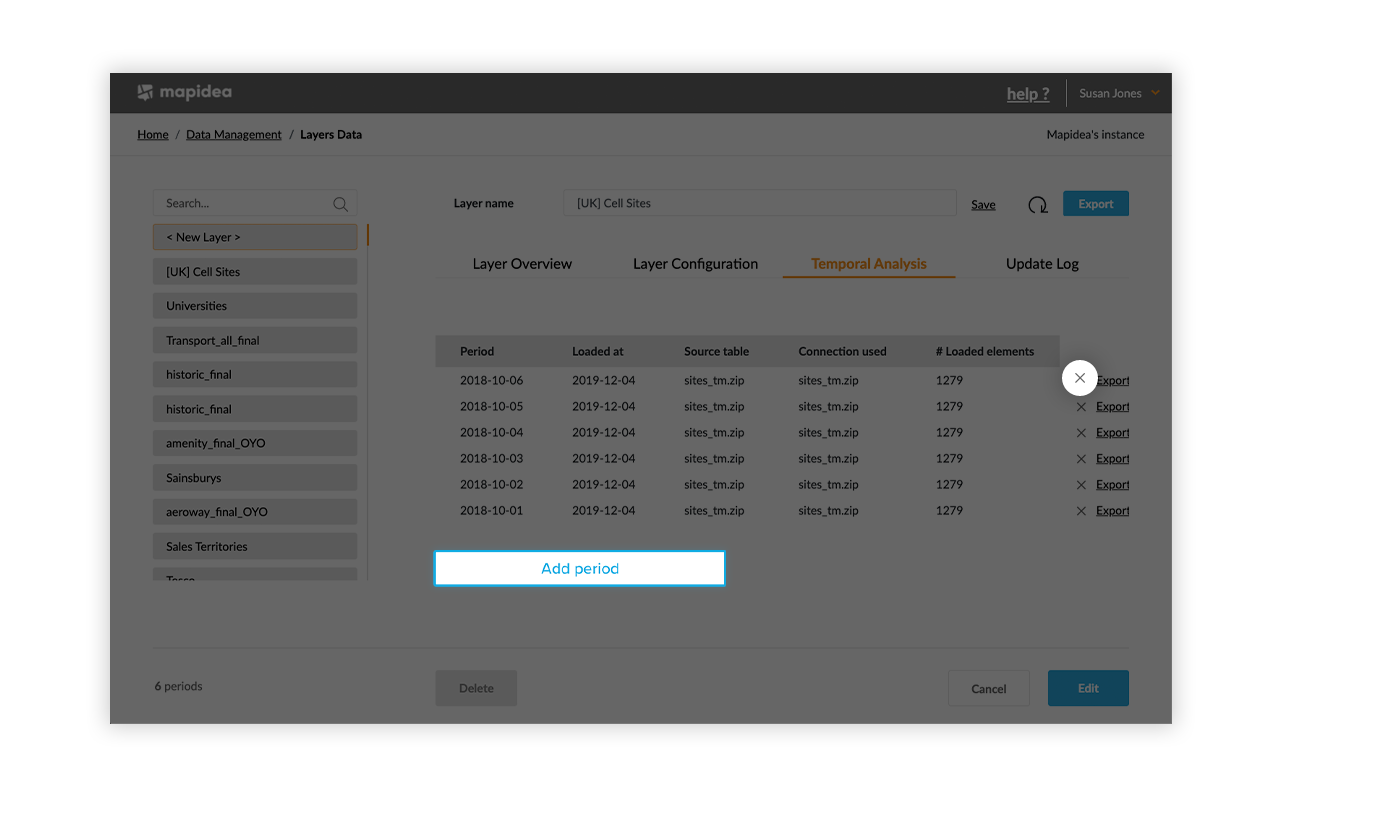
The process of adding periods is the same as updating a layer. The new file must have the table key and a column with the periods to add (it can be selected after in facts period, if the data has one period only)
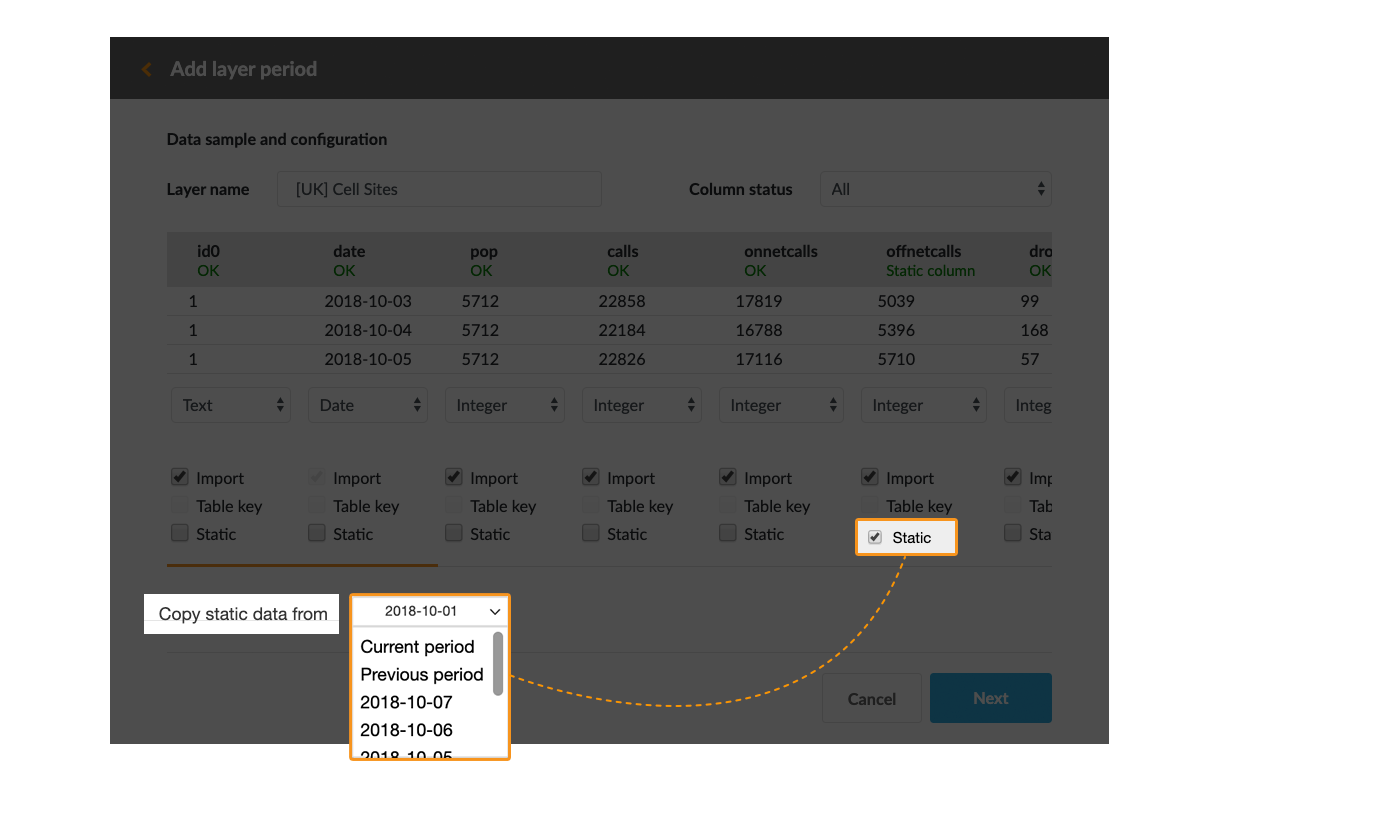
Also, if there’s a column marked as Static, an existing period must be chosen to copy the data for the new period
Next, when choosing the facts period, select Defined in column, if it is integrated in the updating file, or select on Only for…, if the updating has not that information. After doing it, press Next.
In Geographic configuration, it’s possible to select the geometries of the updating layer, to select the columns with geometric coordinates or to select the existing geometries of the different uploaded periods.
