Contents
7. Configure a Layer
![]() Updated
by Mapidea Team
Updated
by Mapidea Team
After login and access to the Administration Area, to configure a Layer, select Layers and Attributes from the list. Drag & drop the Layer to the Manage a layer area, to:
- Change the Layer name
- Configure it visually
- Configure the label
- Change the Attributes names
- Add a description
7.1 Style
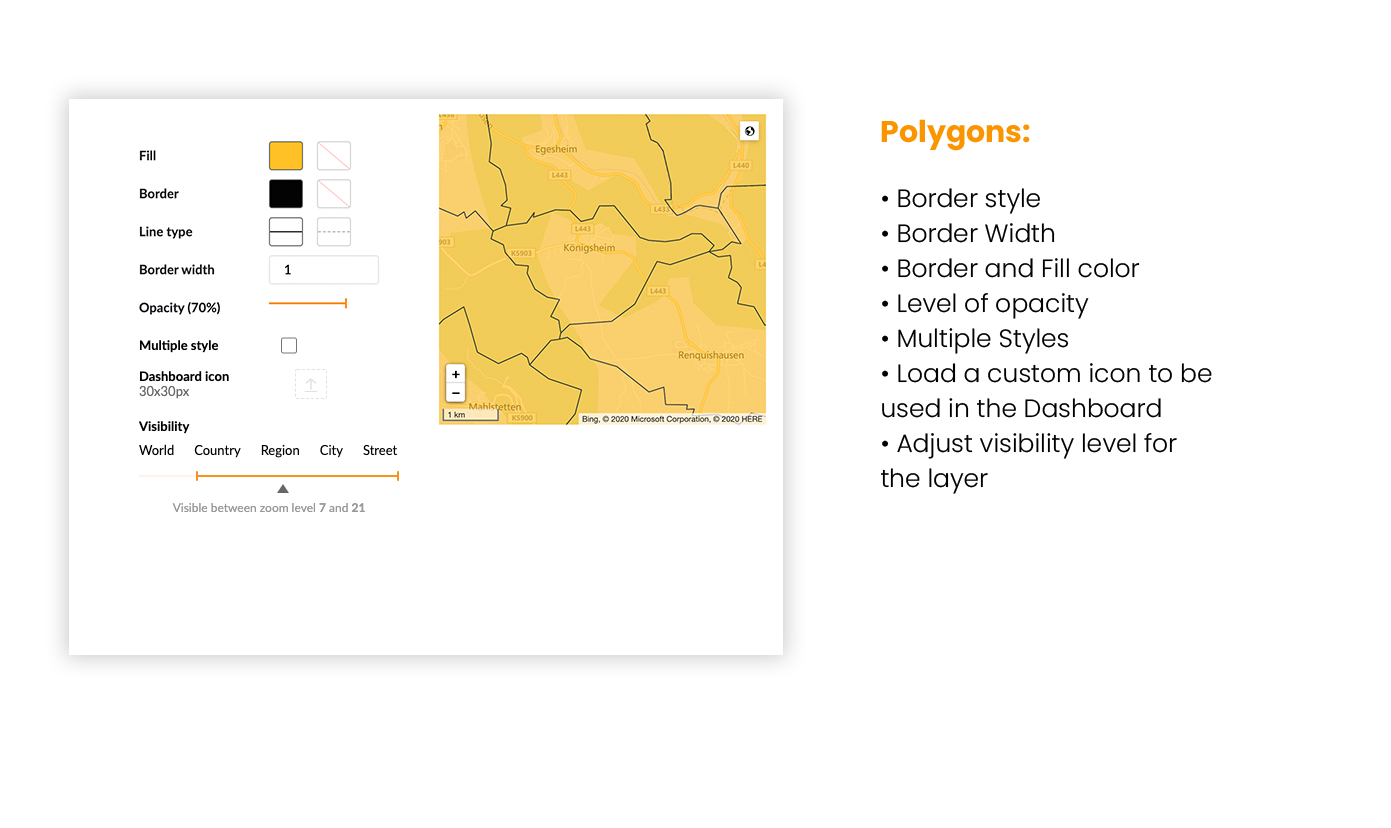
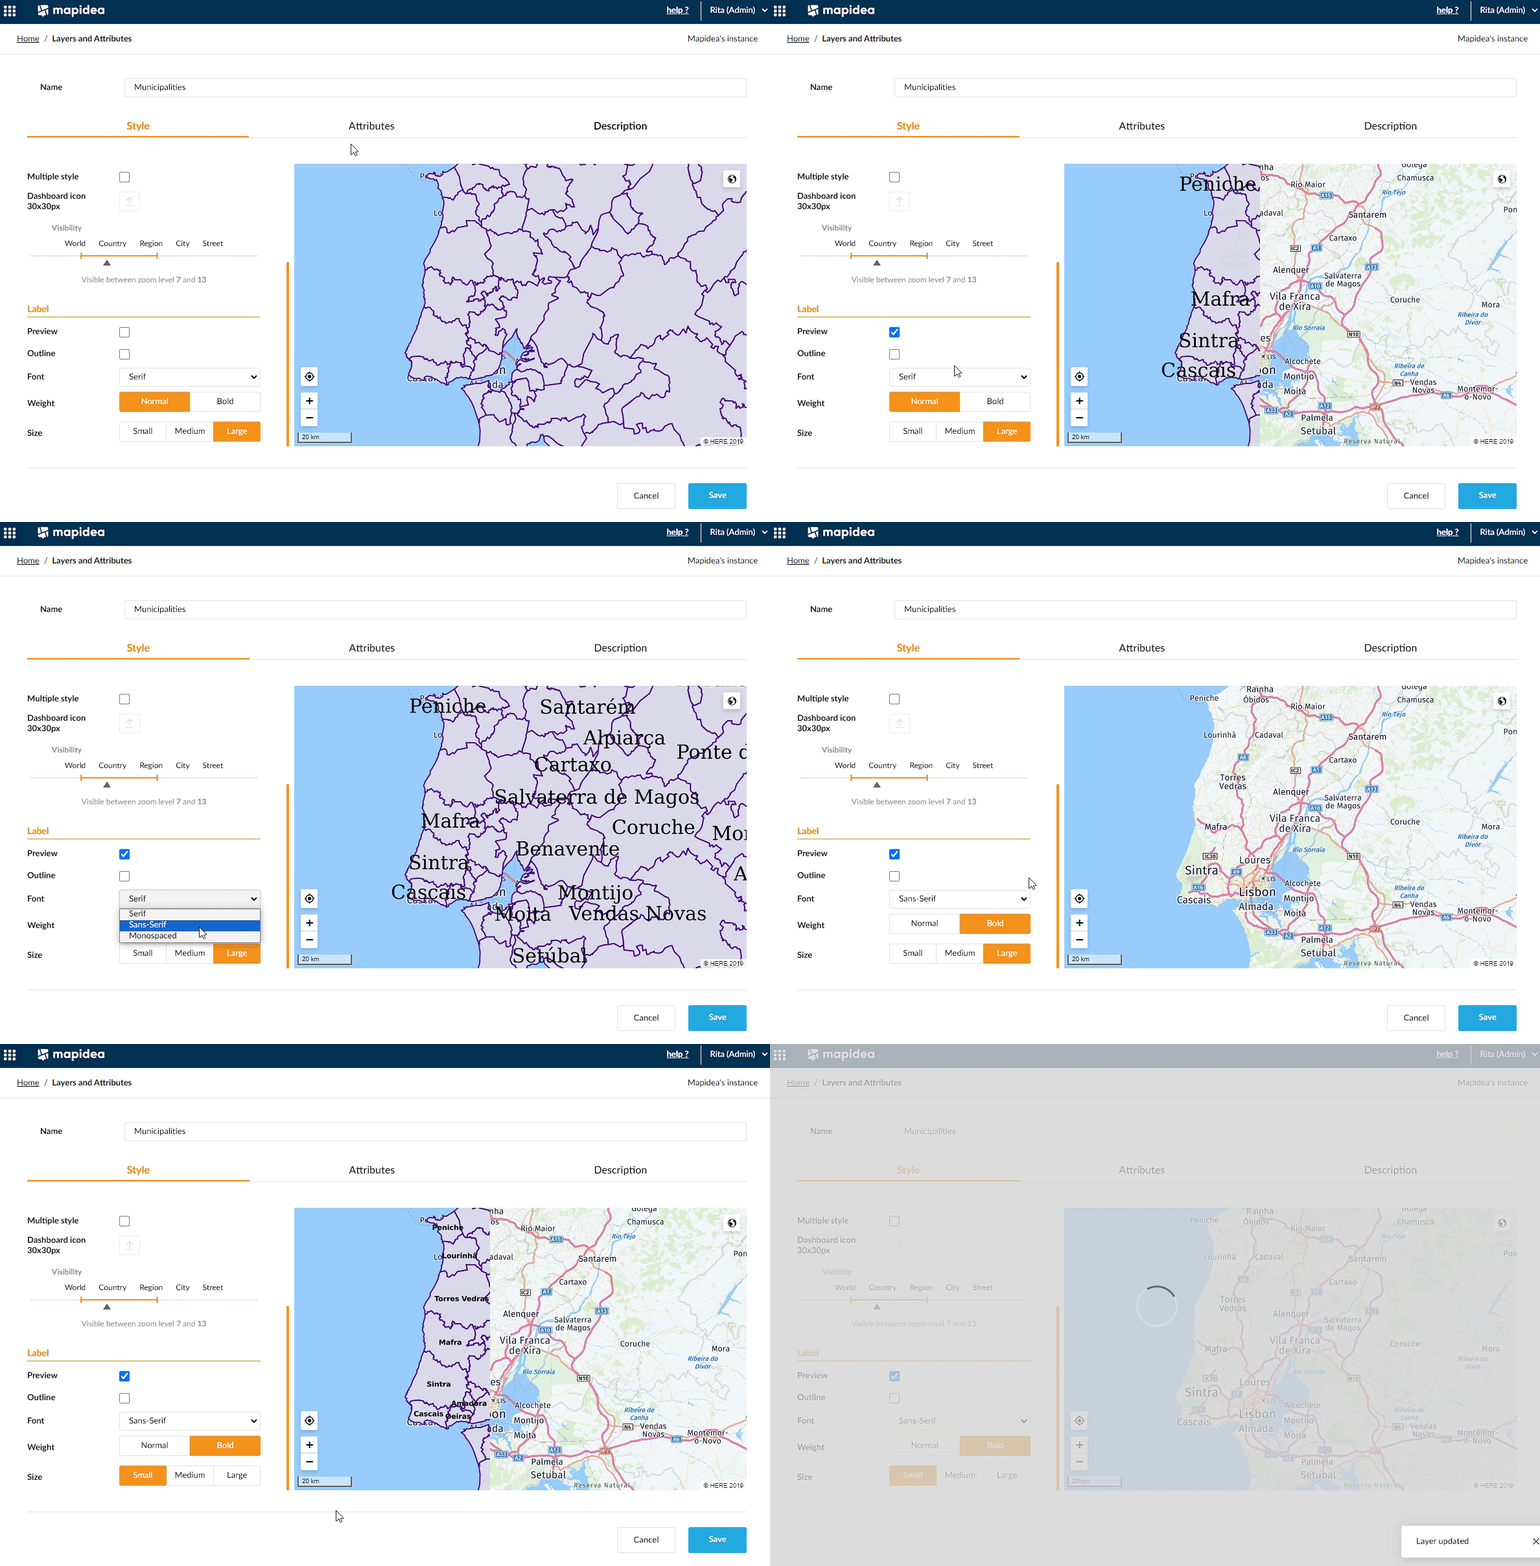
In the layer tab you can visually customize all types of data: polygons, lines and points.


7.1.1 Multiple Style layer
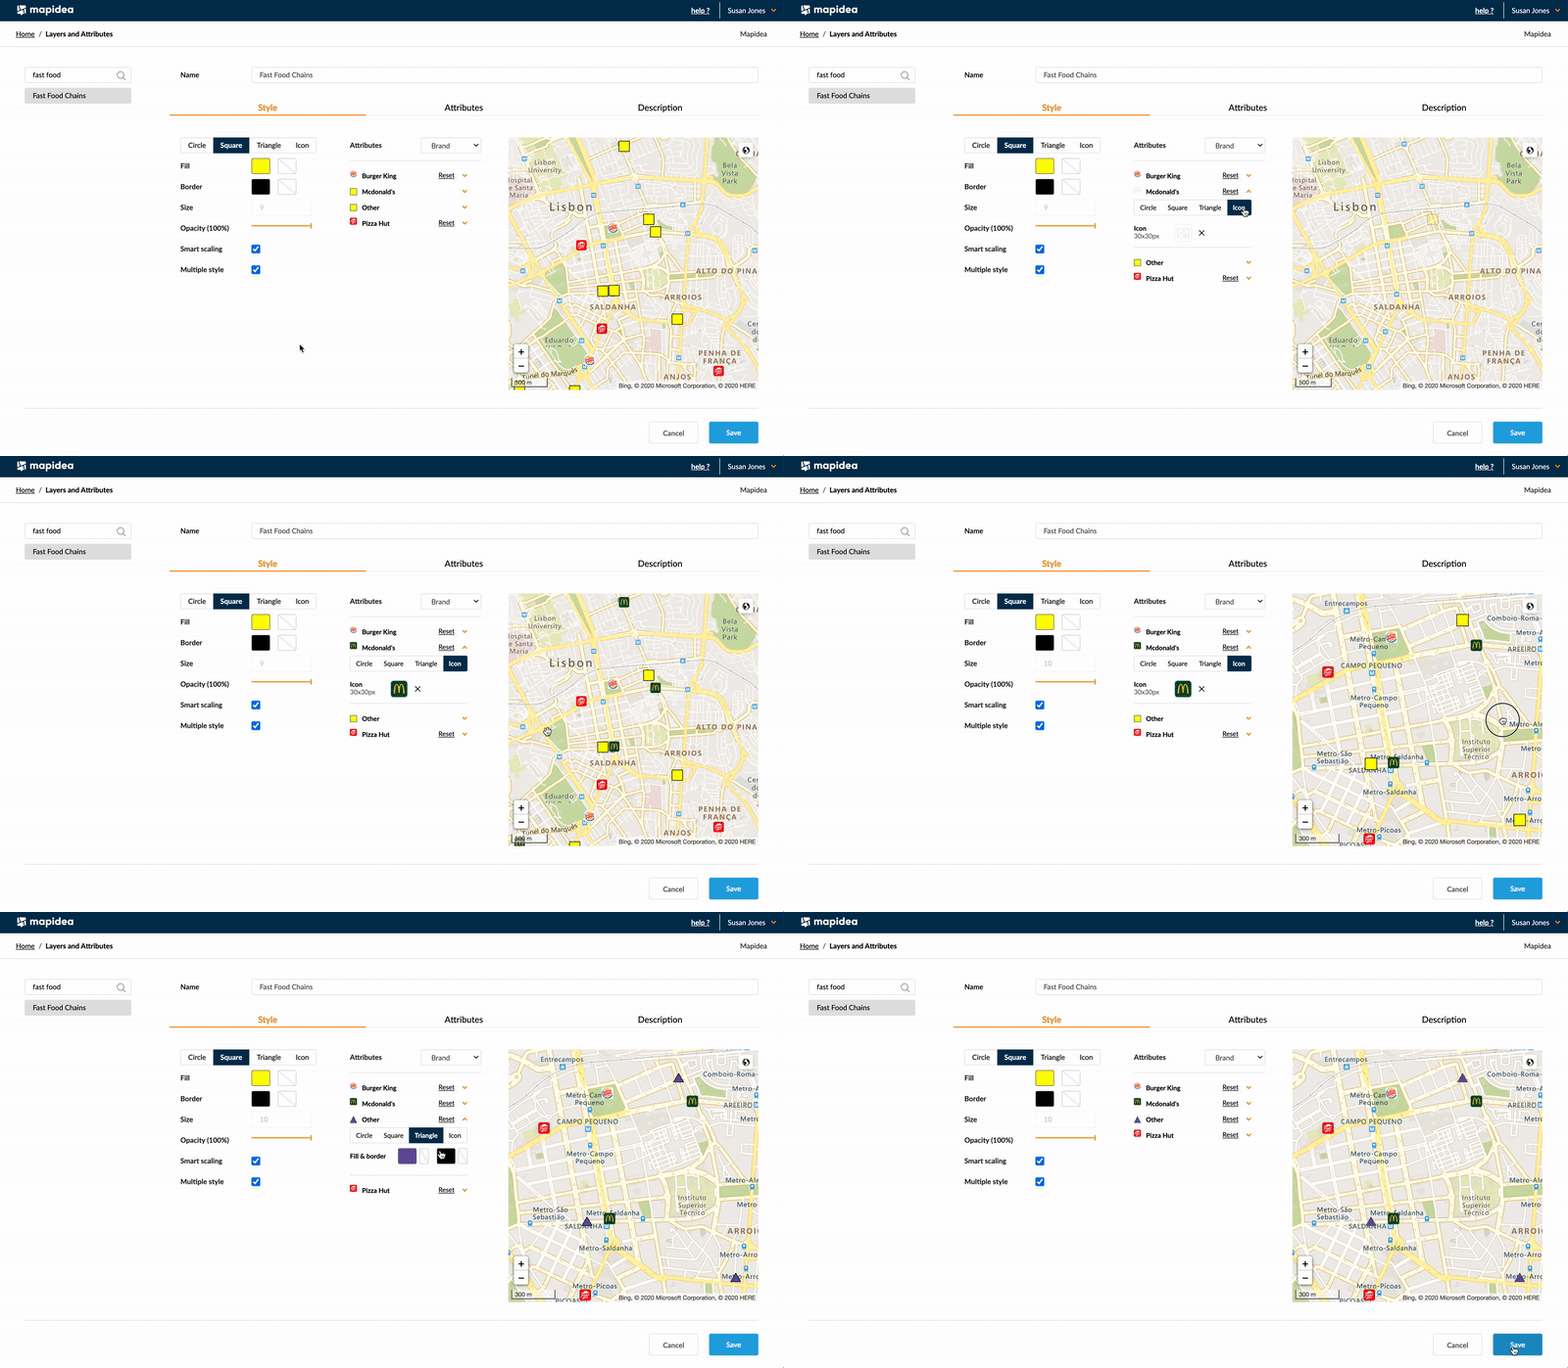
With this feature, it’s possible to have multiple symbols on the same layer.
After activate the multiple style option, an attribute combo appears, to select which attribute should be used. For each different value, there are individual options to configure an internal symbol or upload an external one.
For example, you can have all fast food locations in one layer, using one different symbol for each brand.
7.1.2 Layer Visibility
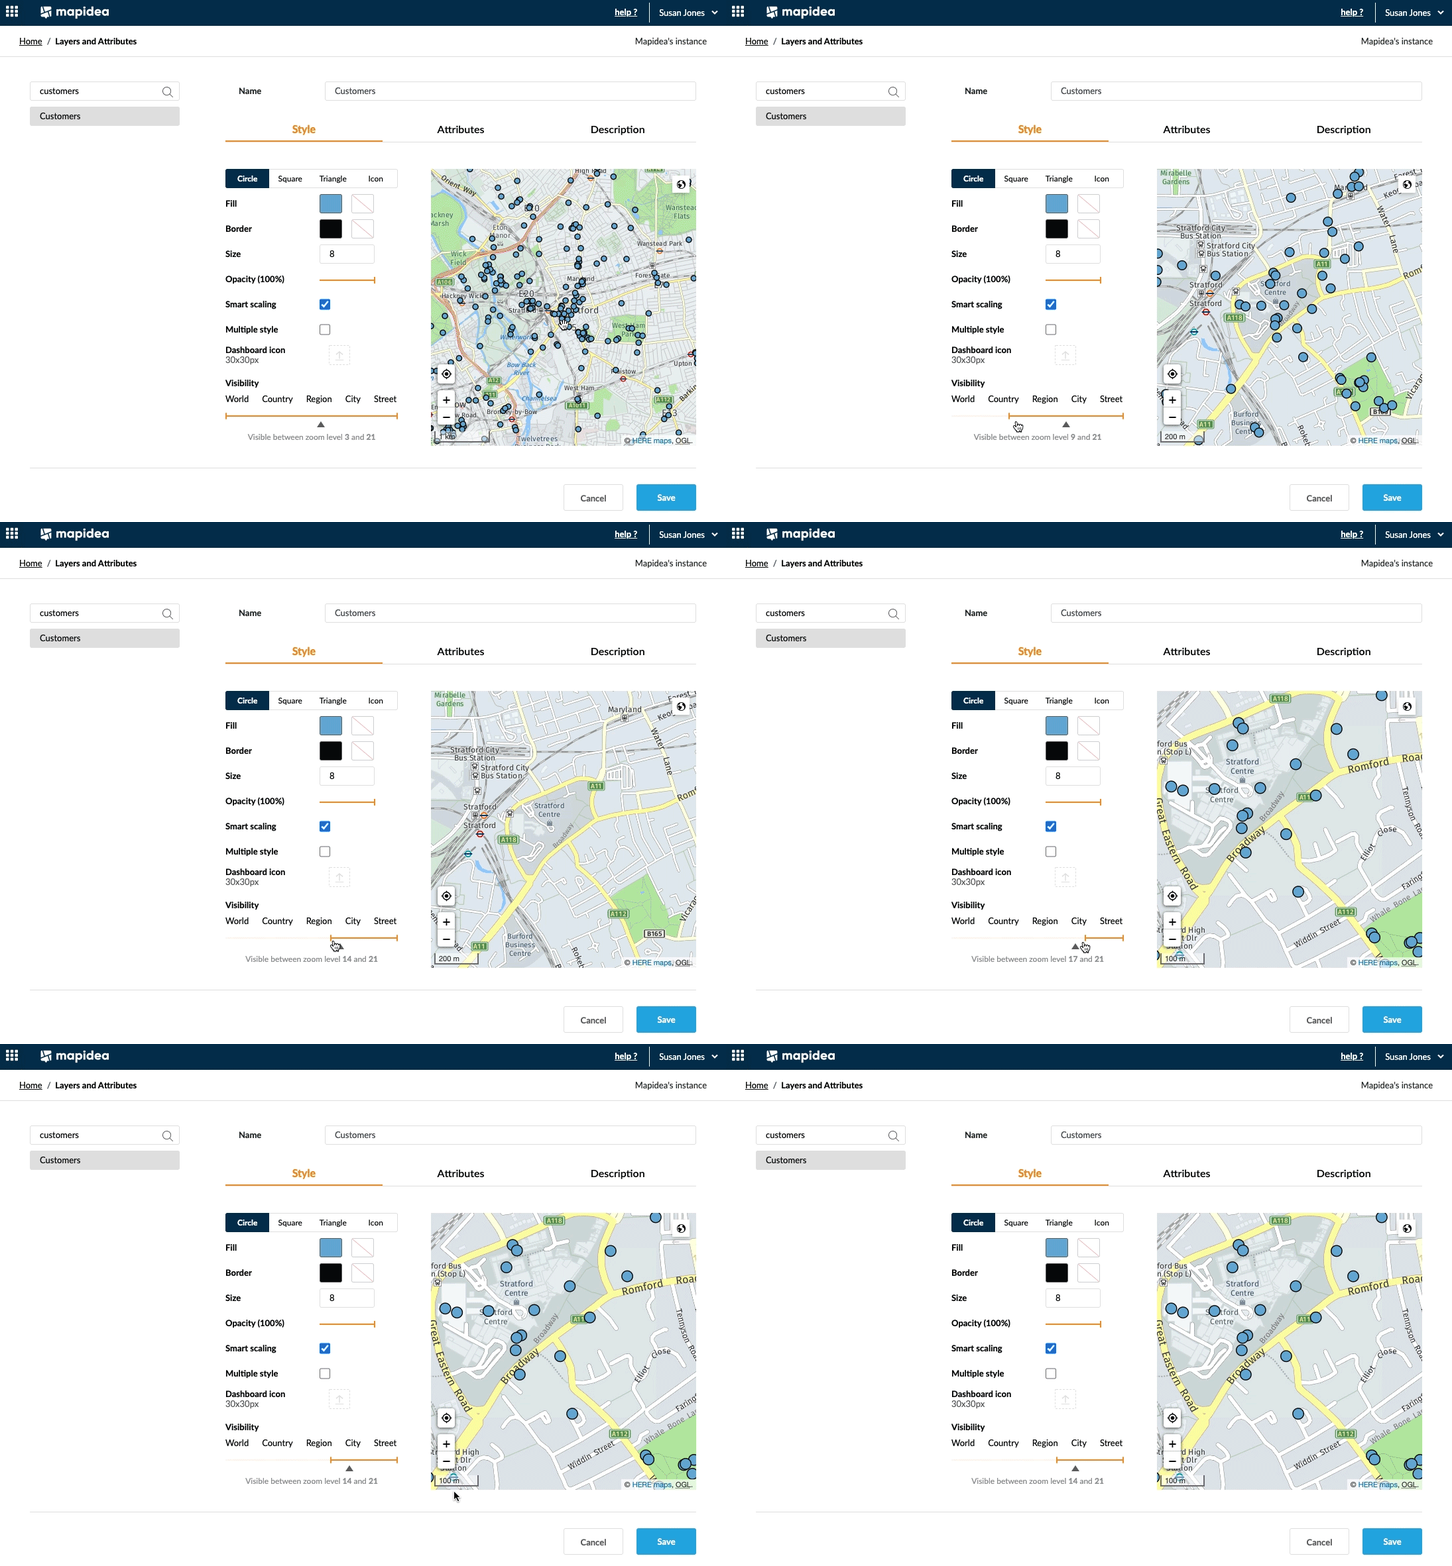
With this feature, the user can configure the layers visibility to a certain zoom range (from minimum to maximum zoom levels).
7.1.3 Layer Label
With this feature, the user can configure the layers label in the aplication (Font, Weight and size of the labels).
7.2 Attributes
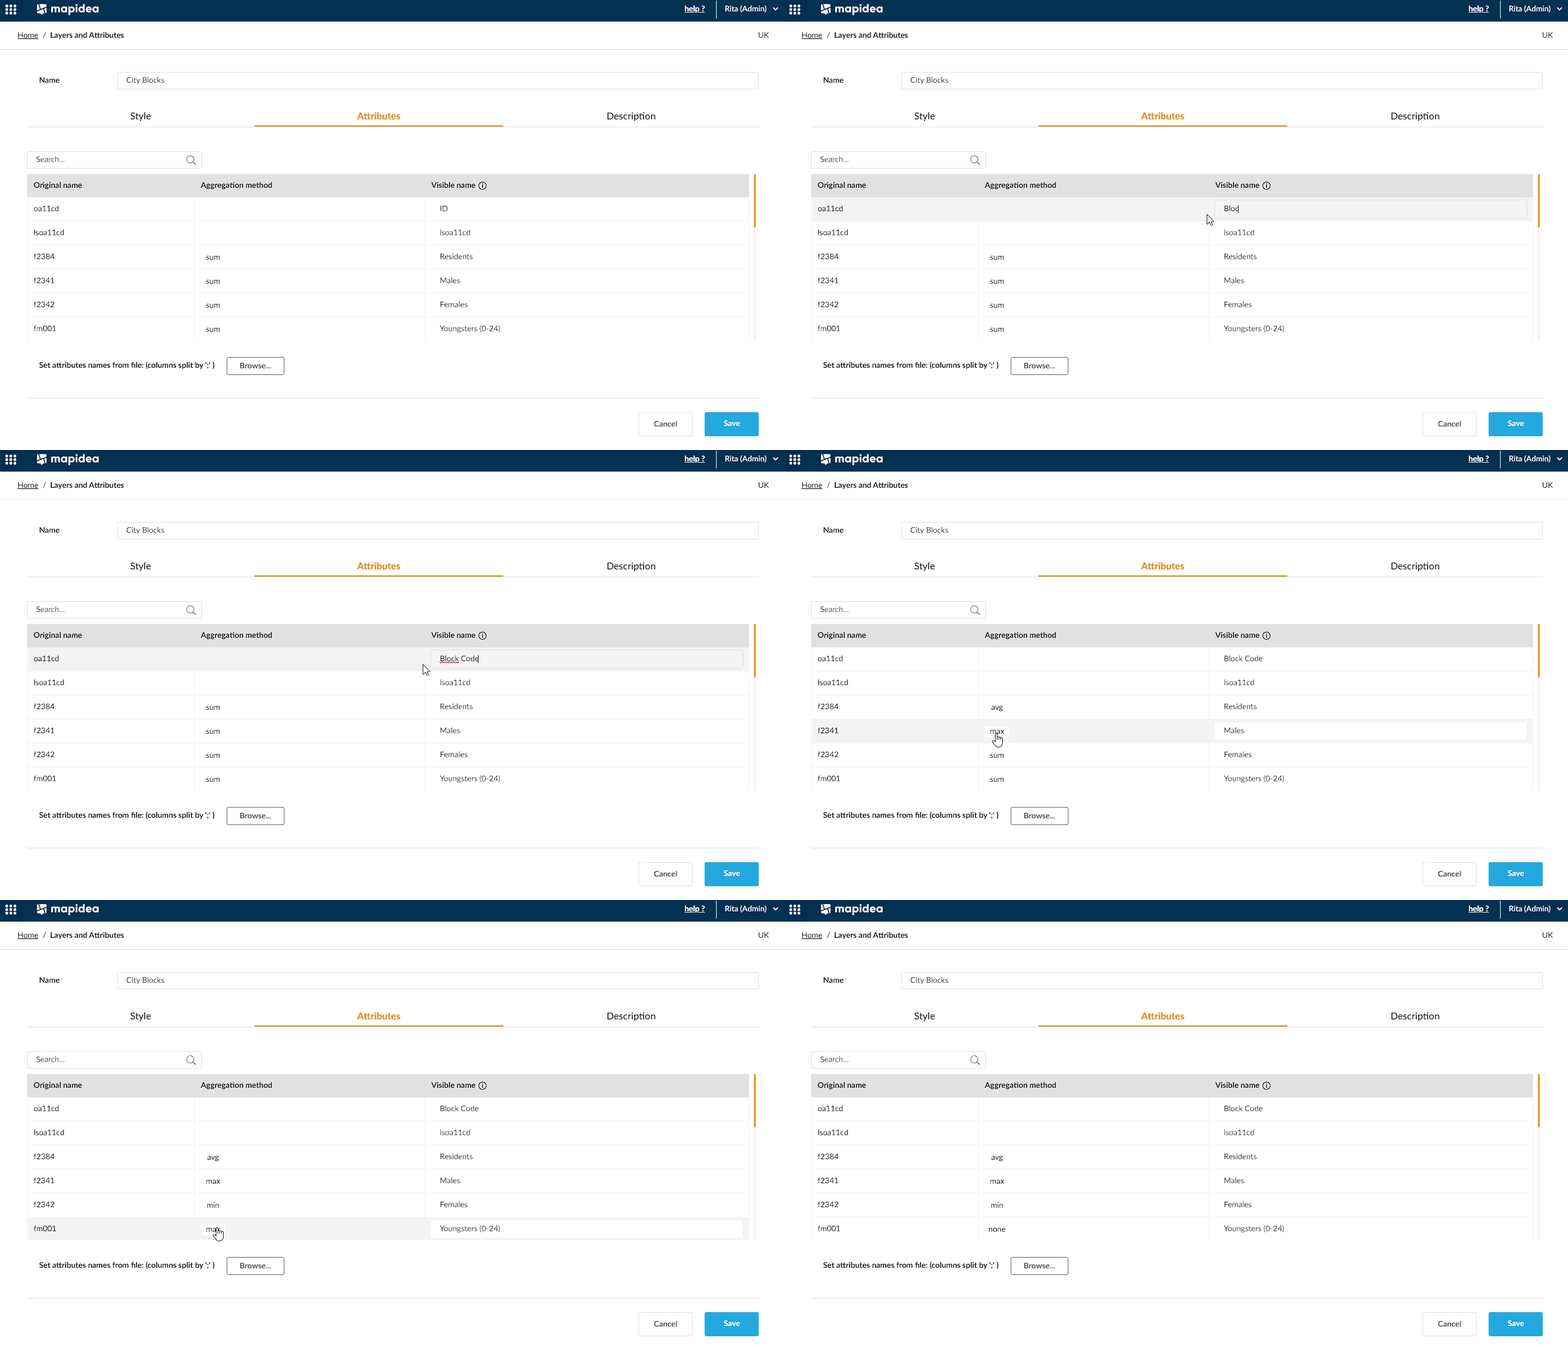
In the Attributes tab you have all attributes for the layer. Here you can:
- Change the attributes name (one at time)
- Establish the arithmetic operation of the numeric attributes (which will be visible in the table and dashboard)
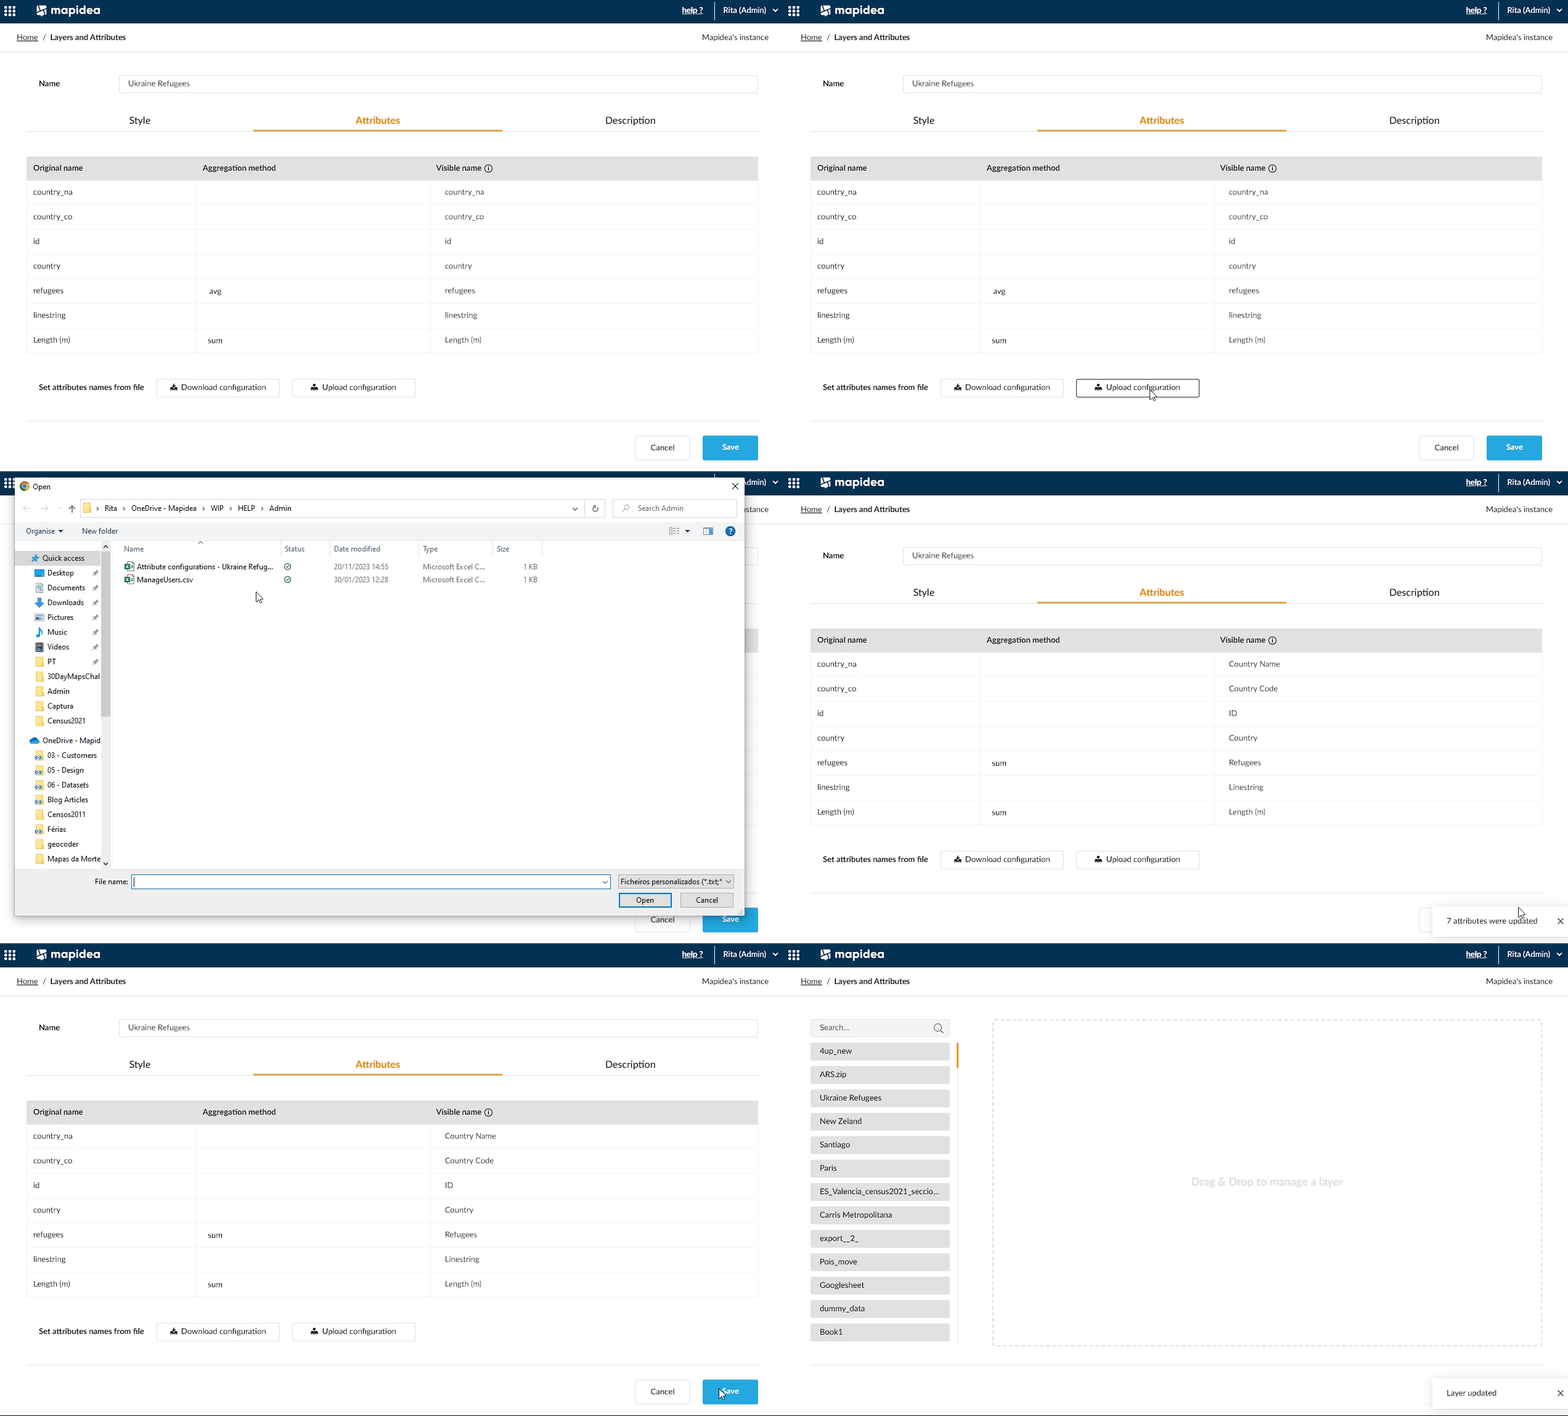
- Change the attributes name and aggregation method in bulk
To change the names in bulk, click in “Upload configuration” and use a .csv or .txt file with the following structure and fields:

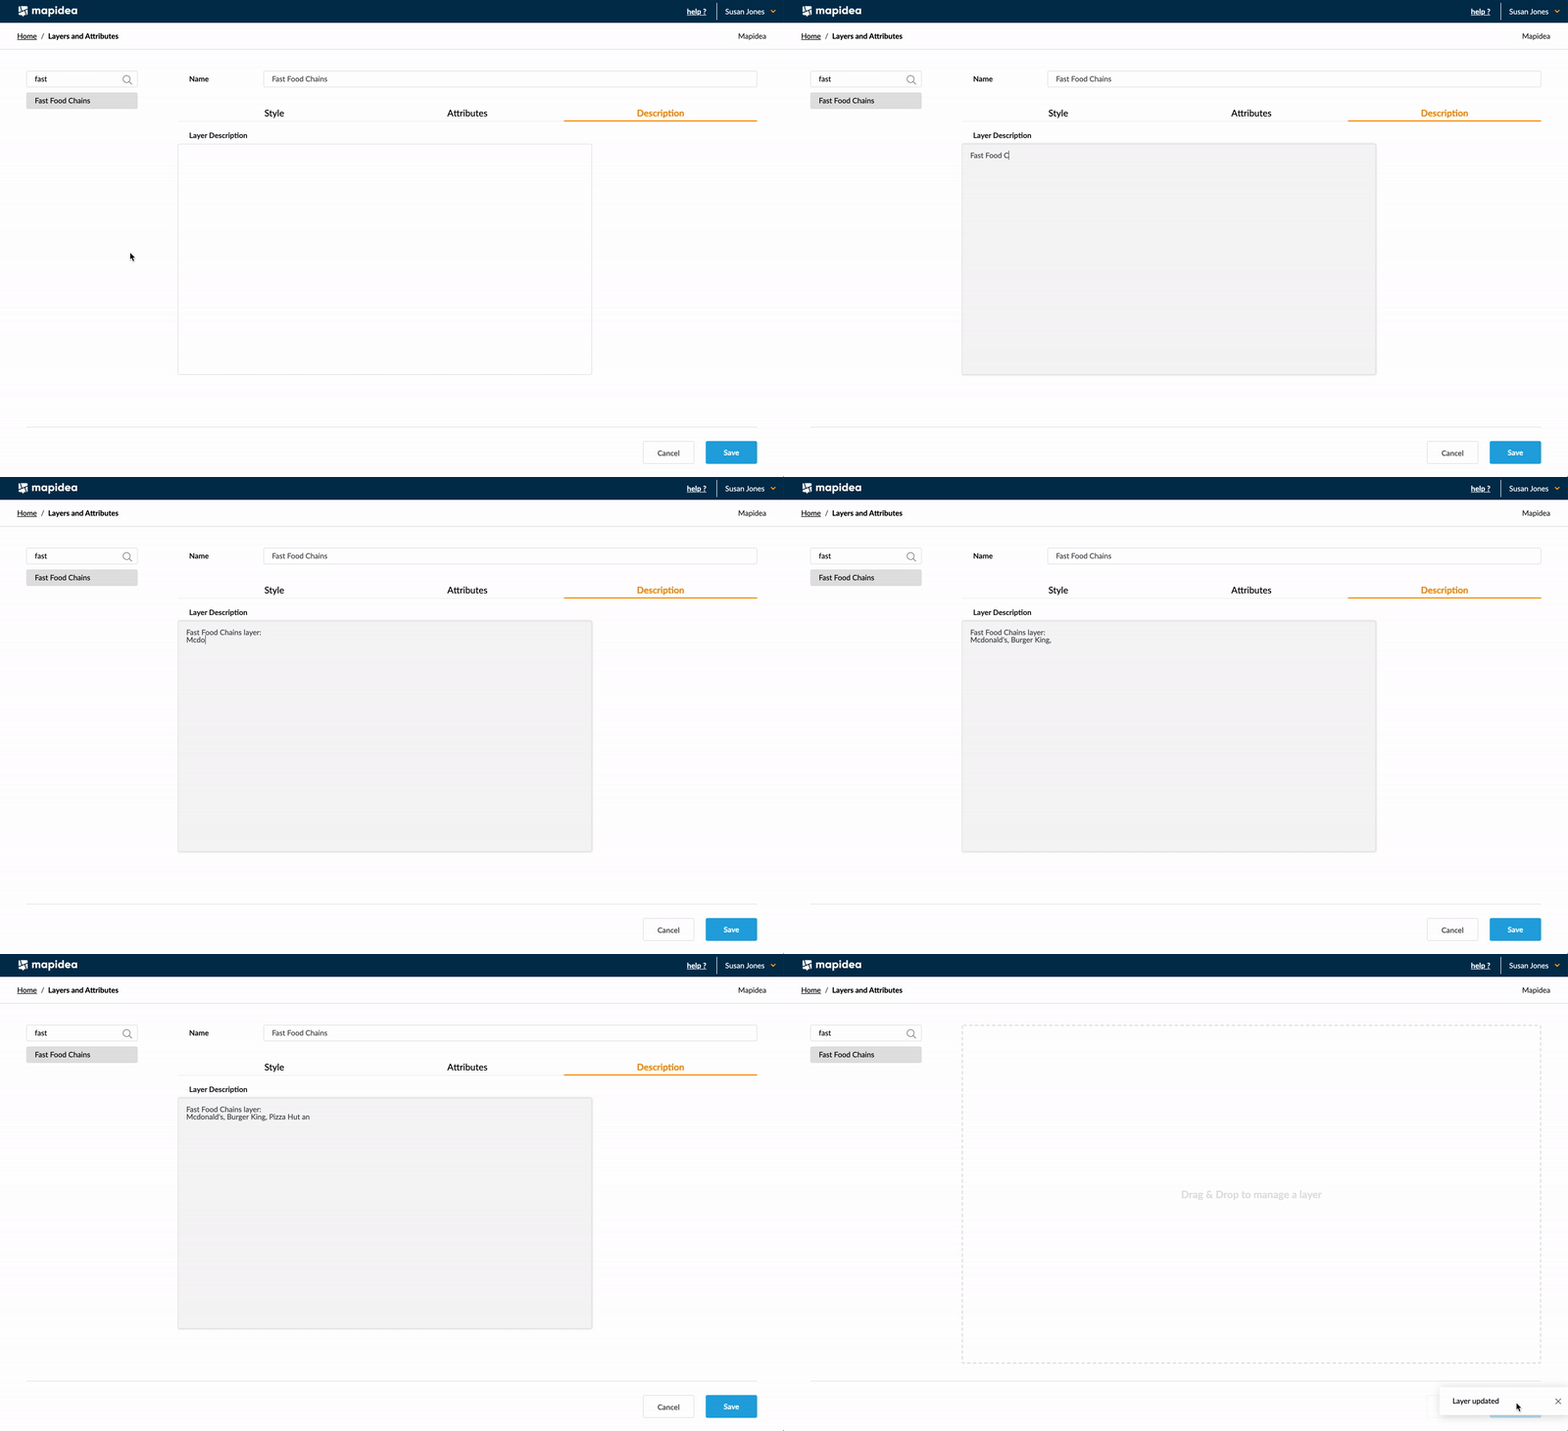
7.3 Description
Here you can write informations about the layer.
